Author: Justin

  • NVIDIA GPU passthrough into an unprivileged Proxmox LXC

    NVIDIA GPU passthrough into an unprivileged Proxmox LXC

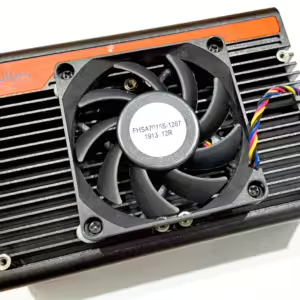
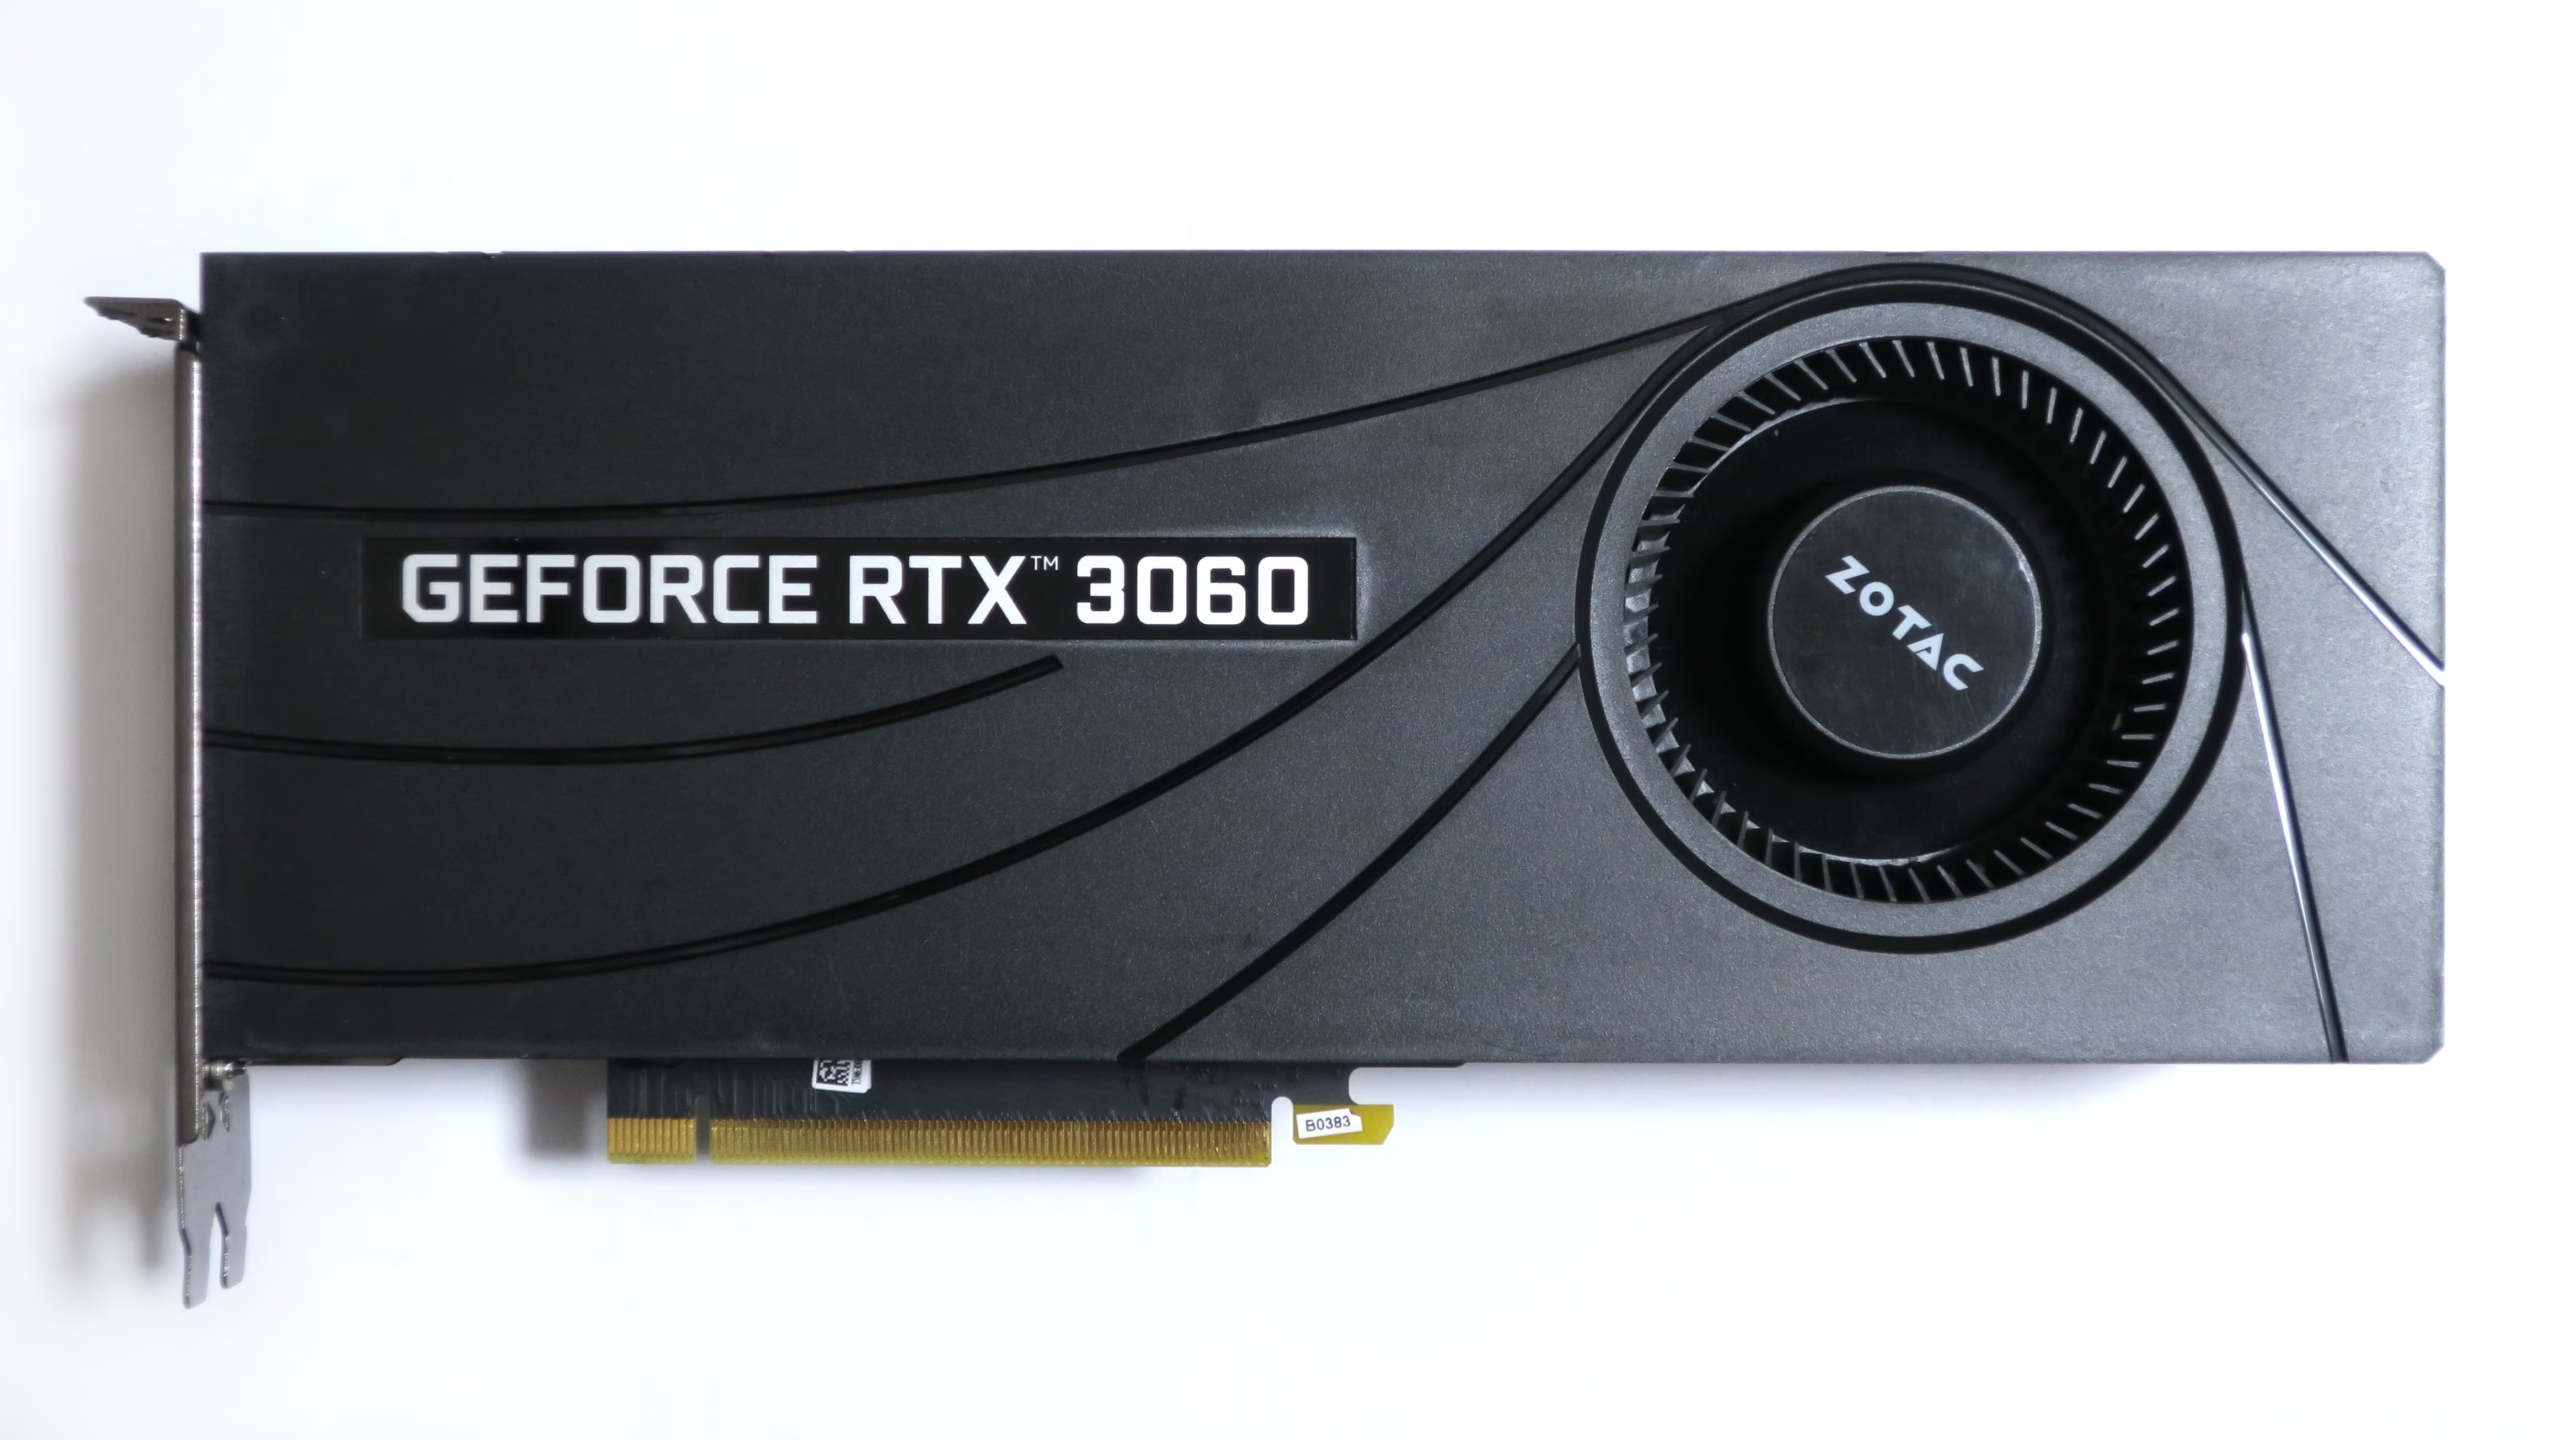
    Header photo: illustrative Zotac RTX 3060, Qurren / Wikimedia Commons, CC BY-SA 4.0.

    I wanted GPU acceleration for the local LLM broker in an unprivileged LXC. The working arrangement keeps the NVIDIA driver on Proxmox and passes its device nodes and user-space libraries through to the container.

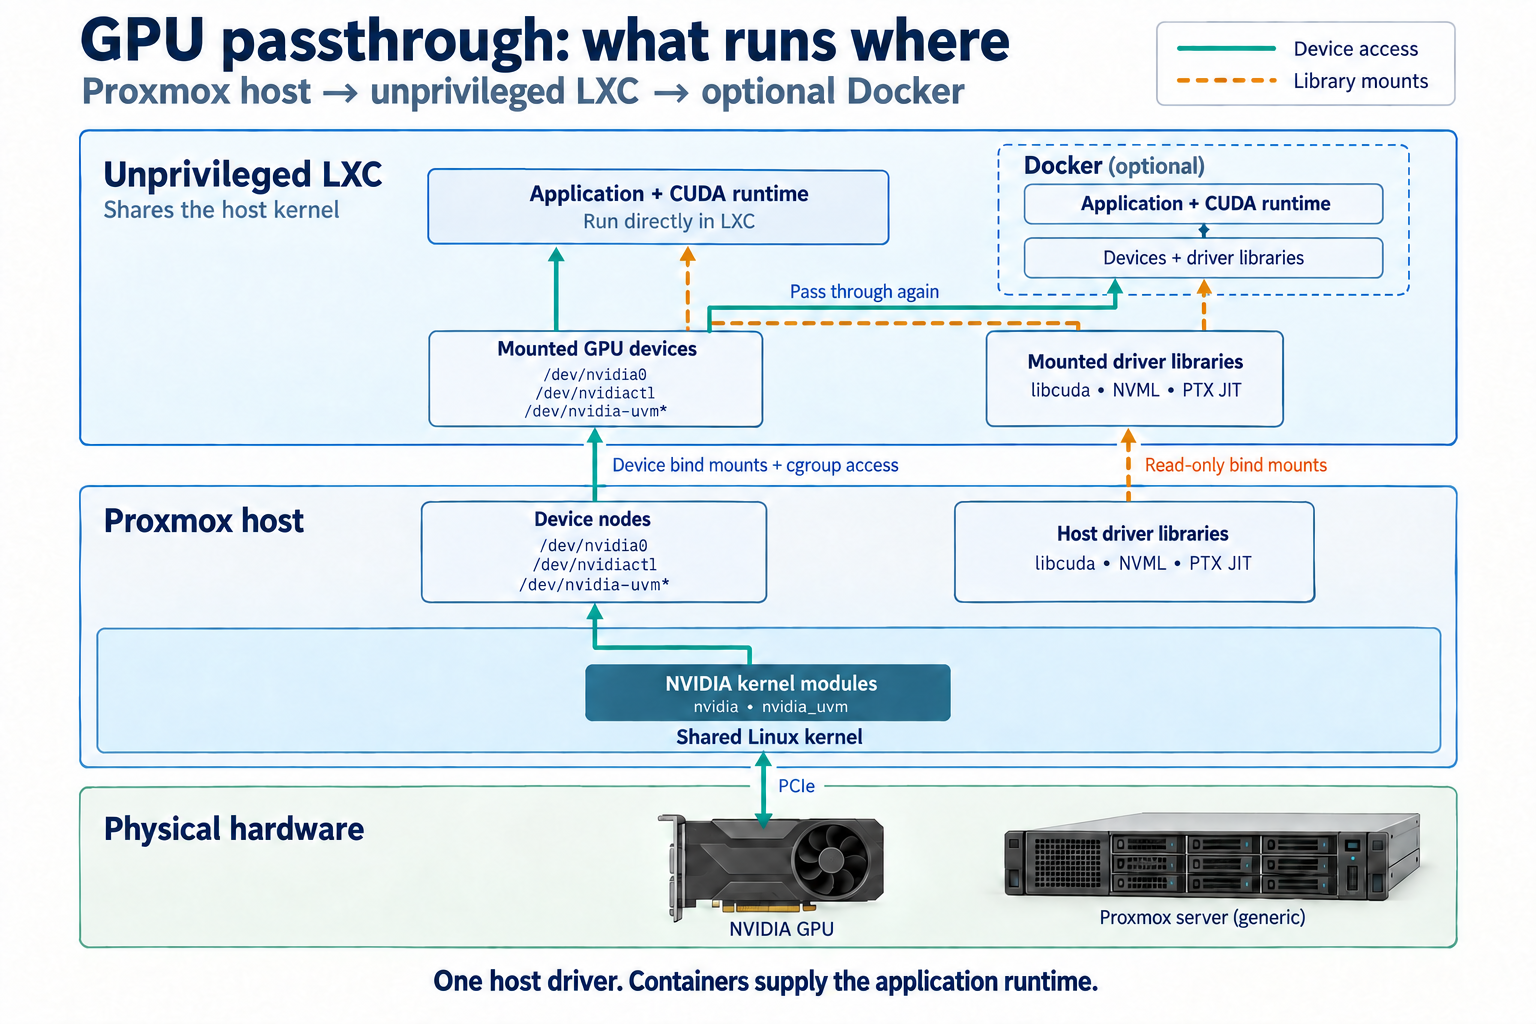
    For LXC, GPU passthrough means sharing the host’s driver. The GPU stays bound to NVIDIA on the Proxmox host; the container uses it through the exposed devices. VFIO and vGPU configuration aren’t involved.

    WhereWhat belongs there
    Proxmox hostNVIDIA kernel modules, matching PVE headers and driver libraries
    Unprivileged LXCSelected GPU devices, read-only driver libraries, application runtime
    Docker, if usedThe same devices and libraries passed through the second container boundary
    GPU stack: physical NVIDIA GPU connects to the Proxmox host driver; device nodes and read-only libraries are shared with an unprivileged LXC and optionally Docker.
    The host owns the driver. Device nodes and driver libraries cross the LXC boundary, then the Docker boundary if used. Click to enlarge.

    This walkthrough targets Proxmox VE 9 on Debian 13, x86-64, using NVIDIA’s open kernel module. It covers Turing and newer GPUs; NVIDIA’s supported-device table lists the model names and PCI IDs.

    1. Get the host driver working

    An older packaged NVIDIA driver failing to build against a newer PVE kernel was one of the snags. The fix was NVIDIA’s current packaged driver and headers for the exact PVE kernel. Start with an updated host, finish any pending kernel reboot, and run these as root with GPU containers stopped:

    pveversion
    uname -r
    cat /etc/os-release
    lspci -nn -d 10de:

    Check that the OS reports VERSION_ID="13" and the kernel ends in -pve. Match the GPU’s PCI ID to the supported-device table above. The repository below is specifically for Debian 13; don’t add it to a Debian 12 host.

    Enable contrib in the Debian repository’s Components: line, normally in /etc/apt/sources.list.d/debian.sources, preserving its other components. Then install the matching PVE headers and NVIDIA’s repository keyring:

    apt update
    apt install proxmox-default-headers "proxmox-headers-$(uname -r)" \
        dkms build-essential wget
    wget https://developer.download.nvidia.com/compute/cuda/repos/debian13/x86_64/cuda-keyring_1.1-1_all.deb \
        -O /tmp/cuda-keyring.deb
    dpkg -i /tmp/cuda-keyring.deb
    apt update
    apt-cache policy nvidia-driver-cuda nvidia-kernel-open-dkms

    Use the current compute driver from developer.download.nvidia.com. The Candidate: lines show the versions APT will install; the version table shows their repository. If an old pin or hold keeps APT on another branch, inspect apt-mark showhold and /etc/apt/preferences.d/ before proceeding. Don’t mix driver components from different branches.

    apt -s install nvidia-driver-cuda nvidia-kernel-open-dkms
    # Check the proposed transaction, then:
    apt install nvidia-driver-cuda nvidia-kernel-open-dkms
    dkms status
    modinfo -k "$(uname -r)" -F version nvidia

    The driver isn’t selected from a PVE-version lookup table. APT selects the packaged release; DKMS builds its kernel interface against your exact PVE headers. In dkms status, the NVIDIA entry must contain the full kernel string from uname -r and end in installed. That proves the build/install step; loading the module is a separate check.

    If it fails, read the make.log path printed by DKMS. Missing headers mean fixing the matching proxmox-headers-… package; compiler errors about changed kernel functions can mean an older driver against a newer kernel. Check the candidate version and NVIDIA’s driver issue tracker using the exact driver version, kernel and error. If the current packaged driver still won’t build, stop there; don’t reboot into an unbuilt module or silently downgrade PVE.

    After a successful build, reboot the host in its maintenance window, then run nvidia-smi -L and lspci -nnk -d 10de:. The GPU should use nvidia. If another driver owns it, check the kernel journal; if Secure Boot rejects the module, follow Proxmox’s DKMS signing procedure. The package/repository steps follow NVIDIA’s Debian compute-only instructions.

    2. Check UVM before starting the LXC

    # Proxmox host
    modprobe nvidia_uvm
    ls -l /dev/nvidia0 /dev/nvidiactl \
          /dev/nvidia-uvm /dev/nvidia-uvm-tools

    This caught us out: nvidia-smi can work while CUDA cannot initialise. UVM and its device nodes need to exist before the container starts. Loading the module afterwards doesn’t repair a missing bind mount in an already running LXC.

    3. Add the devices and libraries

    Stop the unprivileged Debian LXC and back up /etc/pve/lxc/<CTID>.conf. The entries below go in that file, alongside its existing configuration. Run this in Bash on the Proxmox host to print the device entries:

    for dev in /dev/nvidia0 /dev/nvidiactl /dev/nvidia-uvm /dev/nvidia-uvm-tools; do
        if [ ! -c "$dev" ]; then
            echo "Missing character device: $dev" >&2
            break
        fi
        read -r major minor < <(stat -c '%t %T' "$dev")
        printf 'lxc.cgroup2.devices.allow: c %d:%d rwm\n' "$((16#$major))" "$((16#$minor))"
        printf 'lxc.mount.entry: %s %s none bind,create=file 0 0\n' "$dev" "${dev#/}"
    done

    Each device produces a cgroup permission and a bind mount. Check that all four devices produced entries before copying the output into the LXC configuration. UVM major numbers can change, so this reads the actual numbers instead of borrowing them from another machine.

    Find the host’s driver libraries and management binary:

    ldconfig -p | grep -E 'libcuda.so.1 |libnvidia-ml.so.1 |libnvidia-ptxjitcompiler.so.1 '
    command -v nvidia-smi

    For the usual Debian x86-64 paths, add these read-only mounts. If the lookup above reports a different source path, change the first path on that line; keep the destination path as shown. All three libraries must be present.

    lxc.mount.entry: /usr/lib/x86_64-linux-gnu/libcuda.so.1 usr/lib/x86_64-linux-gnu/libcuda.so.1 none bind,ro,create=file 0 0
    lxc.mount.entry: /usr/lib/x86_64-linux-gnu/libnvidia-ml.so.1 usr/lib/x86_64-linux-gnu/libnvidia-ml.so.1 none bind,ro,create=file 0 0
    lxc.mount.entry: /usr/lib/x86_64-linux-gnu/libnvidia-ptxjitcompiler.so.1 usr/lib/x86_64-linux-gnu/libnvidia-ptxjitcompiler.so.1 none bind,ro,create=file 0 0
    lxc.mount.entry: /usr/bin/nvidia-smi usr/bin/nvidia-smi none bind,ro,create=file 0 0

    These supply CUDA’s driver interface, NVML, the PTX JIT compiler and nvidia-smi from the same host installation. This example assumes Debian x86-64 on both sides. Install the application runtime inside the LXC, not another kernel driver.

    Device permissions must also allow the application’s mapped UID/GID access; a cgroup rule alone doesn’t grant filesystem permission. Run the following checks as the actual application user.

    4. Test CUDA inside the LXC

    Start the LXC and run nvidia-smi -L. Then, from its CUDA-enabled PyTorch environment as the application user:

    import torch
    
    assert torch.cuda.is_available(), "CUDA is unavailable"
    x = torch.ones(1024, device="cuda:0")
    assert (x + x).sum().item() == 2048
    print(torch.cuda.get_device_name(0), "OK")

    This checks that the application can allocate GPU memory and run a CUDA operation, rather than just read driver telemetry.

    Docker and later upgrades

    The next snag was inside Docker: the NVIDIA Container Toolkit didn’t propagate the host driver libraries through our unprivileged LXC. Explicit device and library mounts fixed that. Enable nesting and keyctl for Docker on the LXC, then add these entries to the GPU service in its Compose file:

    devices:
      - /dev/nvidia0:/dev/nvidia0
      - /dev/nvidiactl:/dev/nvidiactl
      - /dev/nvidia-uvm:/dev/nvidia-uvm
      - /dev/nvidia-uvm-tools:/dev/nvidia-uvm-tools
    volumes:
      - /usr/lib/x86_64-linux-gnu/libcuda.so.1:/usr/lib/x86_64-linux-gnu/libcuda.so.1:ro
      - /usr/lib/x86_64-linux-gnu/libnvidia-ml.so.1:/usr/lib/x86_64-linux-gnu/libnvidia-ml.so.1:ro
      - /usr/lib/x86_64-linux-gnu/libnvidia-ptxjitcompiler.so.1:/usr/lib/x86_64-linux-gnu/libnvidia-ptxjitcompiler.so.1:ro
      - /usr/bin/nvidia-smi:/usr/bin/nvidia-smi:ro

    Merge these with the service’s existing devices and volumes. Use an image with a compatible CUDA runtime and Linux user-space, recreate that Docker service, and repeat the compute test inside it. The source paths here are inside the LXC, where the host libraries were mounted in step 3.

    Stop the GPU LXC before updating the host driver or kernel. Afterwards, verify the host driver and UVM nodes, recheck the device numbers and library paths in step 3, update any changed configuration entries, then start the LXC again. Old bind mounts can retain replaced library files. Check the complete path after a host reboot too; UVM/device creation must precede LXC startup.

    More than one GPU

    The same arrangement works with multiple GPUs. Add its device node (for example /dev/nvidia1) to the loop in step 3 and to the Docker device list if used, then test CUDA on each visible device. That’s how the broker uses two cards. Their VRAM remains separate; splitting a model or assigning workloads to different GPUs is the application’s job.
  • UniFi camera VLANs with OPNsense and FreeRADIUS

    UniFi camera VLANs with OPNsense and FreeRADIUS

    My IP cameras use a local recorder and have no need for Internet access. They’re on a separate VLAN, with firewall rules allowing the recorder access and blocking everything else they don’t need.
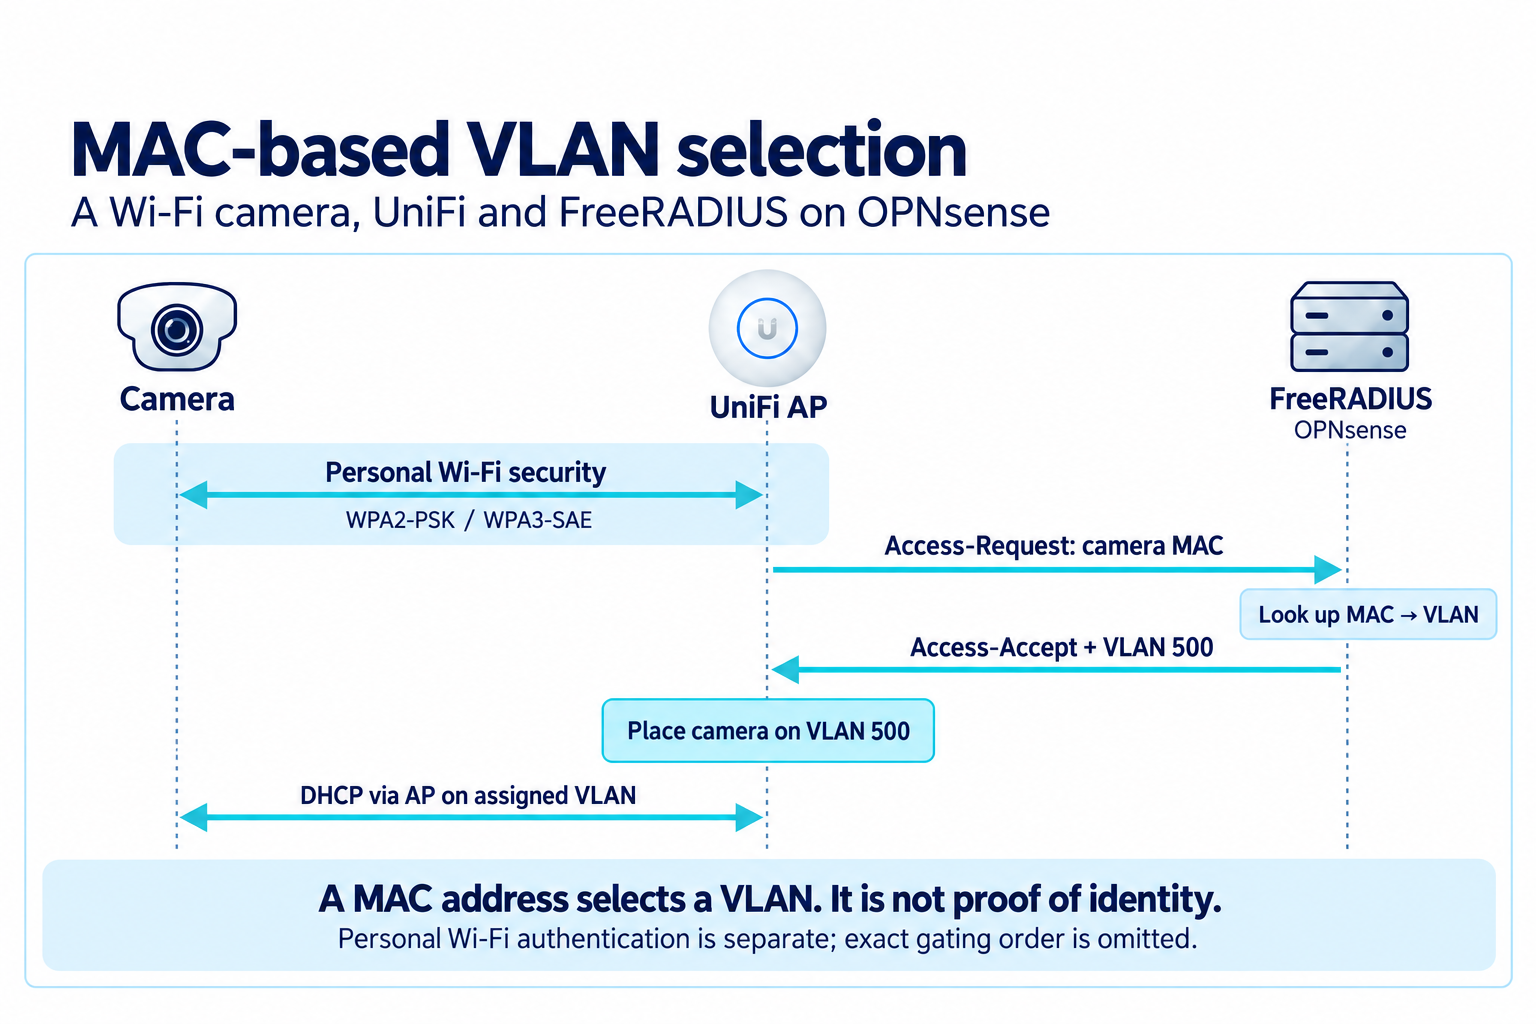
    UniFi’s RADIUS MAC authentication lets them join the existing WiFi and still be assigned to the camera VLAN. FreeRADIUS on OPNsense holds the MAC-to-VLAN mapping. The cameras continue using the normal WiFi password.

    This example uses VLAN 500 for cameras. The VLAN, DHCP scope and firewall rules need to exist on OPNsense, and VLAN 500 must be carried through the switches to the AP. The steps below cover the UniFi and FreeRADIUS configuration.

    Camera MAC address sent by a UniFi AP to FreeRADIUS on OPNsense; the returned VLAN places the camera on VLAN 500.
    The AP asks FreeRADIUS for the camera’s VLAN, then applies the result. Simplified successful connection; click to enlarge.

    UniFi configuration

    1. Add the camera network

    Under Settings → Networks, add a network named Cameras, with VLAN ID 500 and the router set to Third-party Gateway. If the network already exists, use that. Routing and DHCP remain on OPNsense.

    2. Create the RADIUS profile

    Open Settings → Networks → RADIUS Servers and create an external RADIUS profile. Some Network versions put RADIUS under Profiles.

    • Name: opnsense.
    • Authentication server: the OPNsense address reachable from the AP.
    • Port: 1812.
    • Shared secret: a generated secret, which will also be entered against the AP in FreeRADIUS.
    • RADIUS Assigned VLAN Support: enable it for wireless networks.

    Save the profile. Accounting isn’t required for VLAN assignment.

    3. Select the profile on the WiFi network

    Under Settings → WiFi, edit the existing SSID. Keep its usual WPA2/WPA3-Personal security and password.

    1. Open the advanced settings and enable RADIUS MAC Authentication.
    2. Select the opnsense RADIUS profile.
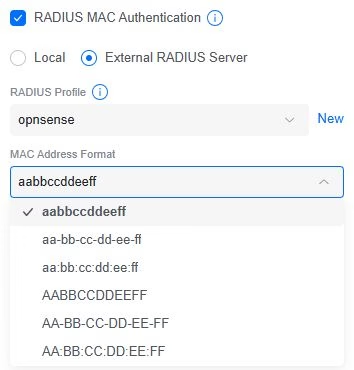
    3. Set MAC Address Format to lowercase without separators: aabbccddeeff.
    UniFi RADIUS MAC Authentication settings with the MAC address format dropdown open
    UniFi Network 10.1.85: MAC address format.

    For a new setup, apply the WiFi change after completing the FreeRADIUS configuration below, so reconnecting clients have a working RADIUS service to query. These settings follow Ubiquiti’s MAC-based VLAN guide.

    OPNsense / FreeRADIUS configuration

    4. Enable FreeRADIUS and VLAN assignment

    If needed, install os-freeradius under System → Firmware → Plugins. Open Services → FreeRADIUS → General and enable both Enable and Enable VLAN assignment.

    My configuration also uses Enable VLAN fallback assignment, visible in advanced mode, with Fallback VLAN ID set to 1. This allows devices without a matching camera entry onto the normal network. Use the VLAN appropriate to your default network. This option deliberately accepts failed MAC logins onto that VLAN; leave it off if unmatched devices should be rejected.

    Save the settings. FreeRADIUS’s separate DHCP Enable option isn’t needed here; clients use the existing DHCP service on their assigned VLAN.

    5. Add the AP as a RADIUS client

    Open Services → FreeRADIUS → Clients and add an entry:

    FieldValue
    EnabledChecked
    NameA descriptive AP name
    SecretThe same shared secret entered in the UniFi profile
    IP Address or Network with CIDRThe AP’s RADIUS source address, normally its management IP; use /32 for a single IPv4 address

    Save the entry and repeat for each AP serving this SSID. Allow UDP 1812 from those AP addresses to OPNsense through the relevant firewall rules. The client address is the AP, not the camera or UniFi controller.

    6. Add the cameras as users

    Under Services → FreeRADIUS → Users, add one user for each camera. For an example wireless MAC of AA:BB:CC:DD:EE:FF:

    FieldValue
    EnabledChecked
    Usernameaabbccddeeff
    Passwordaabbccddeeff
    DescriptionA camera name or location
    VLAN ID500
    IP Address / SubnetmaskLeave blank; use DHCP

    The username and password are both the MAC address, in exactly the format selected in UniFi. Leave Password Encryption at its default Cleartext-Password if viewing the advanced fields. This RADIUS password is separate from the WiFi password configured on the camera.

    Save each user, then apply the FreeRADIUS changes. With VLAN assignment enabled, OPNsense generates the required tunnel attributes from VLAN ID; no custom reply attributes are needed. The OPNsense FreeRADIUS guide covers the plugin settings.

    Check the result

    Apply the UniFi WiFi changes, then reconnect a camera. In UniFi’s client list it should still show the existing SSID, but its network should be Cameras. Check that its DHCP lease belongs to the VLAN 500 subnet, that the recorder can reach it, and that Internet access is blocked.

    If it fails, check Services → FreeRADIUS → Log File. A rejected login usually warrants checking the wireless MAC, its formatting and the matching password first. No request points towards the AP client entry, shared secret, firewall or server address. If authentication succeeds but the network is wrong, check both VLAN-assignment settings and the VLAN path to the AP.

    This is running here with cameras on the normal 2.4 GHz SSID and VLAN 500. Adding another camera is one more FreeRADIUS user entry. MAC addresses can be spoofed, so this is convenient segregation for devices using the WiFi password, rather than strong device authentication.

  • Coral TPU driver install for Proxmox 9.0 / Debian 13

    Coral TPU driver install for Proxmox 9.0 / Debian 13

    Another version, another error. Here is a working script to install the Coral TPU driver on a fresh Proxmox VE 9.0 system:

    wget -qO - https://packages.cloud.google.com/apt/doc/apt-key.gpg | gpg --no-default-keyring --keyring gnupg-ring:/etc/apt/trusted.gpg.d/google.gpg --import -
    rm /etc/apt/trusted.gpg.d/google.gpg~
    chmod 644 /etc/apt/trusted.gpg.d/google.gpg
    echo "deb https://packages.cloud.google.com/apt coral-edgetpu-stable main" | tee /etc/apt/sources.list.d/coral-edgetpu.list
    apt-get update
    apt-get install pve-headers libedgetpu1-std dkms devscripts dh-make dh-dkms git -y
    git clone https://github.com/google/gasket-driver.git
    cd gasket-driver
    sed -i -e 's/no_llseek/noop_llseek/g' gasket_core.c
    sed -i -e 's/MODULE_IMPORT_NS(DMA_BUF)/MODULE_IMPORT_NS("DMA_BUF")/g' gasket_page_table.c
    debuild -us -uc -tc -b
    cd ..
    dpkg -i gasket-dkms_1.0-18_all.deb

  • CWWK i3-N305 Benchmarks & Power Consumption

    CWWK i3-N305 Benchmarks & Power Consumption

    As previously admitted I have a bit of an obsession with mini-ITX / SBC (single board computers). I love the concept of getting maximum performance in a small form factor, preferably using as little power as possible and as near silent as possible.

    Depending where you live in the world today, electricity is becoming a relatively expensive commodity. Below is a graph showing UK energy prices relative to inflation.

    As I write this, in the UK, average electricity cost is around £0.24 ($0.31) /kWh. Now if we think about a home server, powered up 24/7, we can quickly calculate energy costs based on average power consumption:

    WkWh /yearCost /yearCost /5year
    543.8£ 10.51£ 52.56
    1087.6£ 21.02£ 105.12
    20175.2£ 42.05£ 210.24
    30262.8£ 63.07£ 315.36
    40350.4£ 84.10£ 420.48
    50438£ 105.12£ 525.60

    You can see that when you’re running a server 24/7, electricity cost over a 5 year life are significant, even if the power consumption is pretty low. So every time I see someone talking about using their 10-year old desktop PC as a Plex server I’m pretty sure they haven’t done their sums … chances are that it doesn’t make sense to reuse old, inefficient hardware when you figure in the power consumption. Even in the US where power is (generally) a bit cheaper it probably still pays to use something newer and more efficient.

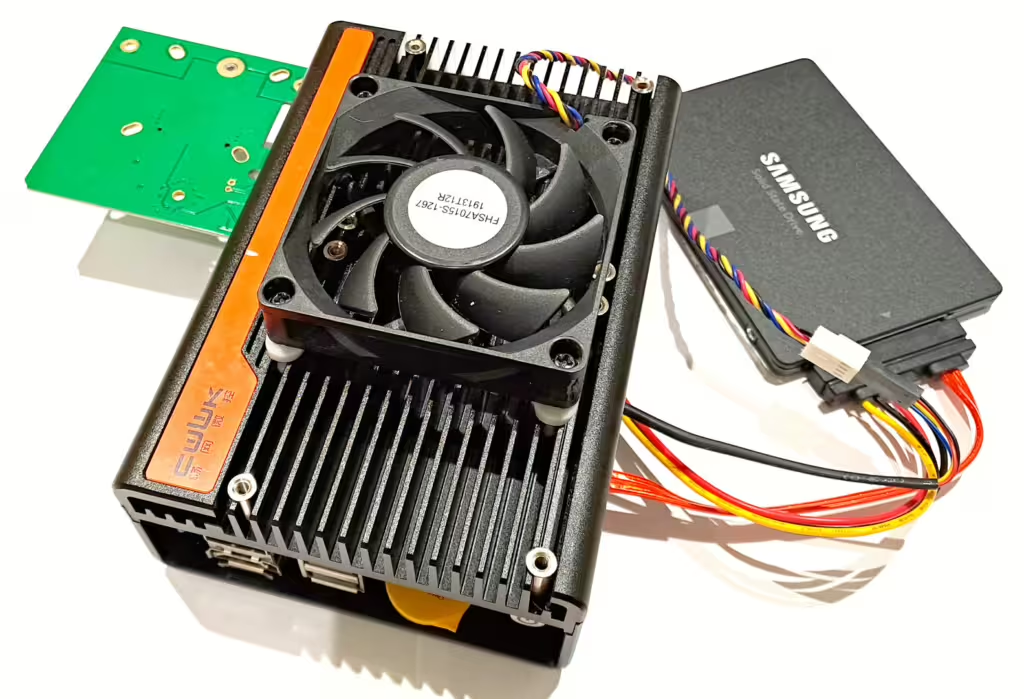
    Anyway, as a baseline, currently my main home server is this bad boy, the CWWK crazy, which has an Intel N100 4-core processor. It has 32Gb RAM, a 4Tb NVMe drive, 4Tb SATA SSD and a Coral dual TPU in the PCIe slot:

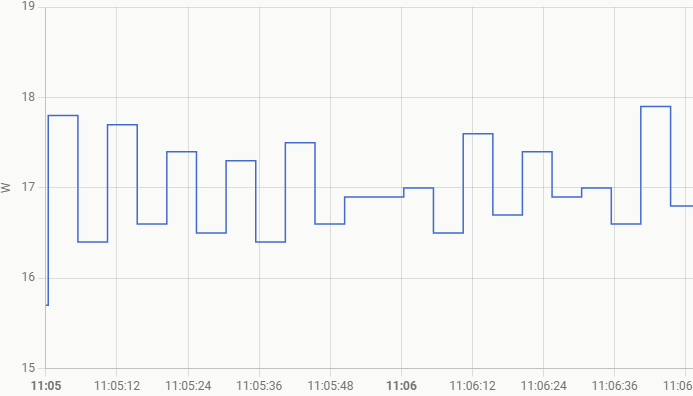
    Baseline power consumption measured at the wall when powered on but idle is 11W. While running a bunch of containers and Frigate NVR with detection on 6 IP cameras it’s around 17W. That gives an annual electricity cost around £36, which for me is reasonable compared to paying a subscription for a cloud provider for smart cameras, with the added benefit of not streaming cameras inside my house to some random Chinese cloud…

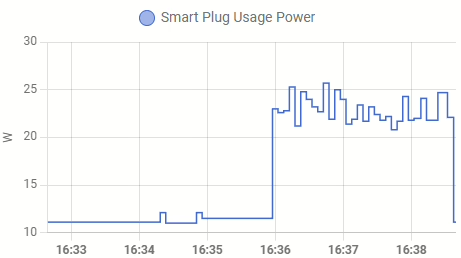
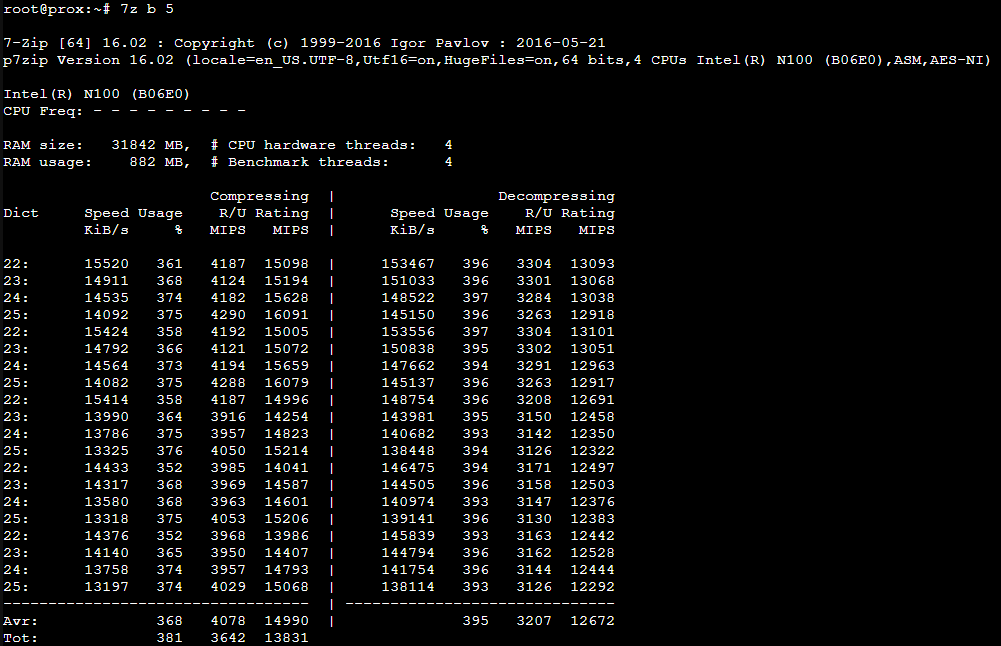
    Stopping all my containers and running a quick 7Zip benchmark gives me a sustained power draw around 23W for around 15 GIPS performance (about 1.5 W/GIPS) . On this PC I’ve increased the power limit to get increased sustained max performance (I’ve also added a fan).

    So that’s my starting point of reference, let’s build out the CWWK N305 NAS board and see how it compares!

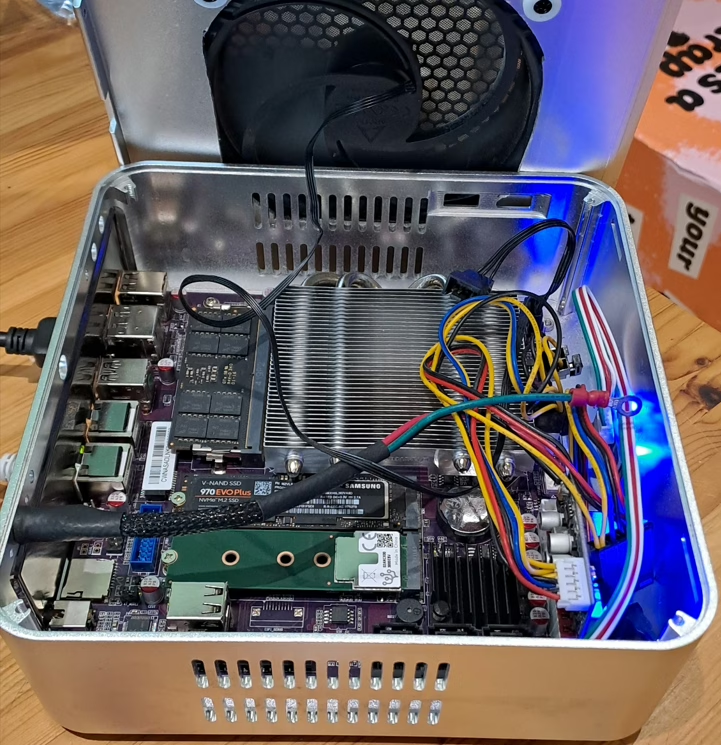
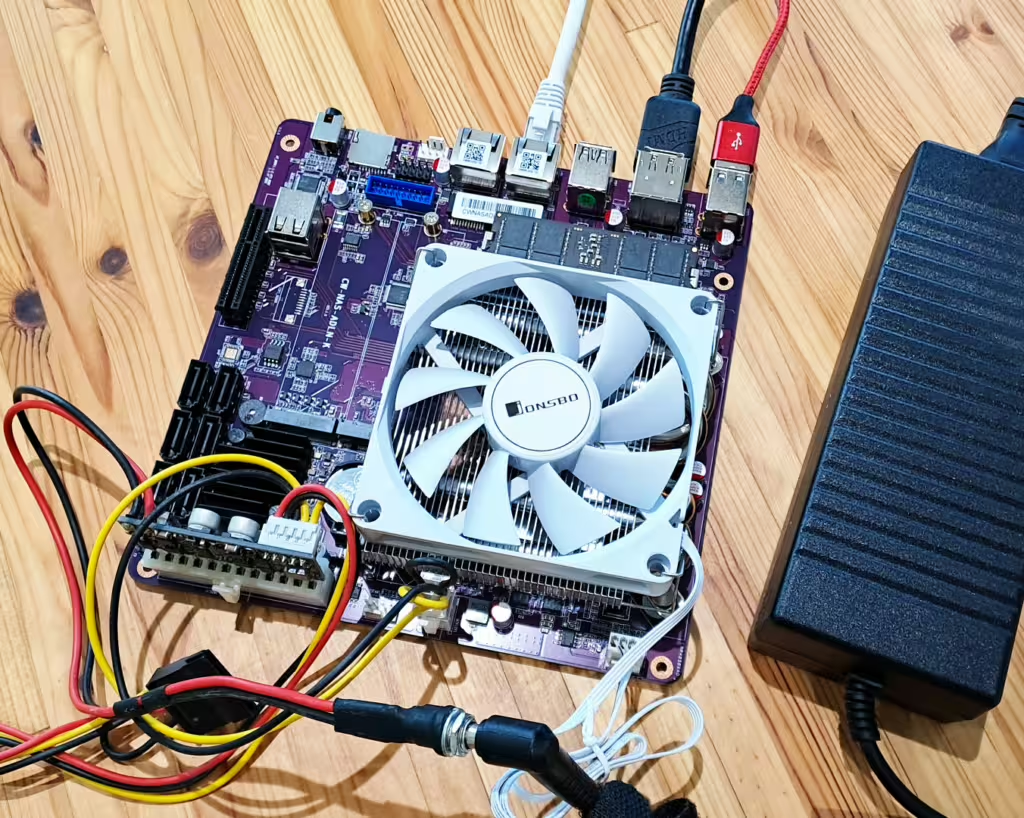
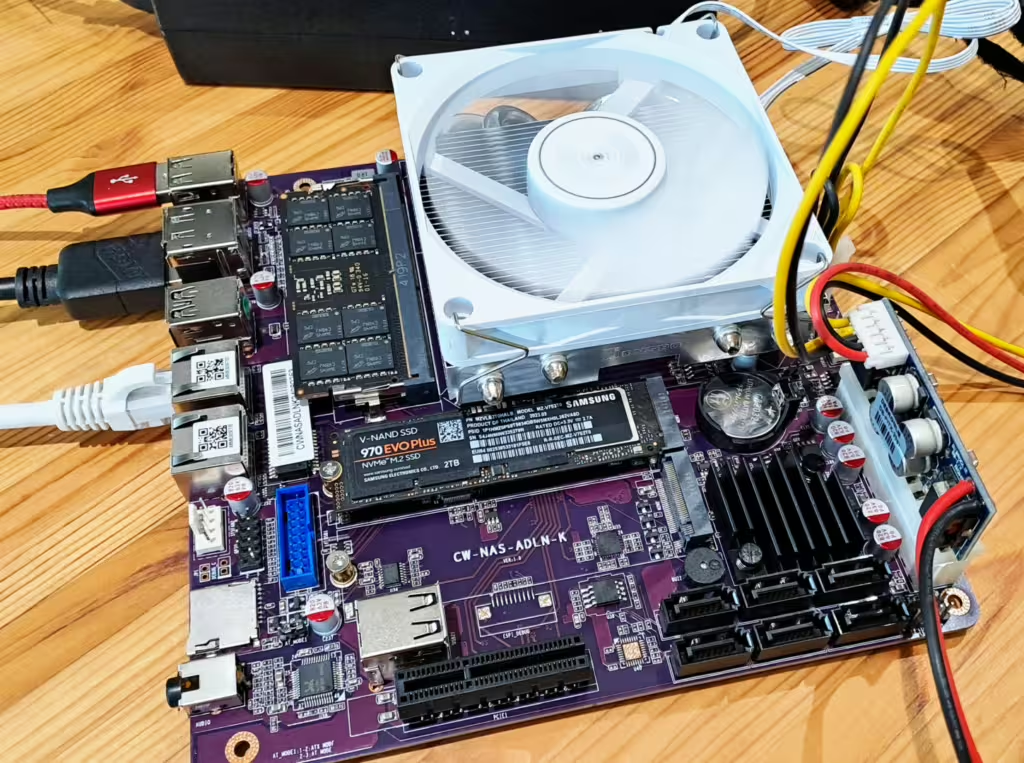
    Here I’ve added 32Gb RAM and a 2Tb NVMe drive to the board. I’ve also added a Coral TPU to the second M.2 slot (which I believe is shared with the PCIe slot, so it’s an either-or). The system is powered using a PicoPSU and external 12V brick.

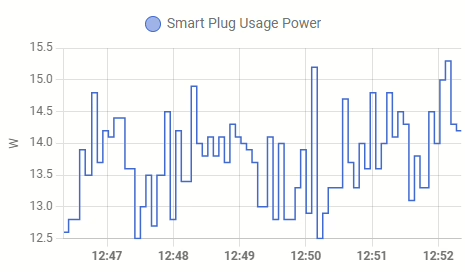
    With Proxmox bare install and nothing running, this setup idles around 13.5W. That’s a bit more than the N100 build, but it’s giving me 4 extra cores to play with, roughly twice the performance headroom.

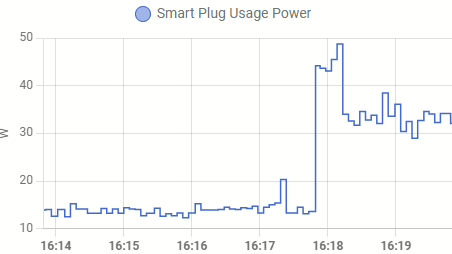
    Hitting the system with a quick 7Zip benchmark we see a peak power consumption around 50W that settles after a few seconds to around 34W.

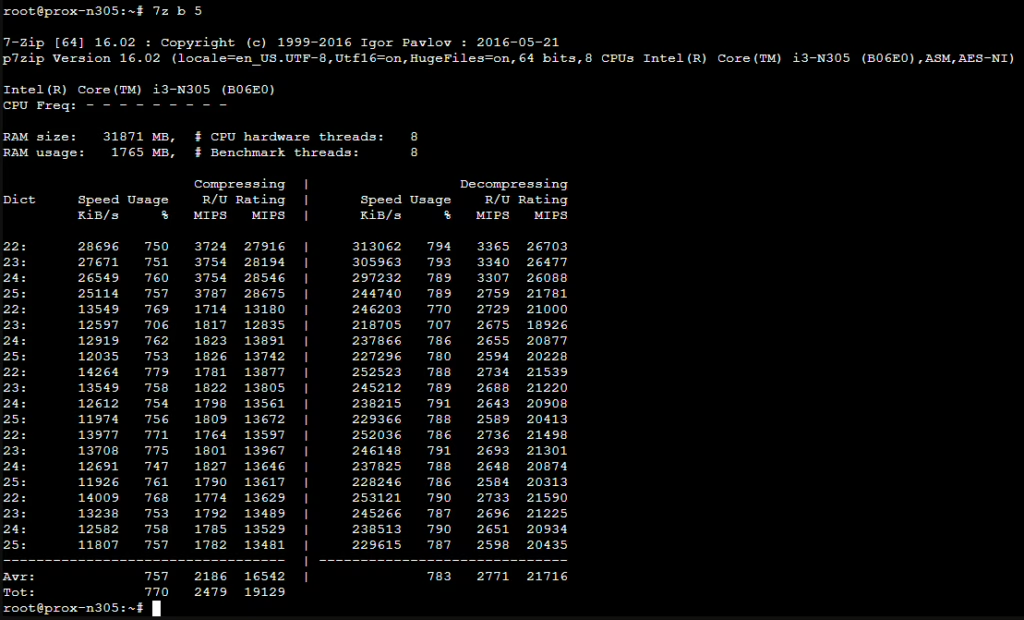
    The benchmark figures show the same, a high initial peak around 28 GIPS then a lower sustained output around 13.5 GIPS. At peak performance that’s about 1.8W/GIPS, then throttled around 2.5W/GIPS

    I tried to increase the power limit, but unfortunately it doesn’t seem to be possible on this processor / motherboard:

    root@prox-n305:~# powercap-set -p intel-rapl -z 0 -c 0 -l 50000000
    Error setting constraint power limit: No data available
    Considerations for common errors:
    - Ensure that the control type exists, which may require loading a kernel module
    - Ensure that you run with administrative (super-user) privileges
    - Enabling/disabling a control type is an optional feature not supported by all control types
    - Resetting a zone energy counter is an optional powercap feature not supported by all control types
    
    root@prox-n305:~# cat /sys/class/powercap/intel-rapl/intel-rapl:0/enabled
    0

    It’s possible there is a BIOS setting that can enable changing this …. I’ll dig in at a later date.

    So the numbers are clear, we’re actually getting more bang/buck from the N100 in terms of performance vs power draw, with this hardware.

    N100 ~ 1.5W/GIPS
    N305 ~ 1.8-2.5W/GIPS

    The flip side of course is that the peak performance of the N305 is roughly twice that of the N100, so for peaky workloads you have much more grunt available. Idle power load is comparable, but still better for the N100.

  • CWWK i3-N305 NAS mini-ITX board

    CWWK i3-N305 NAS mini-ITX board

    I’ve been keeping an eye for a while on new boards based on the Intel N305. I’m a great fan of the Alder Lake N100, so a similarly low-powered offering with double the core count is too good to pass up. Recently this popped up on AliExpress:

    CWWK 12th Generation I3-N305 N100 2 Intel I226-V 2.5G NAS Motherboard 6 SATA3.0 6-disk Soft Router 1*DDR5 4800MHZ Firewall

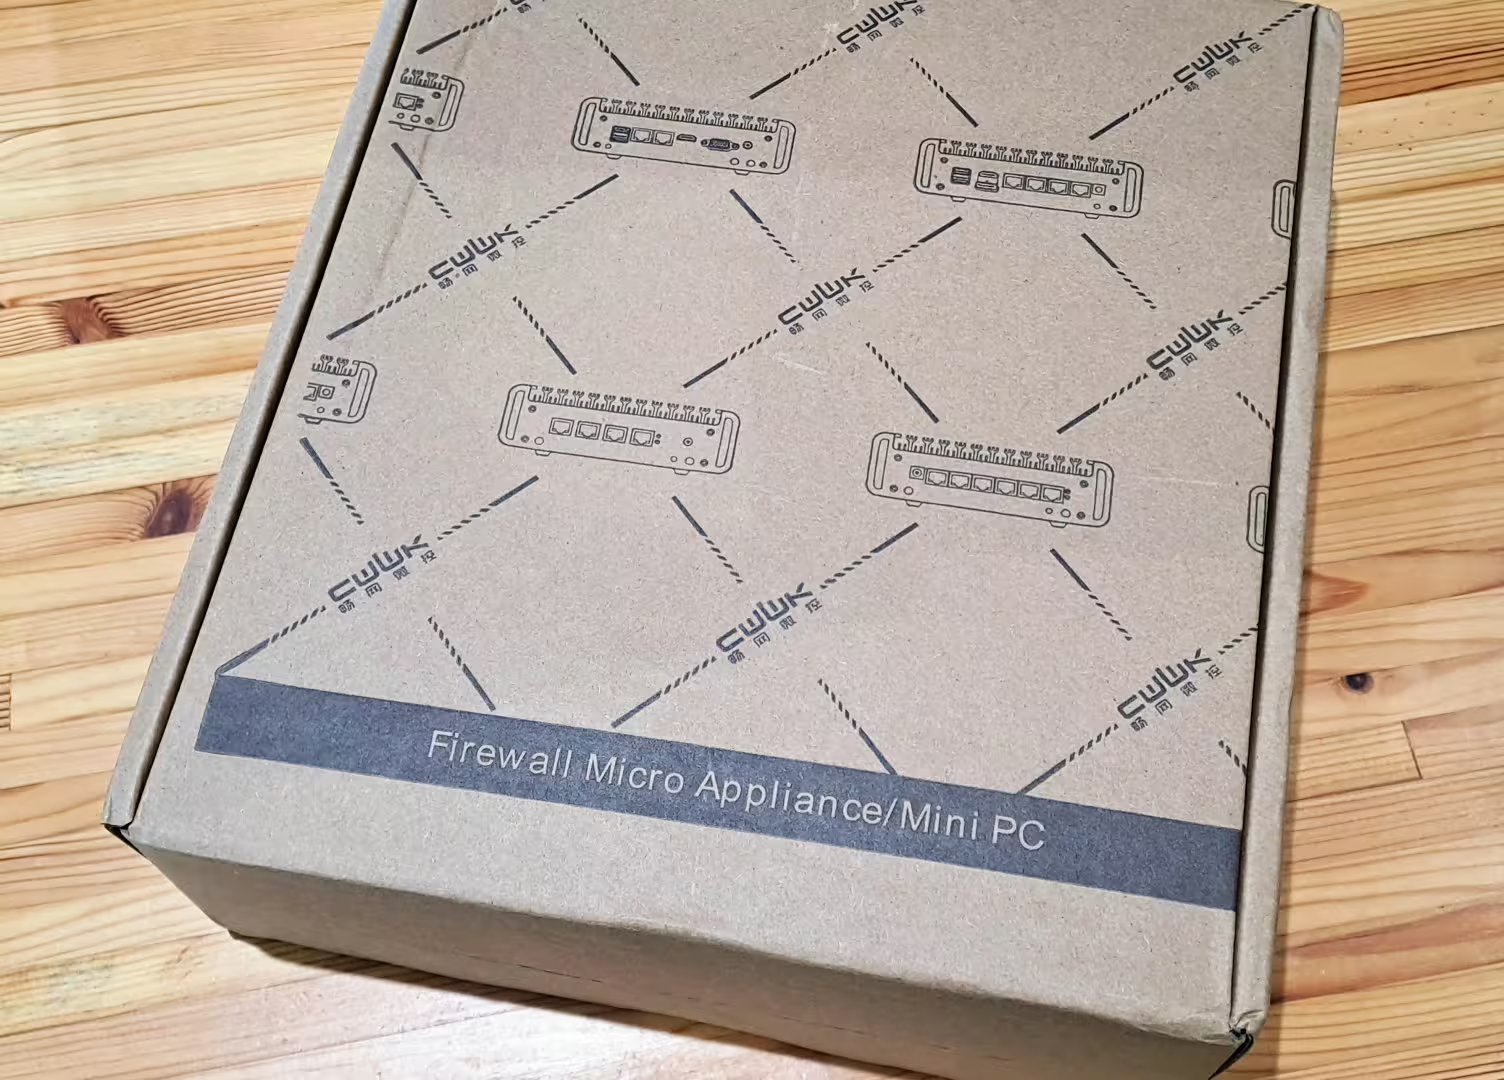
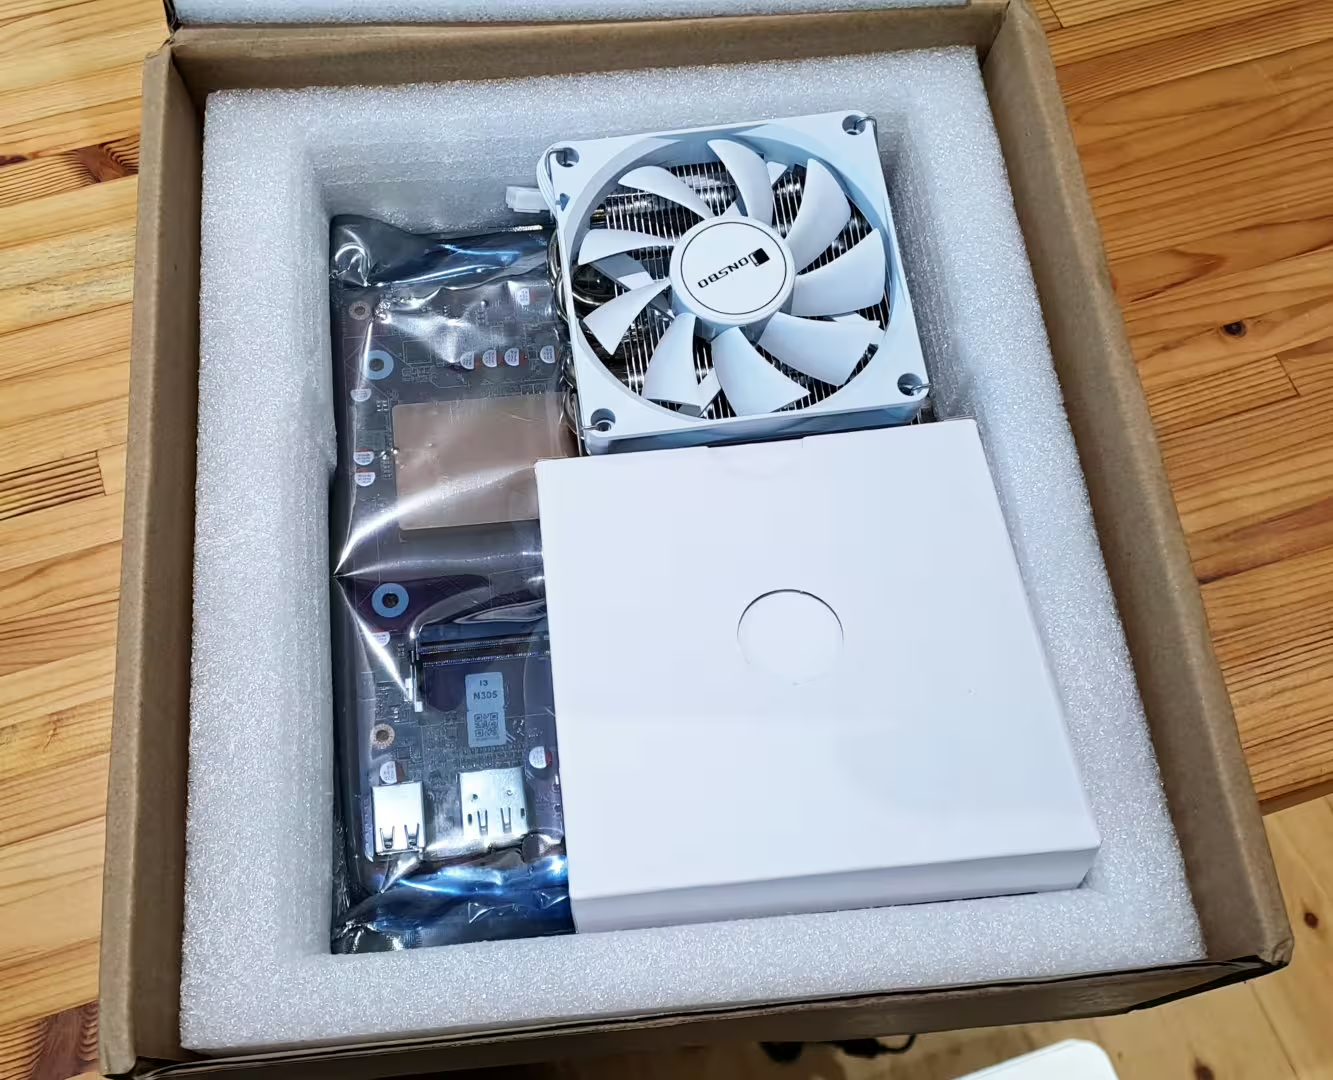
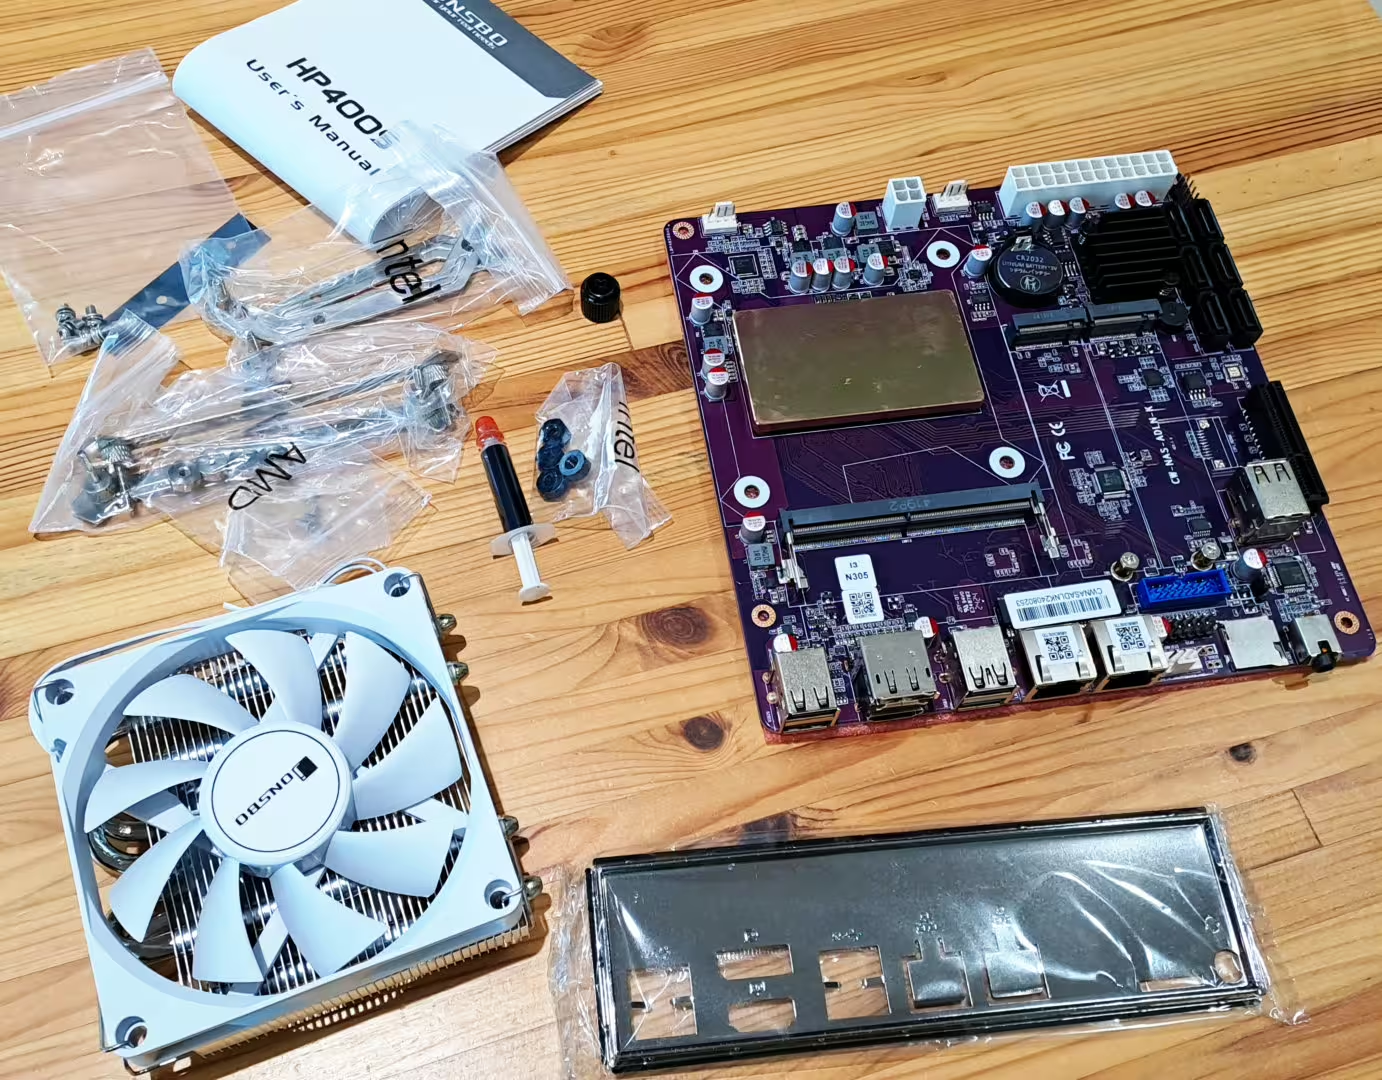
    My what a lot of words! Since I already have the CWWK “Crazy” N100 mini-computer, I obviously hit buy on this near instantly. Not long (and one customs charge) after, this turned up on my doorstep:

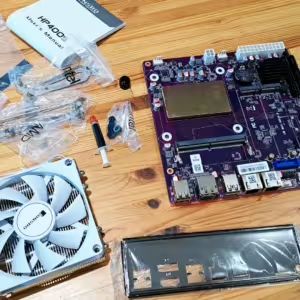
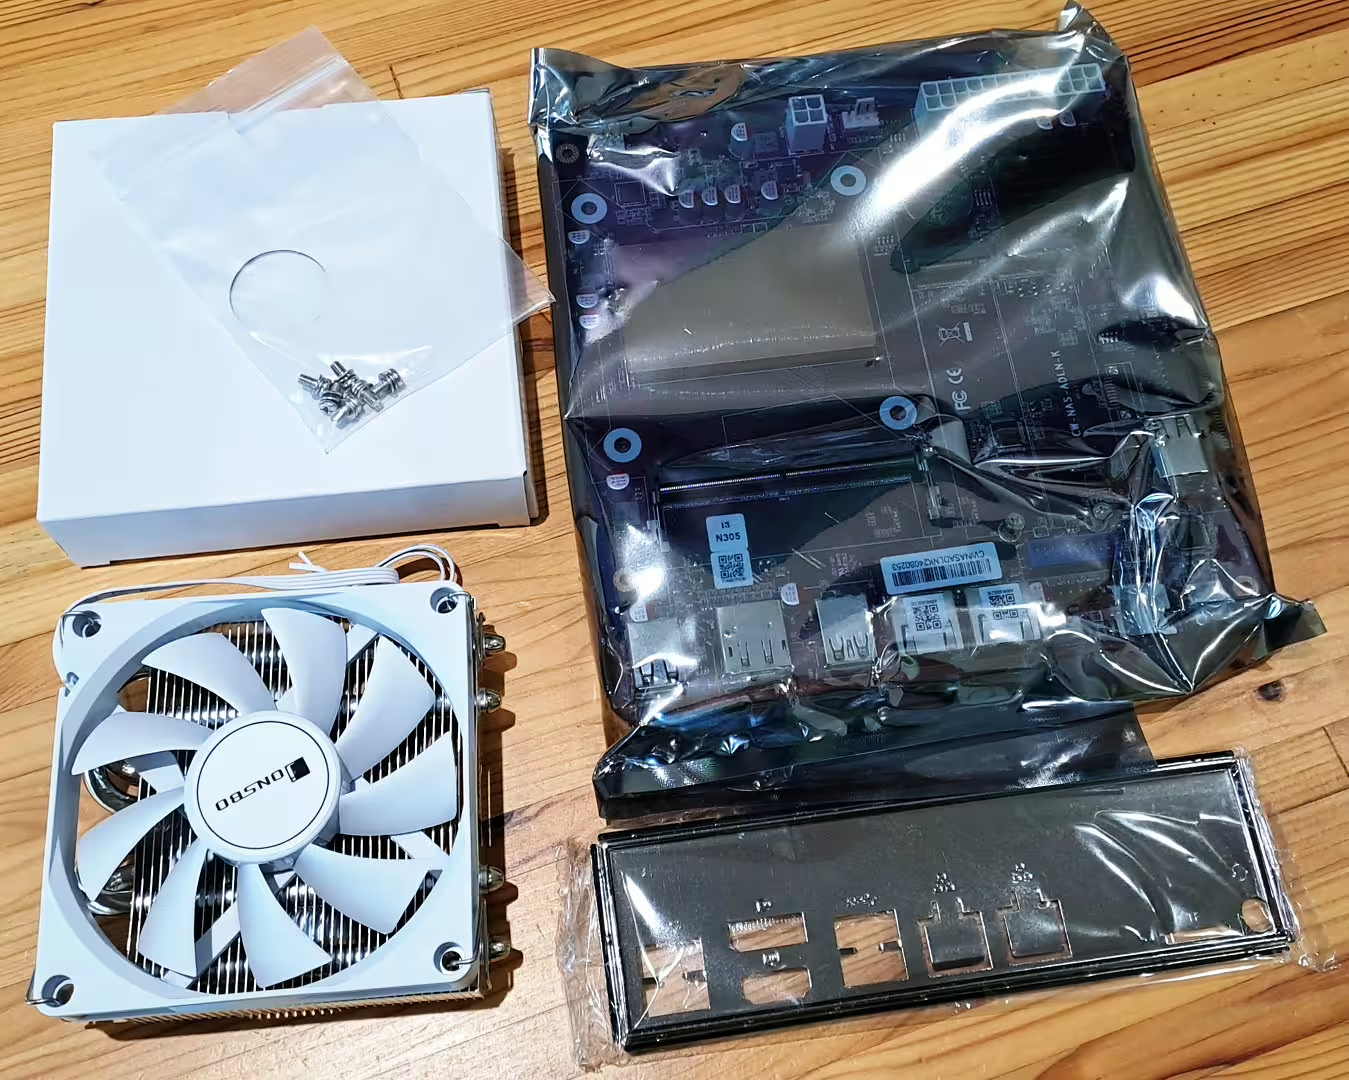
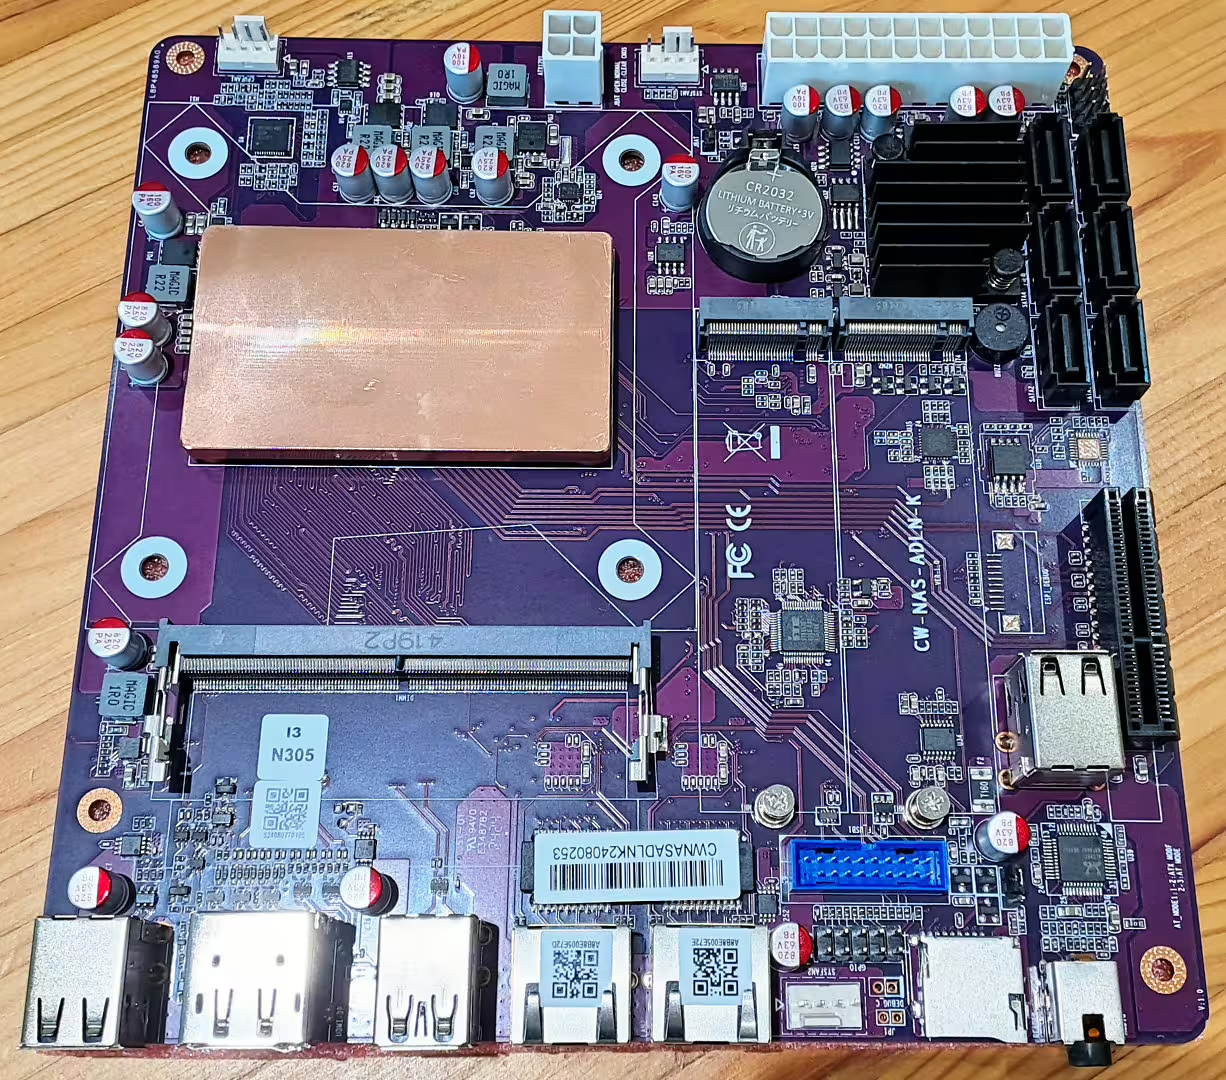
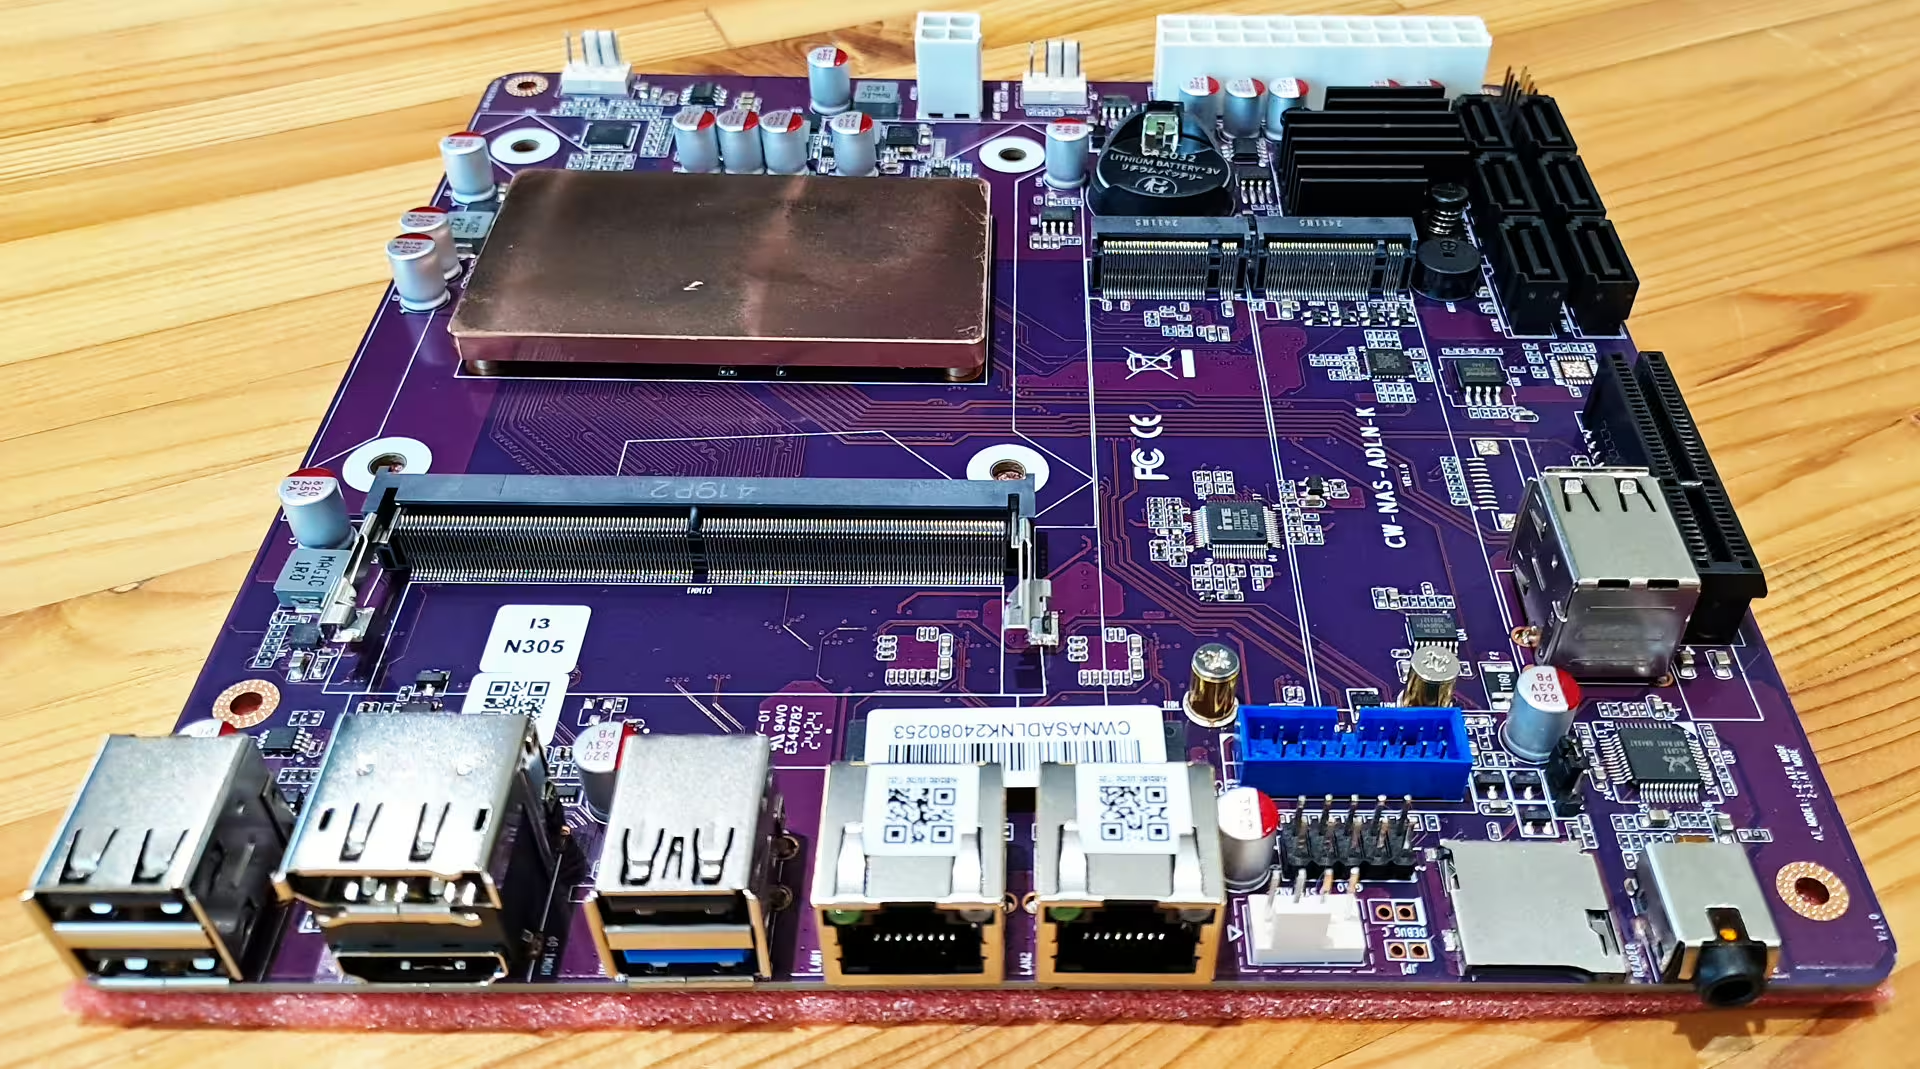
    I love this – it’s my kinda tech. You get a manual … for the cooler, but not for the motherboard. The processor is hidden under a shiny copper block. You get two NVMe ports, 1 PCIe and a bunch of SATA if that’s your thing.

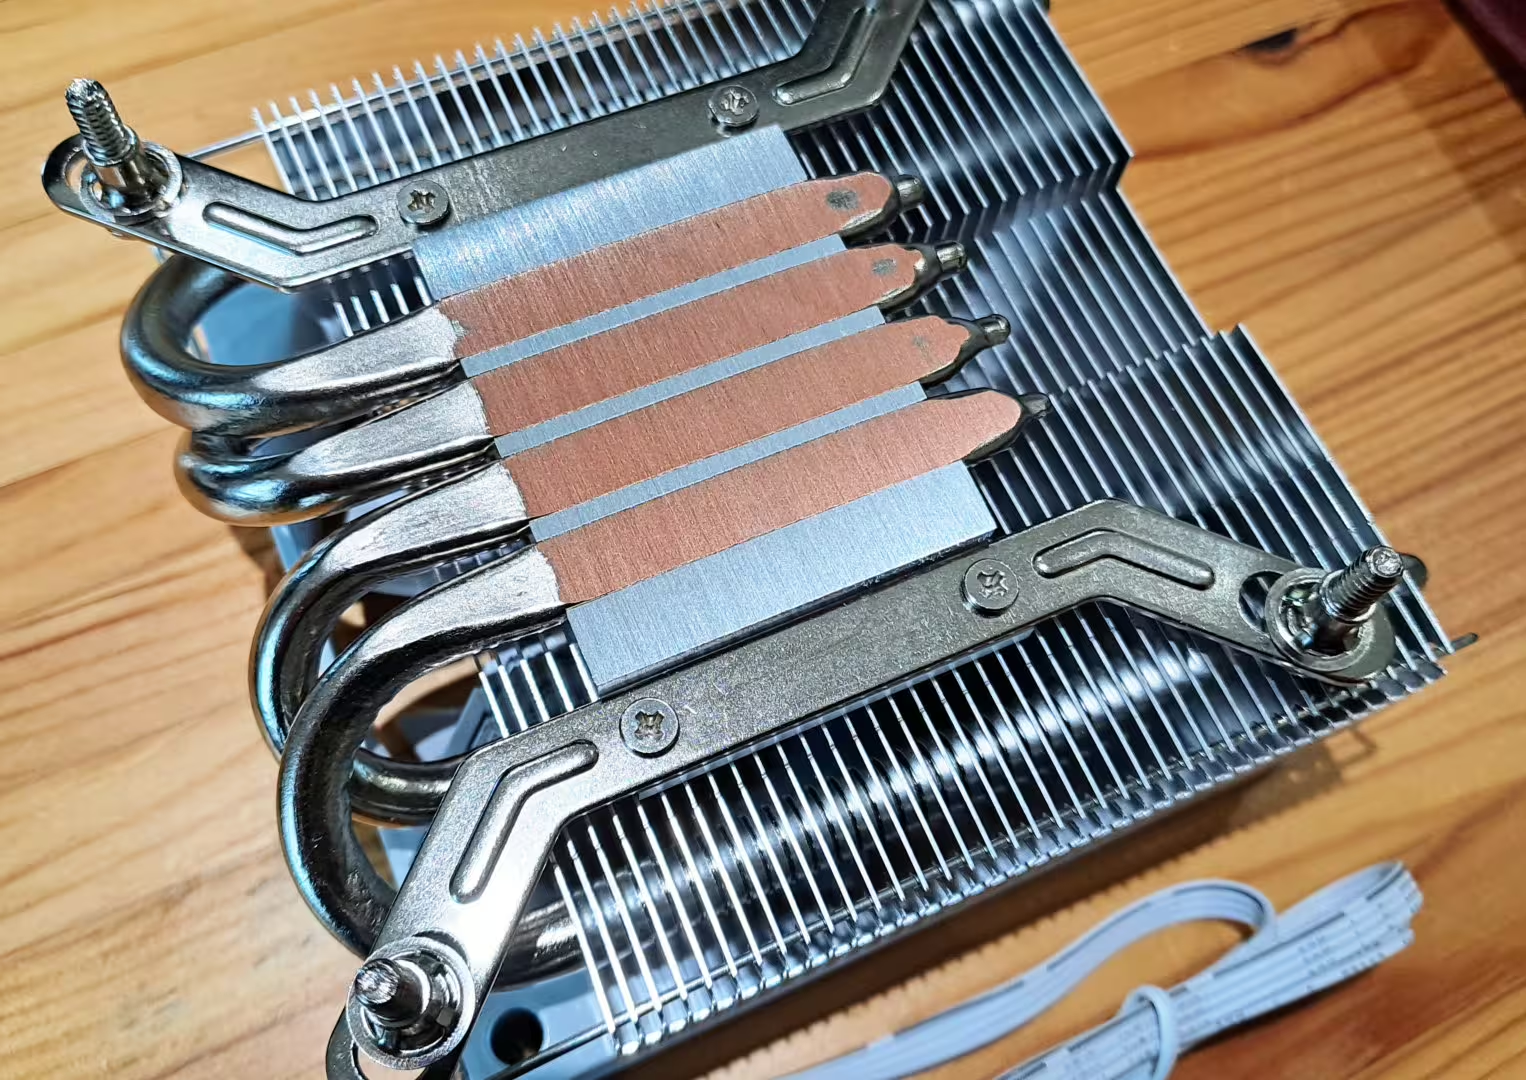
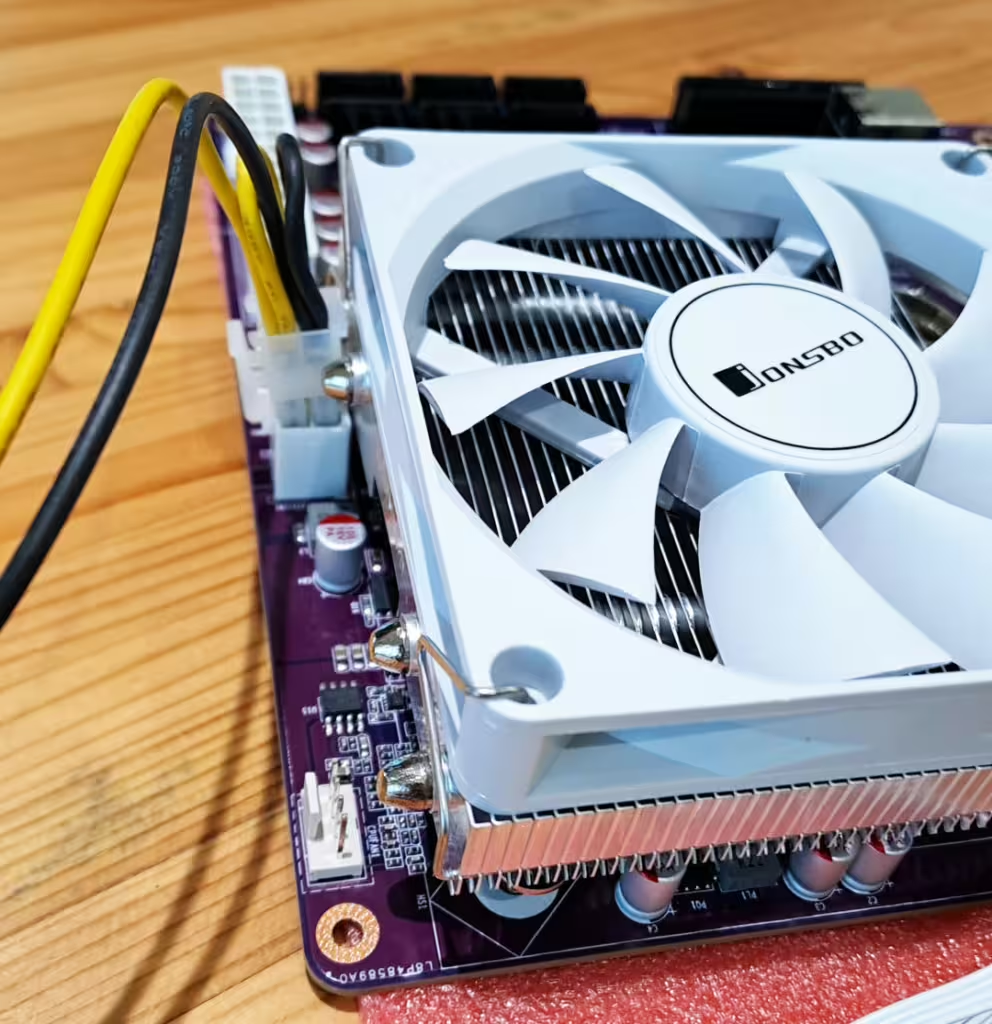
    First challenge – mount the cooler. This is actually not very obvious, I think CWWK bundled this without a lot of thought. It does fit but only really one way around, because the cooler fouls on some capacitors or blocks the power header in other orientations, and you have to figure that for yourself.

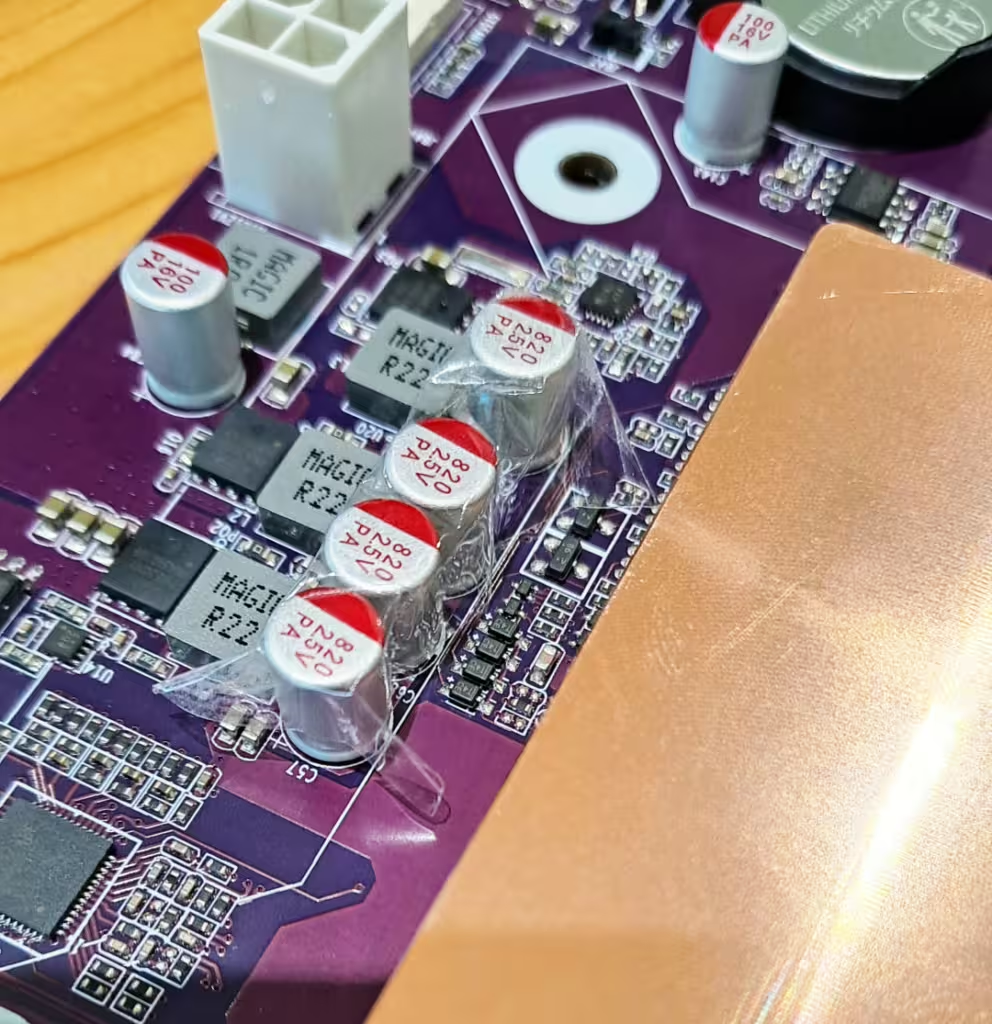
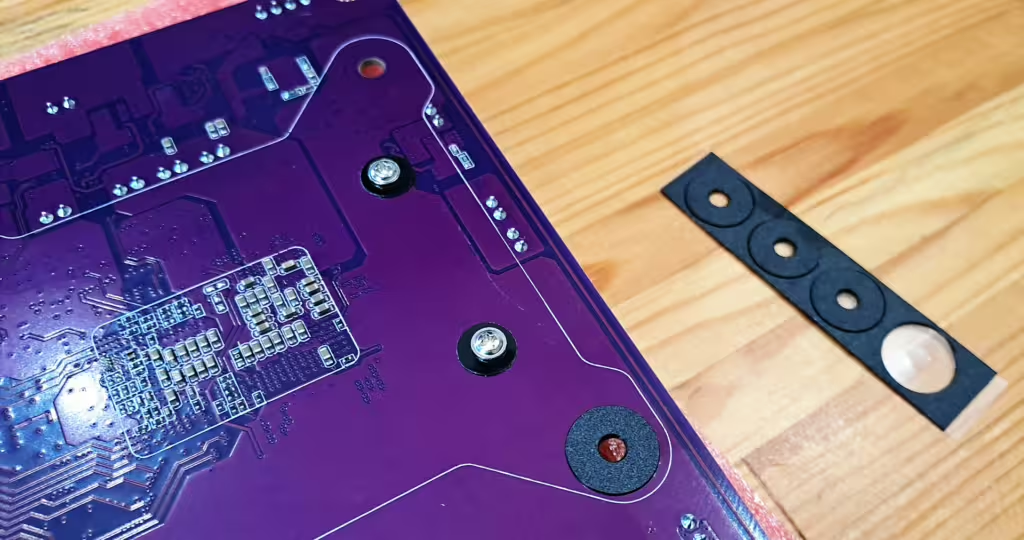
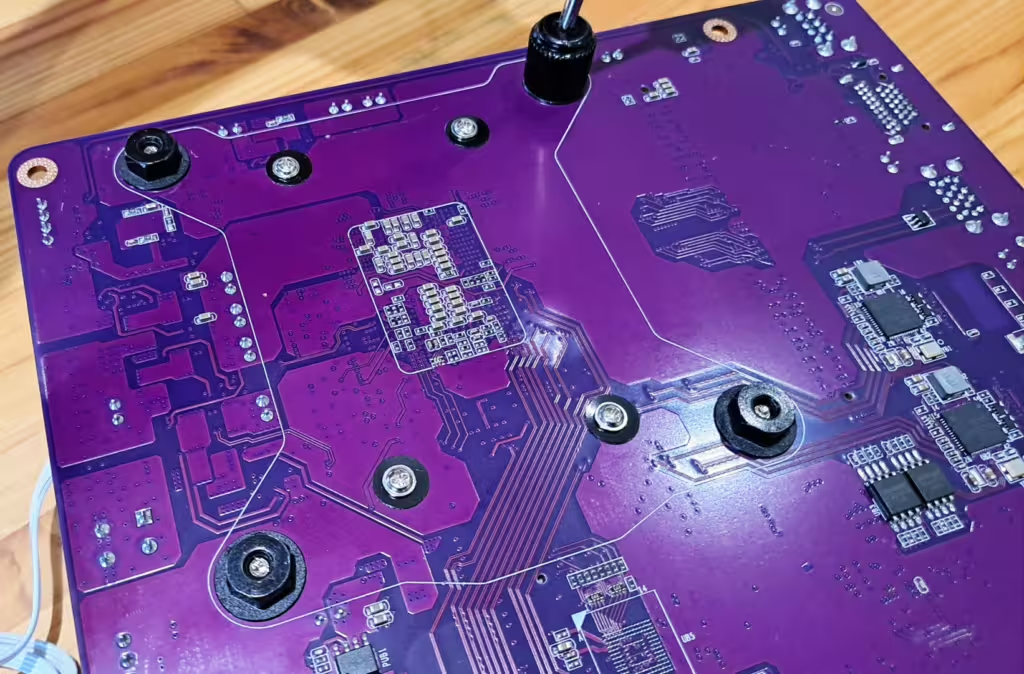
    Even the way around that it does fit it’s almost touching a bunch of capacitors, so I added some tape to insulate. Next up add some insulating pads to the back of the board and install the cooler. There is some thermal paste supplied, which is a nice touch.

    There’s a nifty little tool supplied to help you tighten the nuts. As there’s no metal back-plate here it’s best not to tighten these fully as it bends the board. Thermals aren’t a huge issue for this processor and there is a massive contact surface to the copper spreader anyway, so really not an issue.

    With the cooler installed, I added a picoPSU and a 32Gb DDR5 stick.

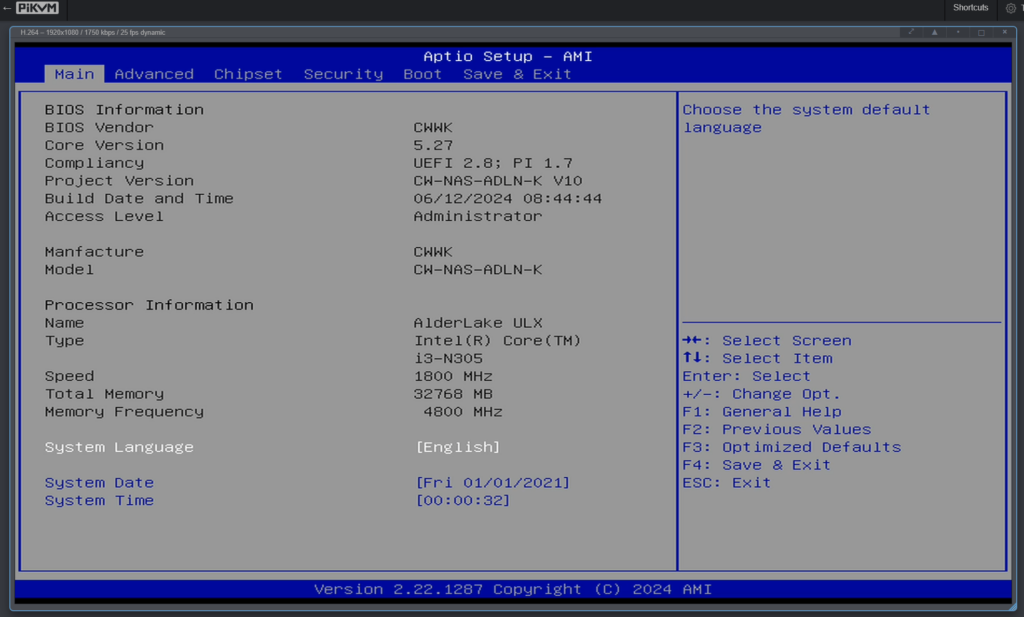
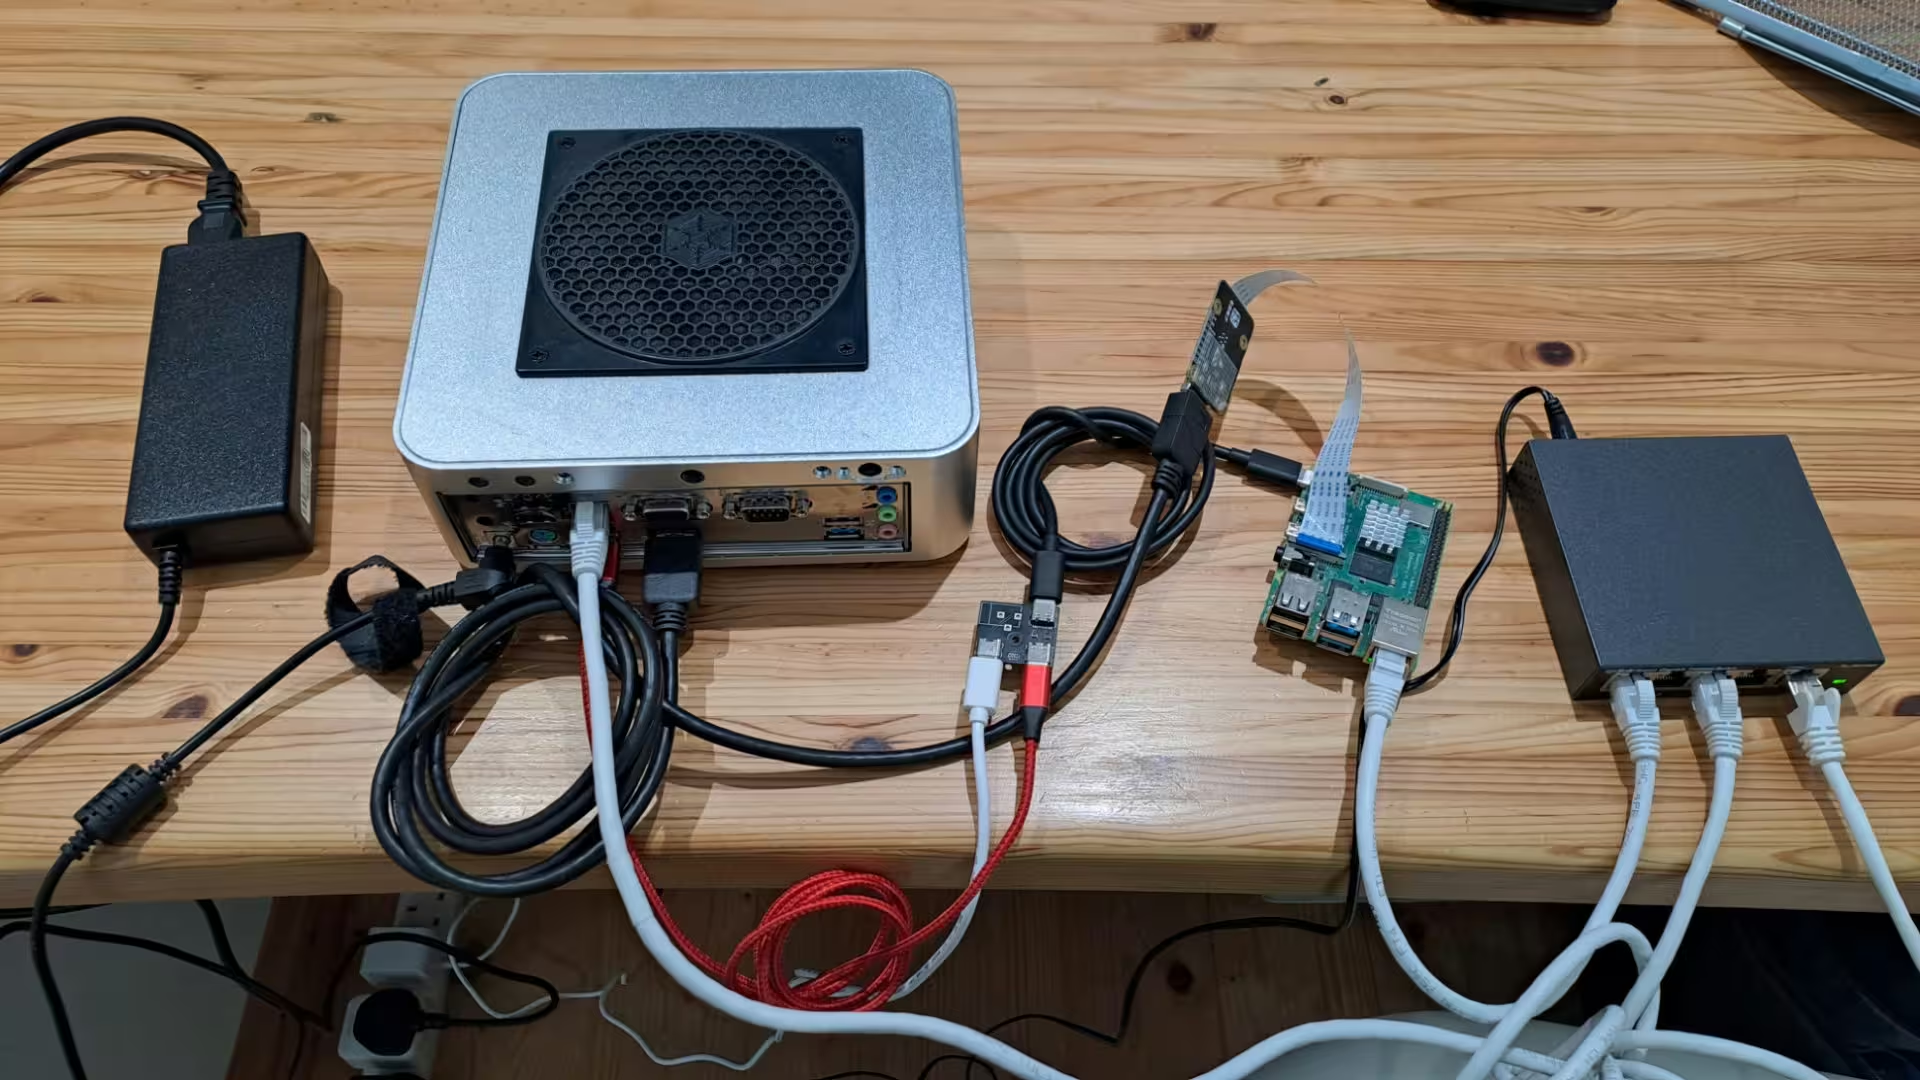
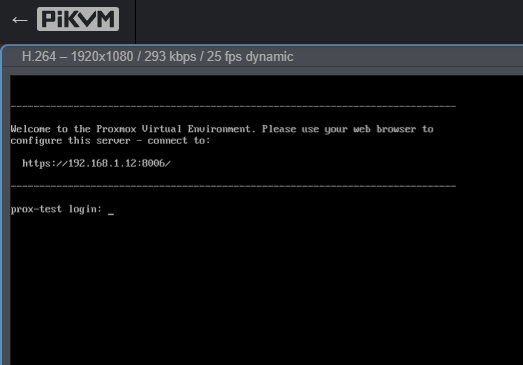
    Popping a 2Tb NVMe drive in and connecting up my PiKVM, I’m ready for a headless install:

    First boot takes a loooooong time. So much so I thought the board was DOA, but it turns out it’s normal. When you chuck in new memory or reset the CMOS there is a fairly extensive memory training period that takes 2-3 minutes with nothing on the screen. Don’t panic! Eventually we get into the BIOS:

    Now we’re ready for OS install!

    I wanted to link you the board I bought, but it looks like it’s no longer available from the same seller. Searching on AliExpress there are now a LOAD of vendors selling what look to be identical hardware, here is a link to one that’s available with N100 or N305 processor and with or without funky Chinese fans … enjoy!

    *Affiliate link, I get small commission if you buy from this link xxx

  • Mele Quieter 2Q in Proxmox Cluster?

    Mele Quieter 2Q in Proxmox Cluster?

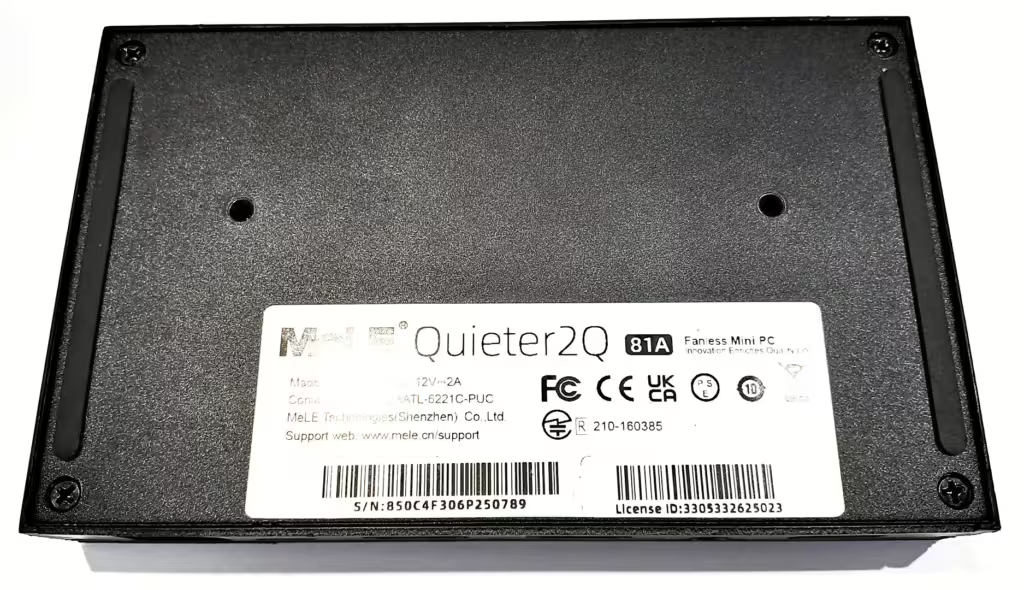
    You might think it a little odd for anyone to get excited about a J4125-based mini-PC in 2024, and you’d be right, but being a couple of generations short of cutting edge doesn’t mean this tiny computer is totally irrelevant.

    There are a few flavours of the Mele Quieter 2Q knocking about but the one on my desk is the model with 8Gb RAM & 128Gb eMMC storage. That’s actually plenty for a basic Windows or Linux install as a useful daily driver, but this PC has a beautiful secret…

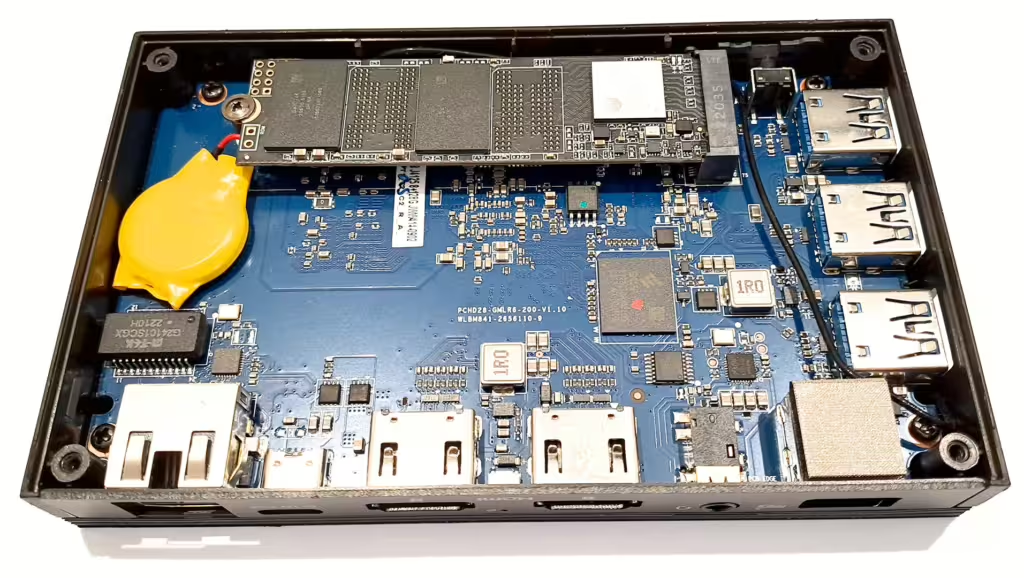
    Just pop 4 screws out of the bottom of the standard mini PC and you’ll find there is a very useful and still relevant NVMe slot. Whack in a chunky NVMe SSD and you can use this miniscule, power-sipping PC for a range of purposes:

    Unfortunately there is no similar upgrade path for RAM as it’s soldered on board, but even 8Gb is quite a lot if you don’t run an OS that’s bloated with irrelevant newsfeeds and Angry Birds installs.

    There is a reason I’ve dragged this little wonder-box out of hibernation – I want to take down my main Proxmox node for maintenance and at the moment it’s running quite a few services (including this site). I’m going to use the Mele to make a two-node cluster and migrate some services to it to keep things up and running while I clean up the main box.

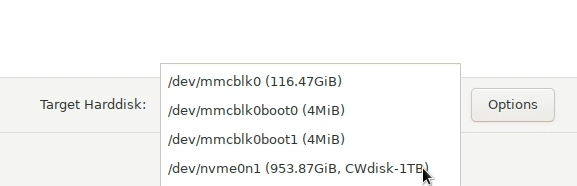
    The Proxmox installer shows the new drive as /dev/nvme0n1. You can see the eMMC device (main chonk and a couple of smaller boot devices):

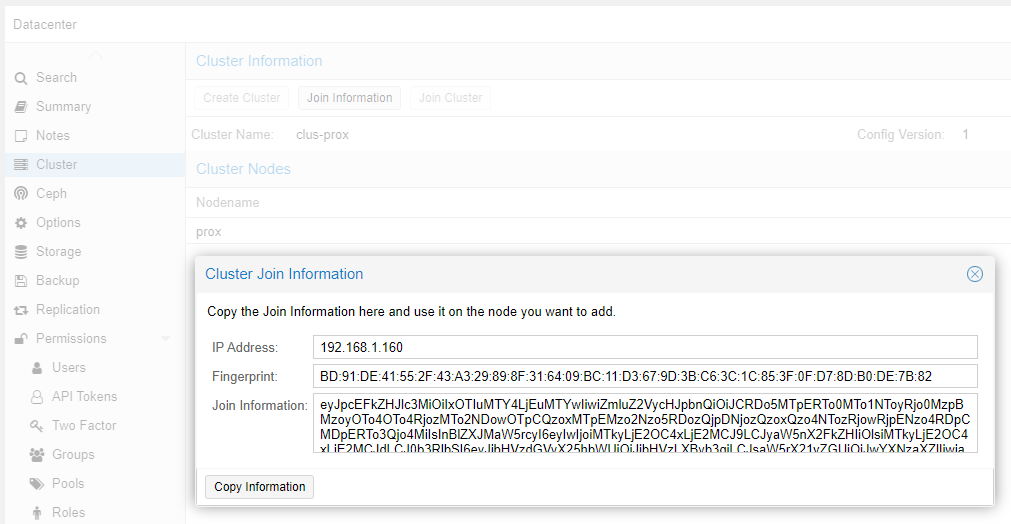
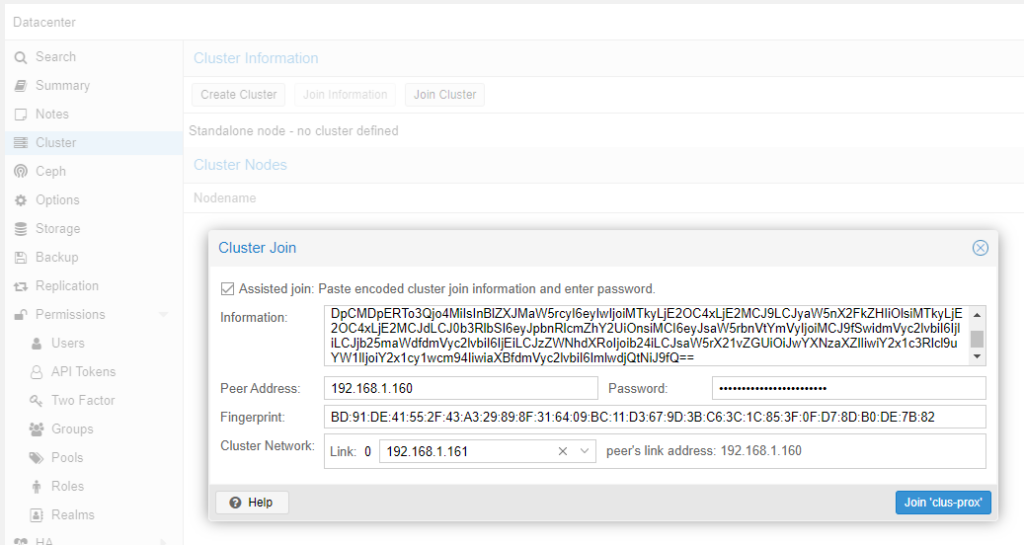
    Install is a breeze as usual, once Proxmox is running I just set up LetsEncrypt to get a certificate, then create a new cluster on the existing Proxmox box, and copy-paste the quick join information from that dialogue to the join dialogue on the new node:

    If you run into any problems with cluster join the first things to check are DNS resolution and the hosts files on each box. If you’re doing something funky like forming a cluster over Tailscale I’d recommend listing every node’s IP in each node’s hosts file. If you’re using a self-signed certificates that are not trusted on all hosts you need to specify the Fingerprint in this dialogue. If you have set up LetsEncrypt to get publicly trusted certs you can leave this blank.

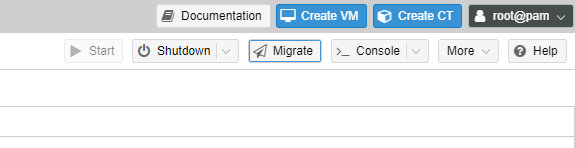
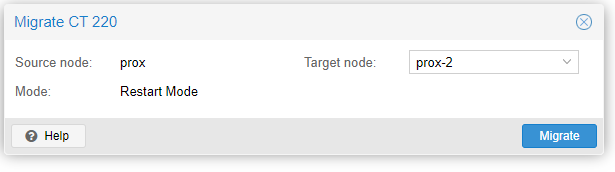
    Nice! That’s my cluster up and running. Now you can manage any node from the UI running on any node, and migrating VMs or containers between nodes is as simple as hitting the Migrate button here:

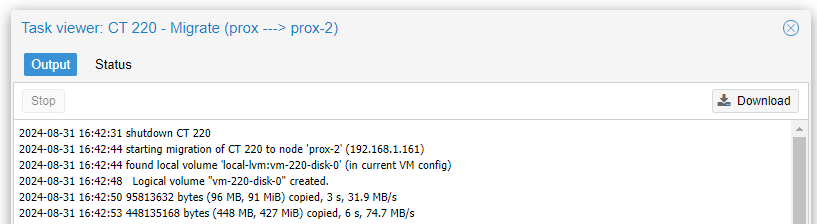
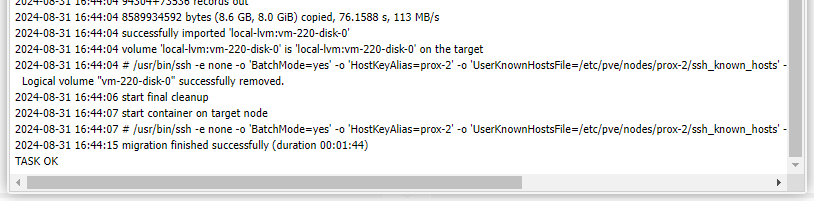
    That’s it! Fun fact – VM migration is pretty much live – the VM continues running right until it switches to the new node, so you get virtually no downtime. LXC containers, though, have to be shut down to migrate so expect some outage while the storage is migrated across.

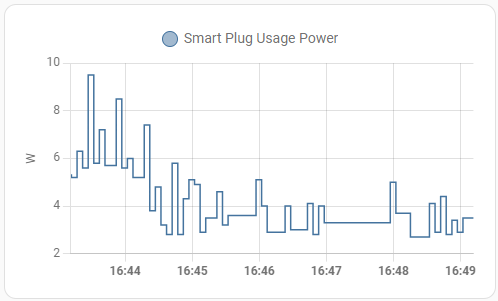
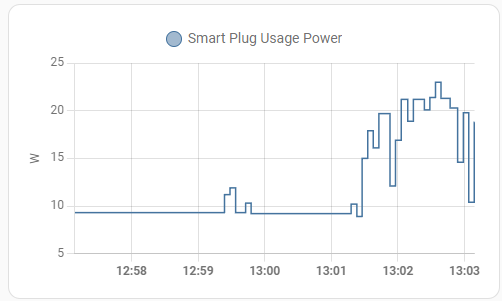
    But now the REALLY impressive thing about the Mele Quieter 2Q – here is the power consumption, measured at the wall. The peak shows the container being migrated over, but it settles under 4W average:

    If you’re going to run something 24/7, it really ought to use as little power as humanly possible, and here the little Mele shows its true strength!

    Final word to the wise

    Proxmox has great support for clustering and resource migration. One thing you need to know though is that a two node cluster isn’t really a cluster and if one node goes down many things stop working. This is because the quorum system used to maintain state between nodes needs a majority (>50%) of nodes online to reach consensus for changes. In a two node cluster one node isn’t enough for this, so the cluster configuration goes read-only. If you hit this situation you can work around by using this command to reduce the required node votes to reach quorum:

    A two-node cluster can also be used to easily migrate VMs between two servers you don’t actually want to cluster in long term – you can actually form the cluster, transfer the VMs and break the cluster afterwards. This is a really easy way to perform hardware upgrades with minimal downtime on a standalone Proxmox install.

    The Mele 2Q seems to be discontinued, but you can check out the new version which has an N100 processor (should be pretty good bang/buck)

    *Affiliate link, I get a small commission if you buy which I will probably spend on cat toys and single board computers.

  • Are you getting enough from your N100 SBC?

    Are you getting enough from your N100 SBC?

    Did you buy yourself a cute little CWWK Crazy? Trying to use it as a server? Do you get the feeling that it’s not quite as powerful as you would expect from the benchmark figures? Well the N100 is an awesome CPU …. but there’s a good reason you’re not getting as much CPU power as benchmarks suggest you should!

    Let me show you why… First install powercap-utils. That’ll help us understand and modify the CPU power settings under Linux:

    apt install powercap-utils -y

    Now let’s see what the default power limits are set to.

    root@prox:~# powercap-info -p intel-rapl
    enabled: 1
    Zone 0
      name: package-0
      enabled: 1
      max_energy_range_uj: 262143328850
      energy_uj: 429781126
      Constraint 0
        name: long_term
        power_limit_uw: 6000000
        time_window_us: 27983872
        max_power_uw: 6000000
      ...

    From the Zome 0 Constraint 0 you can see that the long term power limit is set to 6W.

    Now let’s see what happens to the CPU under sustained load. On my Proxmox setup that’s already running some containers that are reasonably CPU heavy (so already up against the power limit) a 7z benchmark gives us this:

    Intel(R) N100 (B06E0)
    CPU Freq: - - - - - - - - -
    
    RAM size:   31842 MB,  # CPU hardware threads:   4
    RAM usage:    882 MB,  # Benchmark threads:      4
    
                           Compressing  |                  Decompressing
    Dict     Speed Usage    R/U Rating  |      Speed Usage    R/U Rating
             KiB/s     %   MIPS   MIPS  |      KiB/s     %   MIPS   MIPS
    
    22:       2945   177   1621   2866  |      33225   210   1349   2835
    23:       2461   167   1498   2508  |      32143   206   1351   2781
    24:       2593   184   1514   2788  |      29391   193   1336   2580
    

    On the compression benchmark we’re getting about 2600 MIPS. Even with other stuff running that’s not a lot of spare CPU capacity. In another session, let’s check the CPU frequency:

    root@prox:~# cat /proc/cpuinfo | grep Hz
    cpu MHz         : 1200.011
    cpu MHz         : 1200.013
    cpu MHz         : 1199.967
    cpu MHz         : 1200.036

    You can see here the CPU is clocking right down 1.2 GHz to stay inside that 6W power limit. Let’s try doubling that limit:

    powercap-set -p intel-rapl -z 0 -c 0 -l 12000000

    Instantly we can see the base clock goes up to a respectable 2.9GHz

    root@prox:~# cat /proc/cpuinfo | grep Hz
    cpu MHz         : 2900.065
    cpu MHz         : 2900.021
    cpu MHz         : 2900.020
    cpu MHz         : 2900.002

    And we’re now getting 11000 MIPS! A huge improvement!

    Intel(R) N100 (B06E0)
    CPU Freq: - - - - - - - - -
    
    RAM size:   31842 MB,  # CPU hardware threads:   4
    RAM usage:    882 MB,  # Benchmark threads:      4
    
                           Compressing  |                  Decompressing
    Dict     Speed Usage    R/U Rating  |      Speed Usage    R/U Rating
             KiB/s     %   MIPS   MIPS  |      KiB/s     %   MIPS   MIPS
    
    22:      11163   279   3894  10860  |     116822   314   3172   9967
    23:      11398   299   3879  11613  |     111820   306   3160   9675
    24:      10963   298   3954  11788  |     112025   312   3155   9834

    So why is the default power limit so low? Well for a system like the CWWK Crazy that’s intended to be fanless the long term power limit is set pretty low to stop it getting too hot. It’s that simple. And in fact if you run it fanless with a high power limit you will find it gets uncomfortably hot after a while (and potentially will then thermally throttle anyway).

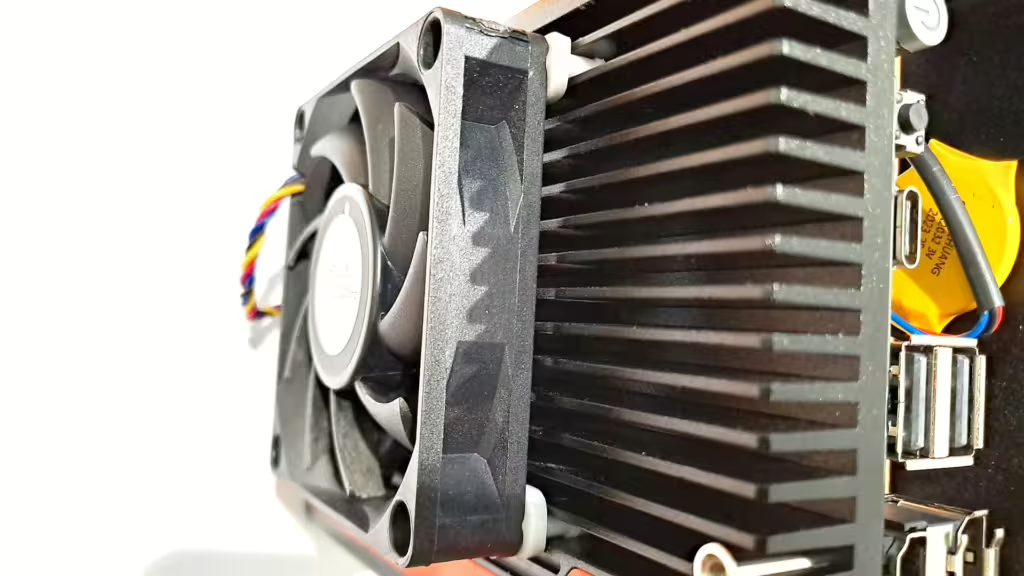
    The addition of one single tiny 80mm fan on the front is all it takes to turn your fanless but very power-limited system into a still-near-silent but way more capable machine. In fact the CWWK Crazy comes with fan headers and cables, and screw mountings for two 80mm fans. I’ve installed a single fan on mine by squishing some small grommets into the cooler fins then screwing the fan into them. It runs pretty well silent and barely gets warm to the touch even under full load:

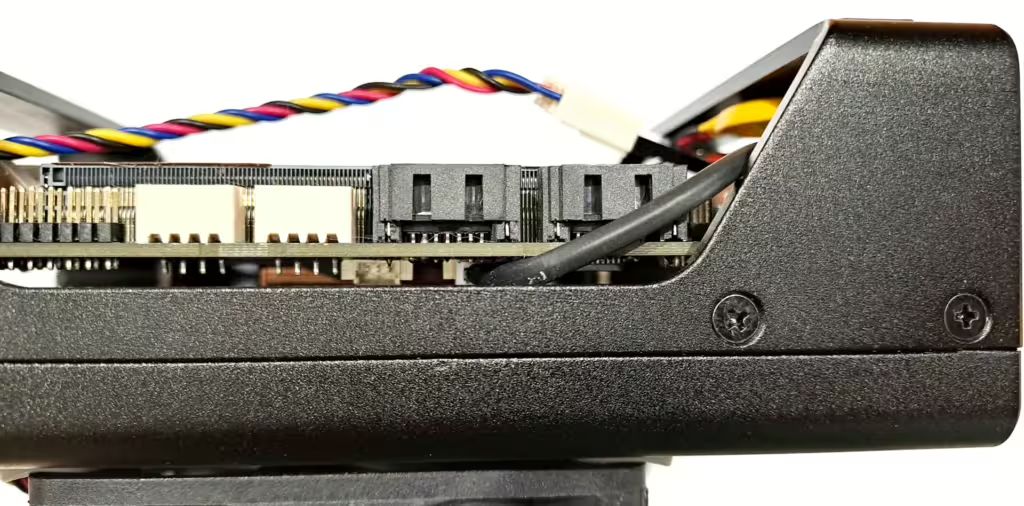
    Hooking up the supplied cable to the fan header is a little bit fiddly though!

    Last words … the command above is not persistent and your power limit will be reset after a reboot. To make it persistant, edit your crontab:

    Then add this line at the bottom:

    @reboot                      /usr/bin/powercap-set -p intel-rapl -z 0 -c 0 -l 12000000 > /dev/null

    Reboot and test, you should be good to go.

    Not got a CWWK Crazy yet? Grab one now!

  • ASRock N100DC-ITX Proxmox Install

    ASRock N100DC-ITX Proxmox Install

    Hello! My name is Roving Climber and I’m a SBC / mini-ITX addict. If you’re reading this you might have the same problem. Symptoms can include a news-feed packed with single-board computers, a collection of every Raspberry Pi ever made, and quite possibly one or more ASRock mini-ITX boards in your possession.

    I’ve built stuff around the ASRock J4125 in the past, it’s an incredible board for a low-power x86 build, and I also have an ASRock J5040 running as my Proxmox Backup Server. Last year the N100DC-ITX came out and I just had to grab one. The stats from CPUBenchmark looked pretty promising … nearly twice as much processing power for a lower TDP. As we all know TDP is a pretty meaningless number these days, but definitely worth a look.

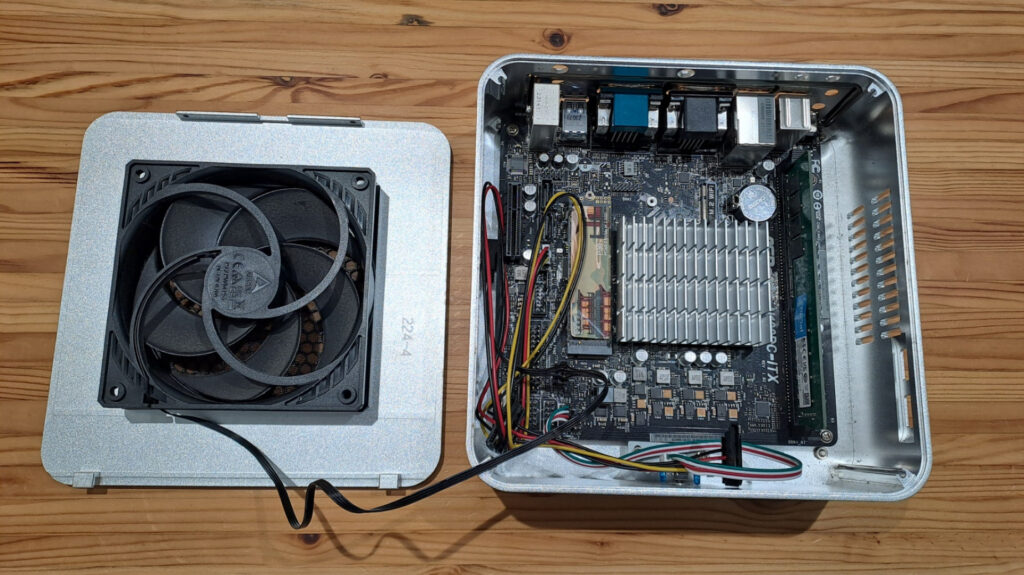
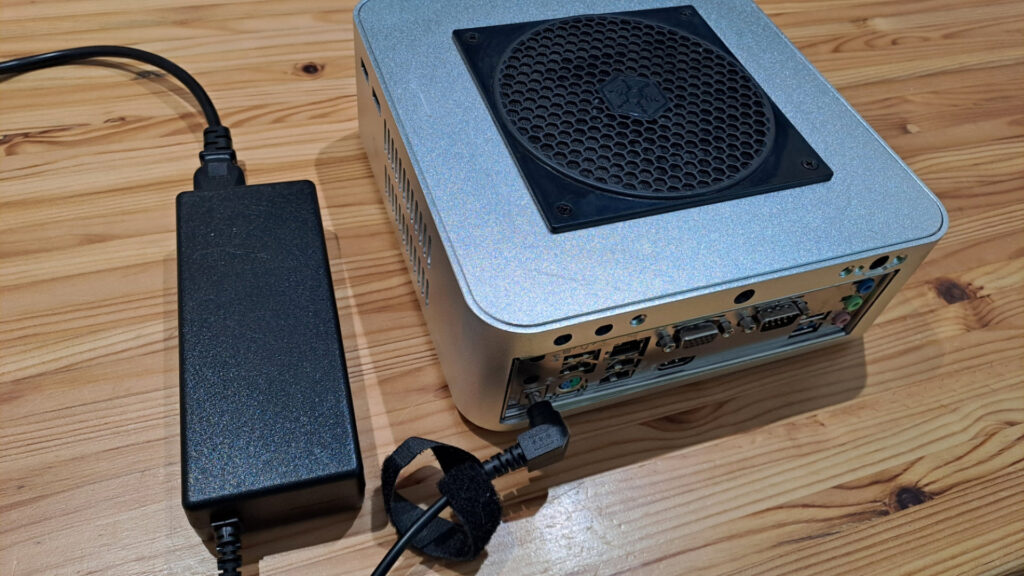
    Here’s the board stuffed into my kinda DIY butchered mini case. The CPU is soldered in and comes with a heatsink pre-installed. I’ve chucked a 32Gb stick of RAM in there and a SSD that was left over after upgrading my CWWK Crazy.

    While it’s a standard mini-ITX form factor, this board has a special trick. If you look closely you’ll see there are no power headers on the board. In fact the N100DC-ITX has a barrel power connector on the back and takes direct 19V DC in from a standard laptop power brick.

    That in itself is pretty cool, because a lot of the time for these mini-ITX boards I would be using a PicoPSU anyway, so having that onboard is a tidy solution. You get power headers straight off the board to power SATA hard drives.

    So let’s get this thing built!

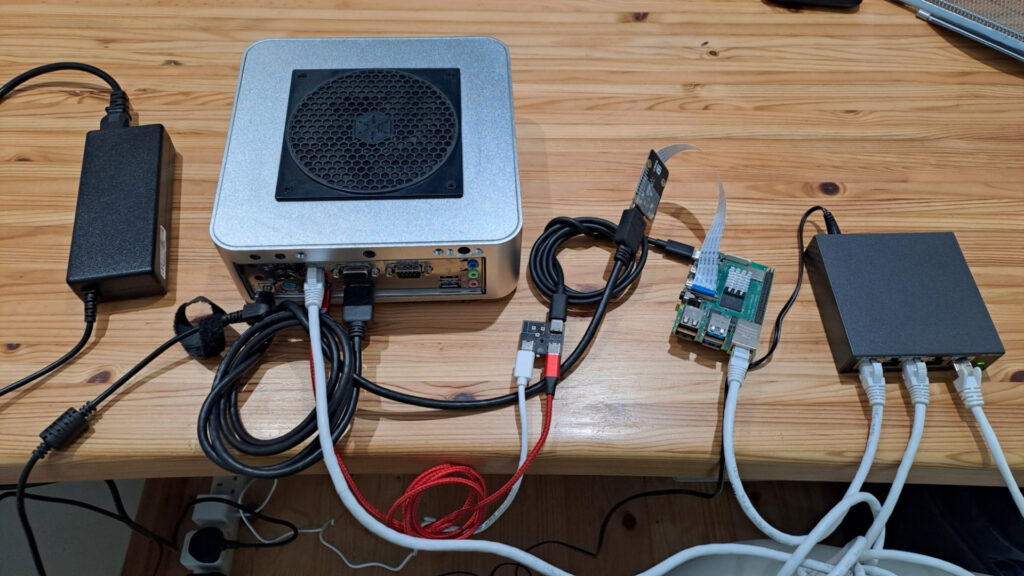
    Now my desk is already full of junk, so I’m going to use a PiKVM setup to build this remotely. I’m also going to run the box off a Salus SP600 smart plug which gives me both remote power control and also power monitoring so we can see how much juice this board drinks.

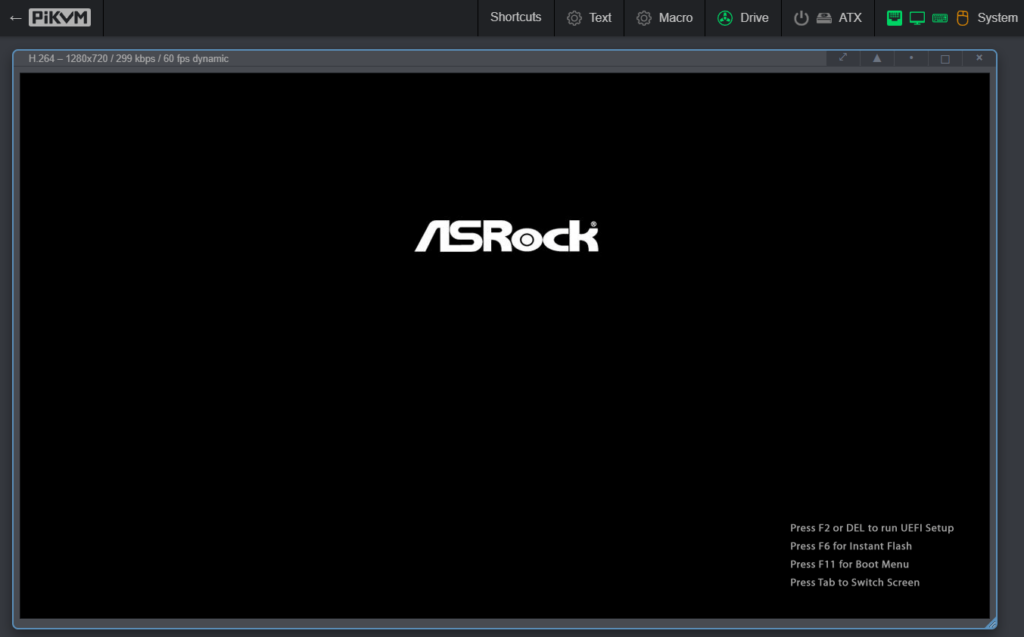
    Now, if you’re using the default PiKVM setup, the default resolution (defined over EDID to the connected PC) is 1280×720. That doesn’t play very well with the UEFI BIOS or the Proxmox GUI installer, so it’s easiest to switch it to 1080p before you start.

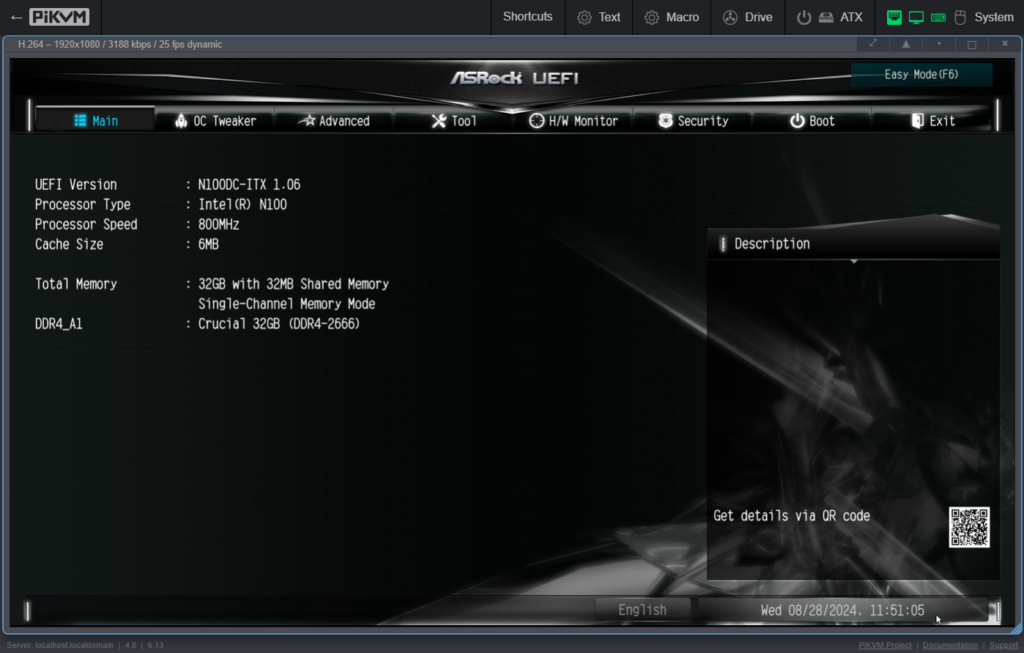
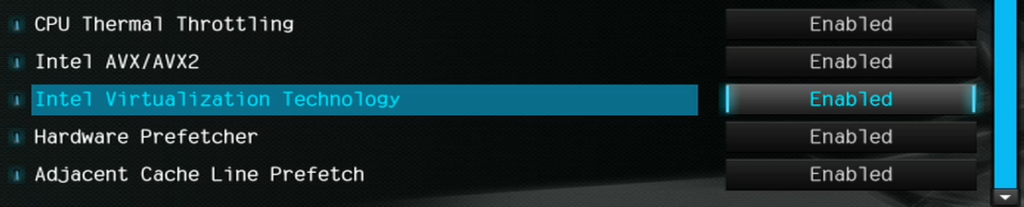
    First thing to do is make sure that virtualization is turned on, should normally be on by default:

    I’ll probably want to use Wake-on-LAN at some point so let’s make sure that’s enabled:

    If you plan to use VT-d to share PCIe device[s] between VMs make sure that’s switched on also (although in my experience it’s not a reliable solution and most of the time you’re better off doing the same thing in LXC which is a much better way to share resources like GPU):

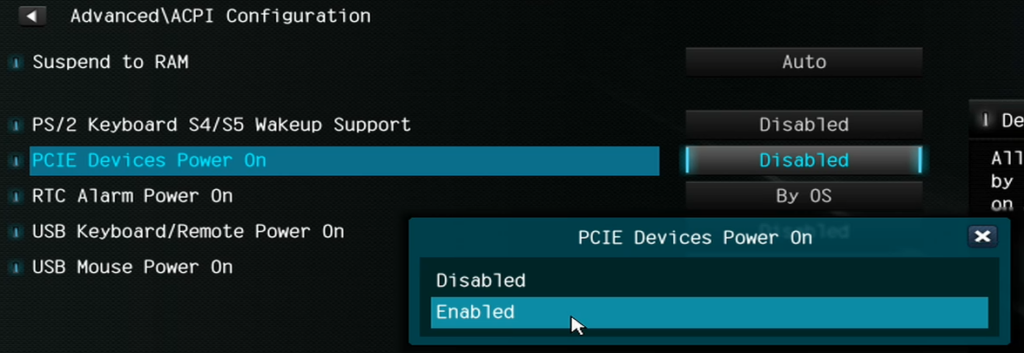
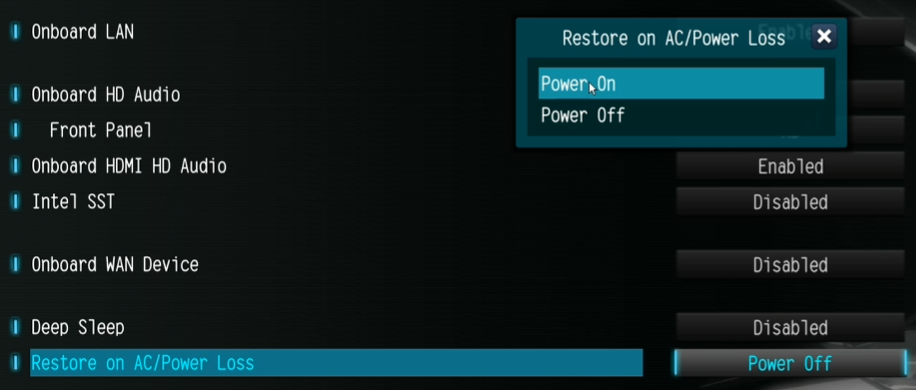
    I’d also advise changing Restore on AC/Power Loss to enabled, this makes sure that the box starts automatically if there is a power outage, which also gives you the ability to hard reset via the smart switch without having to press the power button:

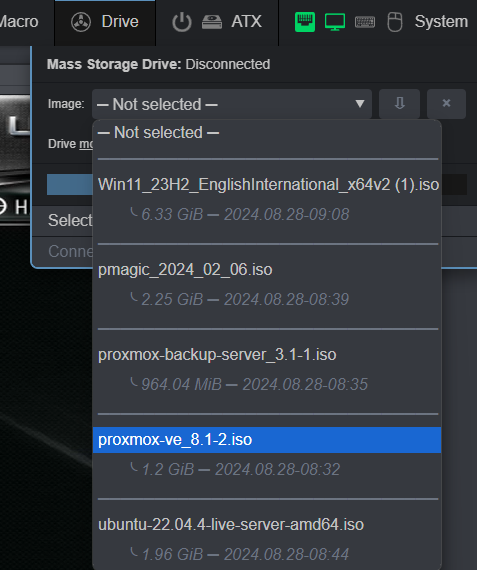
    Now in PiKVM let’s mount the ISO for Proxmox installer:

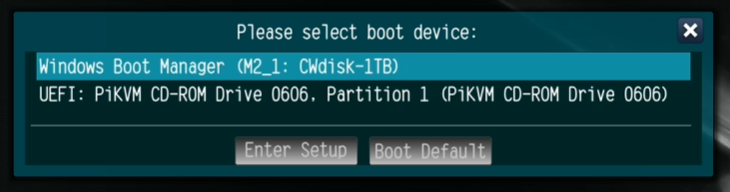
    Reboot and hit F11 on start to bring up the boot menu:

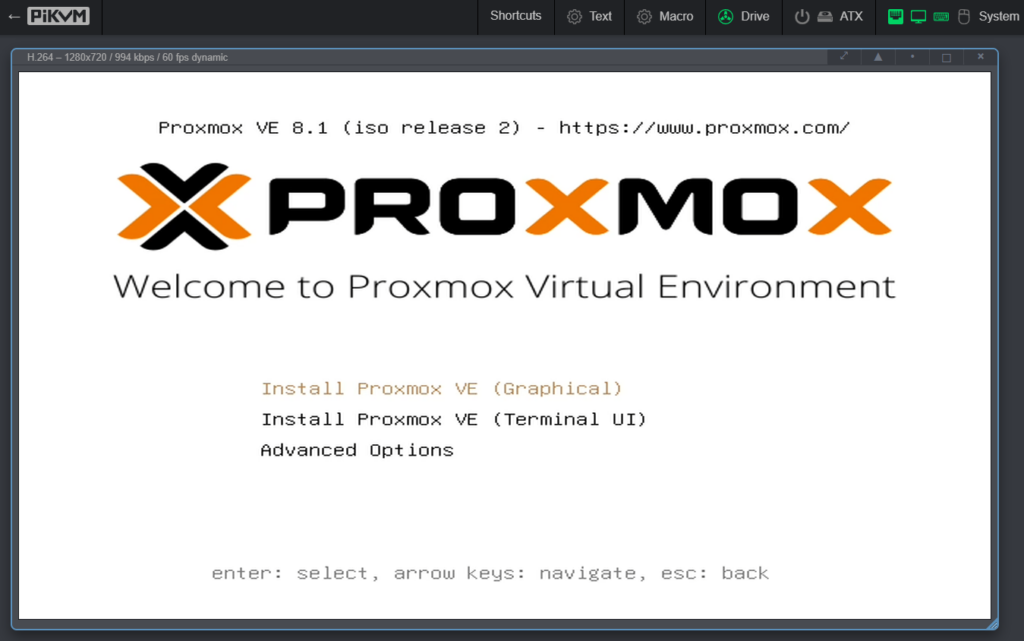
    And we’re straight into the Proxmox installer, yay!

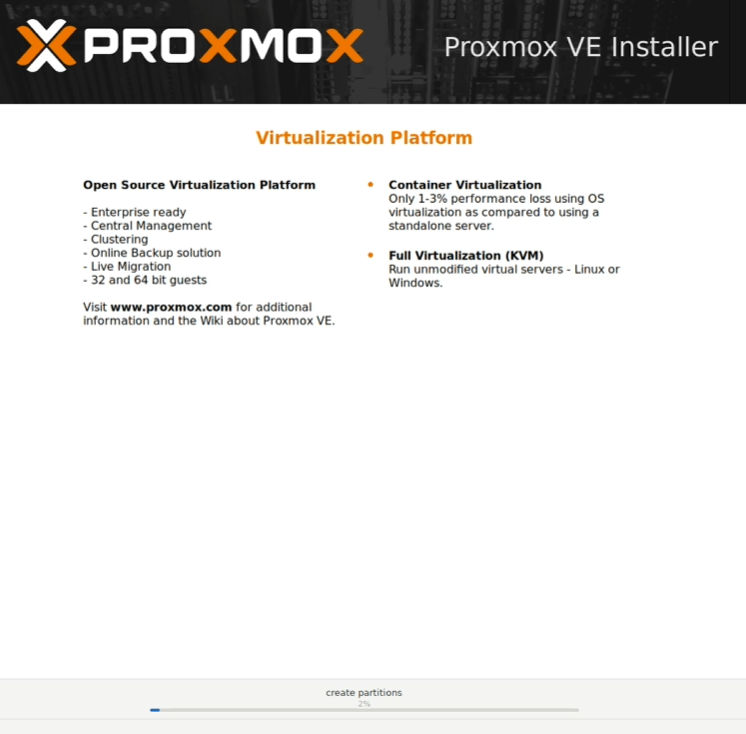
    Installing is pretty much Next, Next, Finish (provided you are happy to wipe whatever disk is in there), so I won’t show you every step:

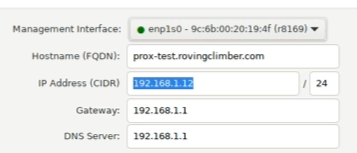
    There’s a clue in the network configuration that we’ll pick up on later … the on-board NIC is shown as r8169.

    Just look at all this lovely stuff you get with Proxmox:

    Now let’s take a quick look at power consumption:

    The whole system is idling around 9W measured at the wall. That’s not quite in the realm of the J4125 but it’s pretty good for any PC!

    In a couple of minutes the installer completes and Proxmox reboots:

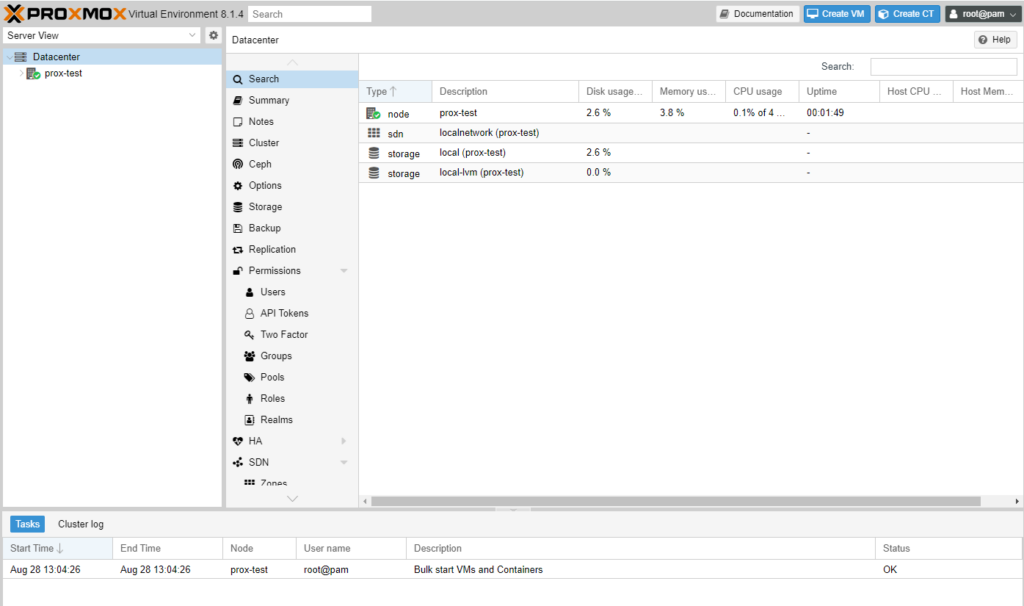
    And there we are, Proxmox up and running!

    Now I mentioned earlier something about the onboard NIC … the N100DC-ITX has an onboard Realtek RTL 8111H, first thing I would recommend is to jump on my other blog post about that, because the default driver that Debian uses works but can cause issues, and you will tear your hair out trying to fix it if you run into that!

    Another slight “annoyance” if you’re using Proxmox just for homelab and you don’t have a subscription (yet) is that by default aptitude is set up to use the enterprise package repositories, which won’t work without a subscription key. You can fix this quickly like this:

    sed -e '/deb/ s/^#*/#/' -i /etc/apt/sources.list.d/pve-enterprise.list
    sed -e '/deb/ s/^#*/#/' -i /etc/apt/sources.list.d/ceph.list
    echo 'deb http://download.proxmox.com/debian/pve bookworm pve-no-subscription' | tee -a /etc/apt/sources.list
    echo 'deb http://download.proxmox.com/debian/ceph-reef bookworm no-subscription' | tee -a /etc/apt/sources.list.d/ceph.list

    Now you should be able to update without errors:

    root@prox-test:~# apt update
    Hit:1 http://security.debian.org bookworm-security InRelease
    Hit:2 http://ftp.uk.debian.org/debian bookworm InRelease
    Hit:3 http://ftp.uk.debian.org/debian bookworm-updates InRelease
    Get:4 http://download.proxmox.com/debian/pve bookworm InRelease [2,768 B]
    Get:5 http://download.proxmox.com/debian/ceph-reef bookworm InRelease [2,738 B]
    Get:6 http://download.proxmox.com/debian/pve bookworm/pve-no-subscription amd64 Packages [336 kB]
    Get:7 http://download.proxmox.com/debian/ceph-reef bookworm/no-subscription amd64 Packages [42.0 kB]
    Fetched 384 kB in 2s (242 kB/s)
    Reading package lists... Done
    Building dependency tree... Done
    Reading state information... Done
    146 packages can be upgraded. Run 'apt list --upgradable' to see them.
    root@prox-test:~# apt upgrade
    Reading package lists... Done
    Building dependency tree... Done
    Reading state information... Done
    Calculating upgrade... Done
    The following NEW packages will be installed:
      proxmox-firewall proxmox-kernel-6.5.13-6-pve-signed proxmox-kernel-6.8 proxmox-kernel-6.8.12-1-pve-signed
      pve-esxi-import-tools python3-pyvmomi
    The following packages will be upgraded:
      base-files bash bind9-dnsutils bind9-host bind9-libs bsdextrautils bsdutils ceph-common ceph-fuse curl
      distro-info-data eject fdisk gnutls-bin grub-common grub-efi-amd64 grub-efi-amd64-bin grub-efi-amd64-signed
      grub-pc-bin grub2-common ifupdown2 krb5-locales ksm-control-daemon less libarchive13 libblkid1 libc-bin libc-l10n
      libc6 libcephfs2 libcryptsetup12 libcurl3-gnutls libcurl4 libfdisk1 libfreetype6 libglib2.0-0 libgnutls-dane0
      libgnutls30 libgnutlsxx30 libgssapi-krb5-2 libgstreamer-plugins-base1.0-0 libk5crypto3 libkrb5-3 libkrb5support0
      libmount1 libnss-systemd libnvpair3linux libopeniscsiusr libpam-systemd libproxmox-acme-perl
      libproxmox-acme-plugins libpve-access-control libpve-apiclient-perl libpve-cluster-api-perl libpve-cluster-perl
      libpve-common-perl libpve-guest-common-perl libpve-http-server-perl libpve-network-perl libpve-notify-perl
      libpve-rs-perl libpve-storage-perl libpython3.11-minimal libpython3.11-stdlib libqt5core5a libqt5dbus5
      libqt5network5 librados2 libradosstriper1 librbd1 librgw2 libseccomp2 libsmartcols1 libssl3 libsystemd-shared
      libsystemd0 libudev1 libunbound8 libuuid1 libuutil3linux libuv1 libzfs4linux libzpool5linux locales lxc-pve lxcfs
      mount nano open-iscsi openssh-client openssh-server openssh-sftp-server openssl postfix proxmox-backup-client
      proxmox-backup-file-restore proxmox-backup-restore-image proxmox-default-kernel proxmox-kernel-6.5
      proxmox-offline-mirror-docs proxmox-offline-mirror-helper proxmox-termproxy proxmox-ve proxmox-widget-toolkit
      pve-cluster pve-container pve-docs pve-edk2-firmware pve-edk2-firmware-legacy pve-edk2-firmware-ovmf pve-firewall
      pve-firmware pve-ha-manager pve-i18n pve-manager pve-qemu-kvm python3-ceph-argparse python3-ceph-common
      python3-cephfs python3-idna python3-rados python3-rbd python3-rgw python3.11 python3.11-minimal qemu-server
      shim-helpers-amd64-signed shim-signed shim-signed-common shim-unsigned spl ssh systemd systemd-boot
      systemd-boot-efi systemd-sysv tar tzdata udev usbutils usrmerge util-linux util-linux-extra zfs-initramfs zfs-zed
      zfsutils-linux
    146 upgraded, 6 newly installed, 0 to remove and 0 not upgraded.
    Need to get 519 MB of archives.
    After this operation, 1,205 MB of additional disk space will be used.
    Do you want to continue? [Y/n]

    If you start really using Proxmox I fully recommend buying a subscription. The community subscription is really very inexpensive and helps to support your access to an enterprise quality product, and also removes the annoying nag on the front page! If you do, remember to switch back to the enterprise repositories for stable updates.

    That’s it for this post, hope you enjoyed!

  • Proxmox Backup Server Wake-on-LAN

    Proxmox Backup Server Wake-on-LAN

    If you’re using Proxmox and you want to back up your VMs & containers there is no better way than Proxmox Backup Server (PBS). If you have a spare PC or motherboard and storage (SSD or spinning rust) you can use it to get regular scheduled backups, whatever retention you need, backup verification, deduplication and all that good stuff. The best bit? You can use if for free (paid support subscriptions available)!

    So, you set up your backup server PC, set a daily backup schedule to run, then what? Your backup takes maybe half an hour each day to run … so for 23.5 hours that backup server is just spinning away burning electricity.

    There is a better way!

    Here’s how you can use Wake-on-LAN (WOL) to automatically wake your backup server and let it shut down gracefully after each backup, saving you electricity and cash.

    Set up PBS

    First we need to set up the backup server for Wake-on-LAN. To do this you will first need to change the BIOS settings. Where the setting is can vary depending on your motherboard’s BIOS, but you’re looking for something that says WOL, wake on LAN or wake on PCI. Turn that stuff on.

    For some network cards, however, that’s not enough. You have to specifically enable wake-on-LAN via the driver before the machine shuts down, or it won’t wake.

    Here’s how you do that. First, install the net-tools package:

    Next we have to create a service that enables wake-on-LAN on the interface when the PC starts up. In this case the interface is called eno1, make sure you change it to whatever yours is called (find out from eg ip a command):

    cat <<'EOF' >  /etc/systemd/system/wol.service
    [Unit]
    Description=Wake-on-LAN for eno1
    Requires=network.target
    After=network.target
    
    [Service]
    ExecStart=/usr/sbin/ethtool -s eno1 wol g
    Type=oneshot
    
    [Install]
    WantedBy=multi-user.target
    EOF
    
    systemctl enable wol.service
    systemctl start wol.service
    systemctl status wol.service

    So that covers the “waking up” bit … now we need to cover the shutdown when backup job is complete. Here’s a script that covers that. It will wait for awhile for a backup job to start, then wait for the job to complete, then once no jobs are running (and no-one logged in) it will do some cleanup tasks (verify all backups and upgrade packages) then shutdown the server:

    cat <<'EOF' > /usr/local/bin/shutdown-nojobs.sh
    #!/bin/bash
    
    # First we wait for the first job to start. We don't want to shut down before the first backup has even started!
    
    echo "Starting script!"
    
    count=0
    
    while [[ $count -lt 5 ]] do
            if [[ $(/sbin/proxmox-backup-manager task list | /bin/grep 'running') == *running* ]]; then
              echo "$(/bin/date +%F_%T) Found a backup job running!"
              count=100
            else
              count=$(( $count+1 ))
              echo "$(/bin/date +%F_%T) Waiting for first backup job to start - count: $count"
            fi
            sleep 10
    done
    
    # Next we wait until we have 20 count of no task running at 5 second intervals (hopefully all jobs completed)
    
    echo "$(/bin/date +%F_%T) Waiting for all jobs to complete"
    
    count=0
    
    while [[ $count -lt 20 ]] do
            if [[ $(/sbin/proxmox-backup-manager task list | /bin/grep 'running') == *running* ]]; then
              echo "$(/bin/date +%F_%T) Found a backup job running."
              count=0
            elif [[ $(/bin/who | /bin/wc -l) != 0 ]]; then
              echo "$(/bin/date +%F_%T) Found a user logged in."
              count=0
            else
              count=$(( $count+1 ))
              echo "$(/bin/date +%F_%T) Idle. Countup (to 20): $count"
            fi
            sleep 5
    done
    
    echo "$(/bin/date +%F_%T) Done. Verifying store."
    
    /sbin/proxmox-backup-manager verify store1 --outdated-after 30
    
    echo "$(/bin/date +%F_%T) Done. Updating packages."
    
    /usr/bin/apt update
    /usr/bin/apt upgrade -y
    echo "$(/bin/date +%F_%T) Done. Shutting down."
    
    /sbin/shutdown now
    EOF
    chmod 770 /usr/local/bin/shutdown-nojobs.sh

    Now we want to make that script run when the PC boots:

    This will open your crontab file with your favourite editor. Add this line to the bottom:

    @reboot /usr/local/bin/shutdown-nojobs.sh >> ~/shutdown-nojobs.txt

    Lastly you need to find the MAC address of the network card in the backup server that will be used to wake the box.

    root@prox-backup:~# ip a
    1: lo: <LOOPBACK,UP,LOWER_UP> mtu 65536 qdisc noqueue state UNKNOWN group default qlen 1000
        link/loopback 00:00:00:00:00:00 brd 00:00:00:00:00:00
        inet 127.0.0.1/8 scope host lo
           valid_lft forever preferred_lft forever
        inet6 ::1/128 scope host noprefixroute
           valid_lft forever preferred_lft forever
    2: eno1: <BROADCAST,MULTICAST,UP,LOWER_UP> mtu 1500 qdisc mq state UP group default qlen 1000
        link/ether a8:a1:59:e1:55:f4 brd ff:ff:ff:ff:ff:ff
        altname enp3s0
        inet 192.168.1.220/24 scope global eno1
           valid_lft forever preferred_lft forever
        inet6 fe80::aaa1:59ff:fee1:55f4/64 scope link
           valid_lft forever preferred_lft forever

    In this example the MAC of our wake-on-lan interface is a8:a1:59:e1:55:f4.

    Now reboot the backup server. It should come up, then shut down again after a short while.

    Note that if you SSH in to the server while it’s up, it won’t shut down until you close the SSH connection, so if you need to do any maintenance on the server that’s an easy way to keep it up.

    Now we need to add some script on the Proxmox server to wake the backup server when a backup job starts.

    First let’s install the wakeonlan package

    You can test waking the backup server like this (replace MAC address of the target server):

    wakeonlan a8:a1:59:e1:55:f4

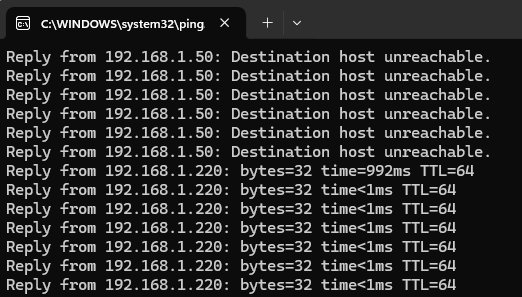
    The backup server should boot:

    Great!

    Now let’s add some automation to your backup job to start the backup server when a job starts. Modify the script below with the MAC address of your server, hostname or IP of the PBS server and name of the backup server datastore as on the proxmox server:

    cat <<'EOF' > /usr/local/bin/vzdump-hook-script
    #!/bin/bash
    
    if [ "$1" == "job-init" ]; then
      /usr/bin/wakeonlan a8:a1:59:e1:55:f4   # <-- edit with mac Address of PBS Server
    
      while [[ $count -lt 30 ]] do
            # if [[ $(/sbin/proxmox-backup-manager task list | /bin/grep 'running') == *running* ]]; then
            if [[ $(/bin/ping pbs.mydomain.com -c 1 | /bin/grep '1 received') == *received* ]]; then  # <-- edit with hostname or static IP of your server
              echo "$(/bin/date +%F_%T) Backup server up!"
              count=100
            else
              count=$(( $count+1 ))
              echo "$(/bin/date +%F_%T) Waiting for backup server up - count: $count"
            fi
            sleep 10
      done
      # Give backup server a chance to get store online
      sleep 10
      # Enable data store
      /usr/sbin/pvesm set pbs-store1 --disable false # <-- edit with name of the datastore on proxmox server
      sleep 10
      echo "Backup datastore status is: $(/usr/sbin/pvesm status 2> /dev/null |grep 'pbs-store1' | awk '{print $3}')" <-- edit with name of the datastore on proxmox server
    
    fi
    
    if [ "$1" == "job-end" ]; then
      sleep 10
      /usr/sbin/pvesm set pbs-store1 --disable true <-- edit with name of the datastore on proxmox server
    fi
    
    exit 0
    EOF

    For the script to run it must be set executable:

    chmod 755 /usr/local/bin/vzdump-hook-script

    Next we need to tell Proxmox to run this hook script each time a backup fires. There are a couple of ways to do this – either add the following line to the global /etc/vzdump.conf configuration where it will apply to all backup jobs, or you can add it in /etc/pve/jobs.cfg where it will apply to only the job[s] you specify. That’s useful for example if you also want to define jobs that back up to locally attached storage.

    script /usr/local/bin/vzdump-hook-script

    Finally, make sure the backup server is shut down then try to run a backup on the Proxmox server. You should see something like this in the backup job log:

    INFO: Sending magic packet to 255.255.255.255:9 with a8:a1:59:e1:55:f4
    INFO: 2024-08-21_10:07:37 Waiting for backup server up - count: 1
    INFO: 2024-08-21_10:07:50 Waiting for backup server up - count: 2
    INFO: 2024-08-21_10:08:00 Backup server up!
    INFO: Backup datastore status is: active
    INFO: starting new backup job: vzdump --storage pbs-store1 --all 1 --fleecing 0 --mailto me@gmail.com --mode snapshot --script /usr/local/bin/vzdump-hook-script --node prox --notes-template '{{guestname}}' --mailnotification always
    INFO: Starting Backup of VM 100 (qemu)
    INFO: Backup started at 2024-08-21 10:08:32
    INFO: status = running
    INFO: VM Name: dt-11
    INFO: include disk 'ide0' 'local-lvm:vm-100-disk-4' 128G
    INFO: exclude disk 'ide2' 'local-lvm:vm-100-disk-6' (backup=no)
    INFO: include disk 'efidisk0' 'local-lvm:vm-100-disk-2' 528K
    INFO: include disk 'tpmstate0' 'local-lvm:vm-100-disk-5' 4M
    INFO: backup mode: snapshot
    INFO: ionice priority: 7
    INFO: creating Proxmox Backup Server archive 'vm/100/2024-08-21T09:08:32Z'
    INFO: enabling encryption
    .
    .
    .
    .
    .
    INFO: Finished Backup of VM 430 (00:00:04)
    INFO: Backup finished at 2024-08-21 01:49:03
    INFO: Backup job finished successfully
    INFO: notified via target `<me@gmail.com>`
    TASK OK

    Nice work! Enjoy your new automated, energy-saving backup solution!

  • Netgear WAX214 WiFi 6 Access Point

    Netgear WAX214 WiFi 6 Access Point

    (Or Why I’ll Never Buy Another Netgear Product)

    A long, long time ago I bought a Matrox Marvel G200 graphics card. It was (for the time) quite expensive. It did 2D, 3D, and had a built-in TV tuner. It was great.

    Shortly after, Windows XP was released. That was great too. Mostly everything just worked.

    There was one hiccup, however. Matrox, in their wisdom, decided not to invest the effort in producing a Windows XP driver set for the Marvel G200. You could use it as a graphics card, but the TV function didn’t work at all, despite it being supported under Windows 2000.

    Matrox went on my manufacturer blacklist from that moment.

    Cut forward some years, I go and buy a Netgear WAX214 access point. I’m relatively impressed with it from a speed point of view, and it covers my house quite well.

    Some time later, I notice I’m not getting great speed in one corner of one room, nearest to the wall shared with our neighbours. I pull out my phone and do a quick scan check strength … and I see that the WAX214 5GHz SSID is overlapping channels badly with next door’s WiFi.

    Simple! I’ll change the channel on the WAX214 to a free higher channel, and that should fix the problem. I log onto the GUI and … what? There are only 4 channels to choose from on the 5GHz side. Wait what?!

    Long story short, it turns out that Netgear have, for some reason, failed to certify this device for higher channels, so those channels aren’t available in the UI. There are mixed reports that on earlier firmware you can still get them, but I downloaded the first release available and it still has the same issue.

    https://community.netgear.com/t5/Business-Wireless/WAX214-Only-U-NII-1-5Ghz-channels-available/td-p/2075537

    https://community.netgear.com/t5/Business-Wireless/WAX214-missing-5GHz-channels/td-p/2217122

    So thanks, Netgear, for your stunning work on this – still current model – access point, that’s basically useless unless you live in a field with no neighbours. Welcome to my shit-list.

    Matrox

    Netgear