Author: Justin

  • Proxmox 8 / Debian 12 with Realtek RTL8111H NIC

    Proxmox 8 / Debian 12 with Realtek RTL8111H NIC

    TL;DR A default Proxmox 8 / Debian 12 install uses the wrong module for the RTL8111H – we need to build & install the correct module

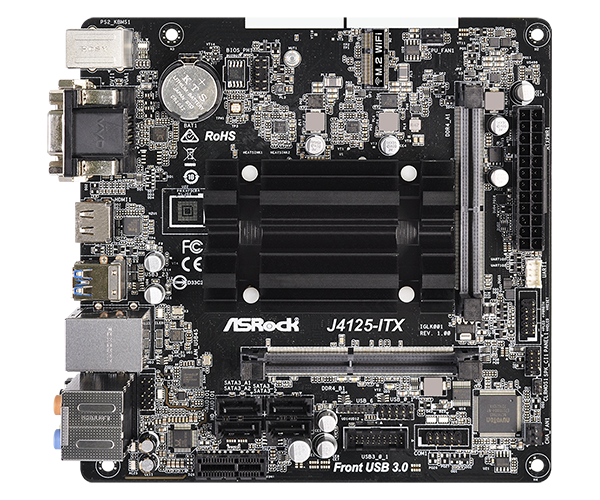
    I came across this problem using Proxmox on the Asrock J4125-ITX / J5040-ITX / N100 series boards. These are great boards to run a low-power mini server, they run Proxmox really very well, but a default install will leave you thinking the onboard NIC is faulty. Here’s why.

    The Realtek RTL8111H NIC used on the Asrock boards is a cheap but capable Gigabit Ethernet (10/100/1000M) PCI Express device. Now I’ve used boards with on-board Realtek NICs for years without incident on Windows machines, but turns out Linux support for some of these chipsets is sub-optimal.

    So you’ve done a default install of Proxmox. Your network is up, you have an IP, everything’s working, right? Wrong!
    02:00.0 Ethernet controller [0200]: Realtek Semiconductor Co., Ltd. RTL8111/8168/8411 PCI Express Gigabit Ethernet Controller [10ec:8168] (rev 15)
    ...
    Kernel driver in use: r8169
    Kernel modules: r8169

    When we take a look at the RealTek website, we can see that the R8169 is part of a family of Realtek NICs sharing the same driver:
    RTL8110S/RTL8169S/RTL8110SB/RTL8169SB/RTL8110SC/RTL8169SC

    Now we know that our board is, in fact, sporting an RTL8111H, which isn’t in that list.

    A little sleuthing and we can find a similar, but different family containing:
    RTL8111B/RTL8111C/RTL8111D/RTL8111E/RTL8111F/RTL8111G(S)/RTL8111H(S)//RTL8118(A)(S)/RTL8119i/RTL8111L/RTL8111K
    RTL8168B/RTL8168E/RTL8168H
    RTL8111DP/RTL8111EP/RTL8111FP
    RTL8411/RTL8411B

    There’s another clue on that page in the driver name: GBE Ethernet LINUX driver r8168 … So Linux has chosen the wrong kernel module to support this hardware. It sort-of works, because the hardware is kinda similar, which is hella confusing, but you’ll run into all sorts of nasty behaviour if you don’t fix it.

    RealTek supply a drivers for kernel up to v6.8, Proxmox 8 currently uses 6.8.8-4-pve and it’s working fine. Go ahead, download the file (behind a captcha, so you’ll need to use a browser):

    GBE Ethernet LINUX driver r8168 for kernel up to 6.8, v8.053.00, 2024/04/18
    https://www.realtek.com/Download/List?cate_id=584

    You should get a file named r8168-8.053.00.tar.bz2. Copy it to /tmp on the Proxmox / Debian box (I used scp for this, if you’re coming from a Windows box WinSCP is a great option).

    If you’ve just installed Proxmox and you don’t have a subscription, you’ll need to change to the free repositories. Don’t do this if you do have a subscription – instead enter your key in the Proxmox UI to enable the enterprise repositories.

    echo "deb http://download.proxmox.com/debian/ceph-quincy bookworm no-subscription" > /etc/apt/sources.list.d/ceph.list
    echo "deb http://download.proxmox.com/debian/pve bookworm pve-no-subscription" > /etc/apt/sources.list.d/pve-enterprise.list

    Do a quick update and install headers and build essentials

    apt update
    apt upgrade
    apt install pve-headers build-essential

    Next let’s extract the driver package

    cd /tmp
    tar xf r8168-8.053.00.tar.bz2
    cd r8168-8.053.00/

    Let’s check the module compiles OK:

    If everything goes right you should get the following with no major errors:

    make -C src/ modules
    make[1]: Entering directory '/tmp/r8168-8.053.00/src'
    make -C /lib/modules/6.8.8-4-pve/build M=/tmp/r8168-8.053.00/src modules
    make[2]: Entering directory '/usr/src/linux-headers-6.8.8-4-pve'
    CC [M] /tmp/r8168-8.053.00/src/r8168_n.o
    CC [M] /tmp/r8168-8.053.00/src/r8168_asf.o
    CC [M] /tmp/r8168-8.053.00/src/rtl_eeprom.o
    CC [M] /tmp/r8168-8.053.00/src/rtltool.o
    LD [M] /tmp/r8168-8.053.00/src/r8168.o
    MODPOST /tmp/r8168-8.053.00/src/Module.symvers
    CC [M] /tmp/r8168-8.053.00/src/r8168.mod.o
    LD [M] /tmp/r8168-8.053.00/src/r8168.ko
    BTF [M] /tmp/r8168-8.053.00/src/r8168.ko
    Skipping BTF generation for /tmp/r8168-8.053.00/src/r8168.ko due to unavailability of vmlinux
    make[2]: Leaving directory '/usr/src/linux-headers-6.8.8-4-pve'
    make[1]: Leaving directory '/tmp/r8168-8.053.00/src'

    If all looks good, we can run the convenience script from RealTek that will unload the r8169 module and install the newly compiled one in its place.

    For the next step you will want to be on a physical console or IP KVM on the box … you’re going to be replacing the network card driver, which will drop connectivity, so don’t try to do this over an SSH connection (unless you’ve installed a second NIC for the purpose)!

    chmod 755 autorun.sh
    ./autorun.sh
    Check old driver and unload it.
    rmmod r8169
    Build the module and install
    Skipping BTF generation for /tmp/r8168-8.053.00/src/r8168.ko due to unavailability of vmlinux
    Warning: modules_install: missing 'System.map' file. Skipping depmod.
    Backup r8169.ko
    rename r8169.ko to r8169.bak
    DEPMOD 6.8.8-4-pve
    load module r8168
    Updating initramfs. Please wait.
    update-initramfs: Generating /boot/initrd.img-6.8.8-4-pve
    Running hook script 'zz-proxmox-boot'..
    Re-executing '/etc/kernel/postinst.d/zz-proxmox-boot' in new private mount namespace..
    No /etc/kernel/proxmox-boot-uuids found, skipping ESP sync.
    Completed.

    For good measure let’s blacklist the r8169 module to prevent future problems:

    echo "blacklist r8169" >> /etc/modprobe.d/pve-blacklist.conf

    Final check with lspci:

    03:00.0 Ethernet controller [0200]: Realtek Semiconductor Co., Ltd. RTL8111/8168/8411 PCI Express Gigabit Ethernet Controller [10ec:8168] (rev 15)
    ...
    Kernel driver in use: r8168
    Kernel modules: r8168

    Nice!

    Now reboot your box and make sure everything works as it should.

    If you can’t ping etc from the box, check the interface name of the RealTek NIC, it might have changed and you might need to update the bridge-port name for vmbr0

    ....
    2: eno1: mtu 1500 qdisc pfifo_fast master vmbr0 state UP group default qlen 1000
    ....
    nano /etc/network/interfaces
    auto lo
    iface lo inet loopback
    
    iface eno1 inet manual
    
    auto vmbr0
    iface vmbr0 inet static
      address x.x.x.x/24
      gateway x.x.x.x
      bridge-ports eno1
      bridge-stp off
      bridge-fd 0

    That’s it! Enjoy your swanky Proxmox box to the full!
  • Frigate in Proxmox LXC container with Google Coral M.2 Dual Edge TPU

    Frigate in Proxmox LXC container with Google Coral M.2 Dual Edge TPU

    If you want to run Frigate NVR, but you don’t want to dedicate a whole PC to it, this guide is for you. Frigate actually runs well on a low-power CPU, provided you have a Coral TPU to run detection. For example, I’m running it on a J4125 4-core CPU that’s also running Openmediavault, Home Assistant and a bunch of other stuff. CPU usage ticks along at barely 20%, and the whole system is using around 15W measured at the wall.

    Here’s a quick review of Coral TPUs:

    USB AcceleratorShould work everywhere, but uses more power and has less bandwidth. Ignore Lesson 1
    Mini PCIe AcceleratorIf you have an older board that has a mini-PCIe slot, this should work. Ignore Lesson 1
    M.2 Accelerator A+E keyMight work if your board has an A or E key M.2 slot. Read Lesson 1.
    M.2 Accelerator B+M keyMight work if your board has an B or M key M.2 slot. Read Lesson 1.
    M.2 Accelerator with Dual Edge TPUMight work if your board has an A or E key M.2 slot. If it does, you might only get access to one TPU, or you might get both. Read Lesson 1.

    Lesson 1 – You need an adapter (probably).

    On the two motherboards I tried it in, the Google Coral M.2 Accelerator with Dual Edge TPU did not work well in the on-board WiFi M.2 E-key slot. On the Asrock J5040-ITX the Coral works, but only one TPU is detected and there is some incompatibility that causes high CPU usage at idle, and total gridlock with a multicore load. On the N100DC-ITX, the Coral isn’t even detected.

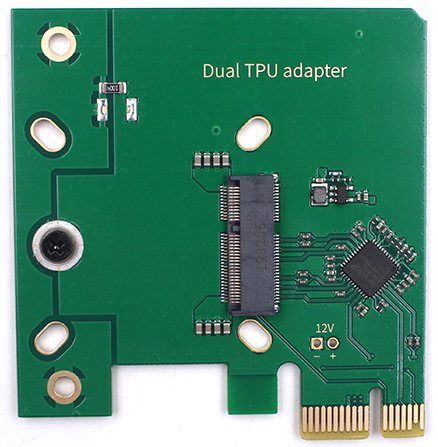
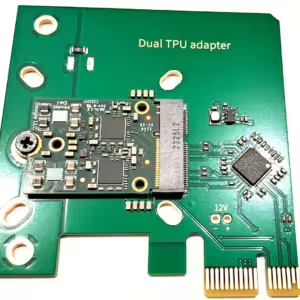
    If you’re using a similar board, or your board doesn’t have an M.2 WiFi slot, save yourself the bother and get one of these:

    Dual Edge TPU Adapter

    Dual Edge TPU Adapter – PCIe x1 Low Profile

    With this adapter you can get access to both the Edge TPUs, even if your motherboard doesn’t support PCIe bifurcation.

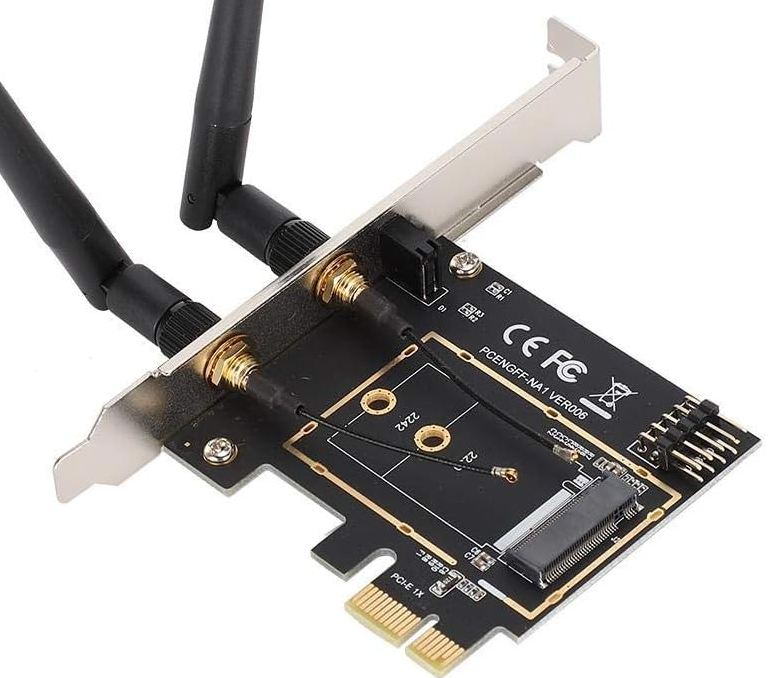
    PCIe to M.2 E-Key

    With this adapter you’ll only get access to one TPU, but it’s much cheaper. You can just unscrew the antennas.

    Lesson 2 – LXC for the win!

    Frigate runs as a Docker container. When I first started using Docker on Proxmox, many people seem to agree that the best / safest way is to spin up a full-fat Virtual Machine, install some flavour of Linux on it, then run Docker under that. In my experience, for Frigate it’s way better to run Docker in an LXC container, and it runs beautifully. If you’re using ZFS you might want to do some research first.

    To get this to work, we need to install the Coral driver on the Proxmox host. Note that if you go the VM route, you specifically don’t want to do this, you instead need to pass the raw PCIe device through to the VM guest, and install the driver in the guest OS instead.

    The official instructions to install the Coral driver use apt-key to install Google’s package-signing key, which is deprecated in Debian Bookworm (12) on which Proxmox 8 is based. To avoid a warning about this, we instead install the key the new / correct way, then install the Coral driver.

    Run the following commands as root on your Proxmox host:

    wget -qO - https://packages.cloud.google.com/apt/doc/apt-key.gpg | gpg --no-default-keyring --keyring gnupg-ring:/etc/apt/trusted.gpg.d/google.gpg --import -
    rm /etc/apt/trusted.gpg.d/google.gpg~
    chmod 644 /etc/apt/trusted.gpg.d/google.gpg
    echo "deb https://packages.cloud.google.com/apt coral-edgetpu-stable main" | tee /etc/apt/sources.list.d/coral-edgetpu.list
    apt-get update
    apt-get install pve-headers gasket-dkms libedgetpu1-std
    make -j4 KERNELRELEASE=6.5.11-4-pve -C /lib/modules/6.5.11-4-pve/build M=/var/lib/dkms/gasket/1.0/build……(bad exit status: 2)
    Error! Bad return status for module build on kernel: 6.5.11-4-pve (x86_64)
    Consult /var/lib/dkms/gasket/1.0/build/make.log for more information.
    Error! One or more modules failed to install during autoinstall.
    Refer to previous errors for more information.
    dkms: autoinstall for kernel: 6.5.11-4-pve failed!

    Congratulations! You’ve hit a bug in the current package for Gasket. Your package manager will probably throw lots of errors all the time now, and your Proxmox server will probably hang if you try to reboot it right now (if you have rebooted, use the boot options to boot a previous kernel)!

    Unfortunately you’ll need to install gasket from source instead:

    apt-get remove gasket-dkms
    apt-get install devscripts dh-make dh-dkms git
    git clone https://github.com/google/gasket-driver.git
    cd gasket-driver
    debuild -us -uc -tc -b
    cd ..
    dpkg -i gasket-dkms_1.0-18_all.deb

    Do a quick apt-get update and confirm no errors showing.

    Now reboot your Proxmox box. When it comes back up, check the driver has loaded:

    03:00.0 System peripheral [0880]: Global Unichip Corp. Coral Edge TPU [1ac1:089a]
    04:00.0 System peripheral [0880]: Global Unichip Corp. Coral Edge TPU [1ac1:089a]
    crw-rw---- 1 root root 120, 0 Jul 20 12:18 /dev/apex_0
    crw-rw---- 1 root root 120, 1 Jul 20 12:18 /dev/apex_1

    Note here that I am using a dual Coral TPU – if you have a single TPU you will only see one entry, and should remove any references to /dev/apex_1 in the instructions below.

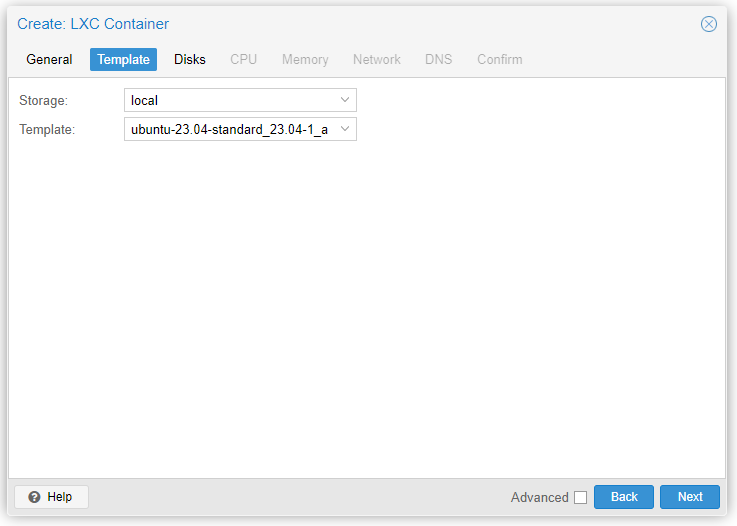
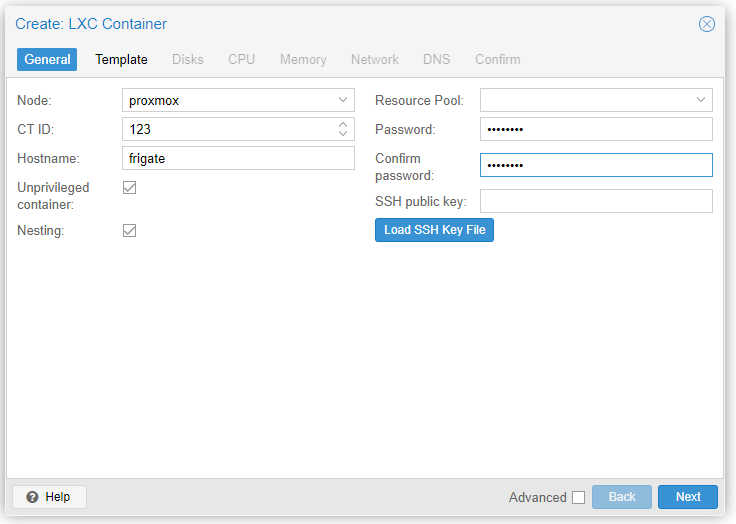
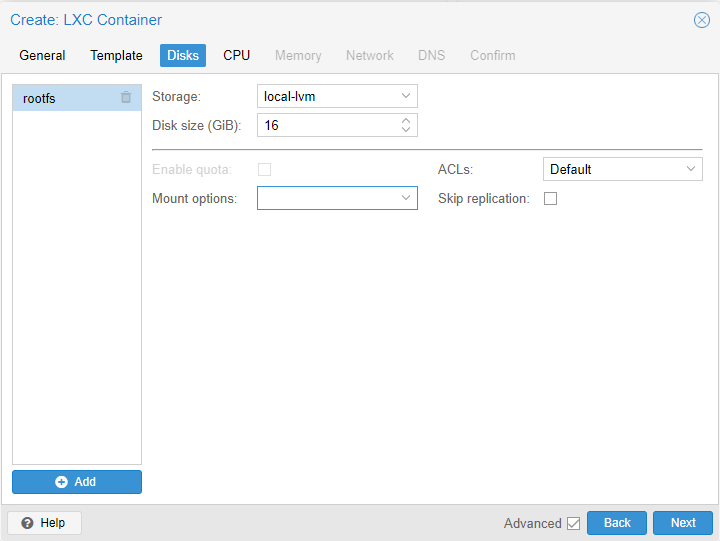
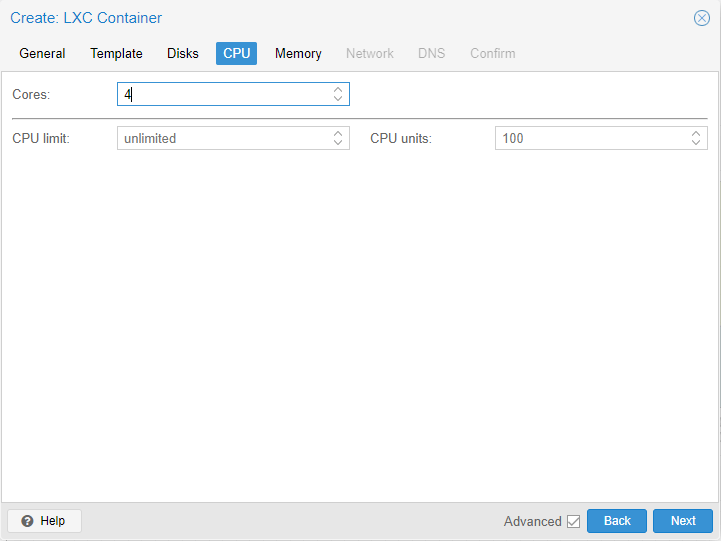
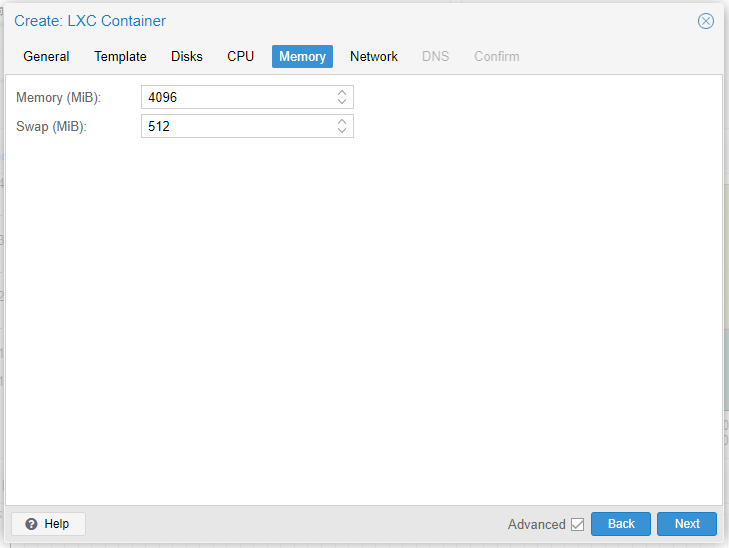
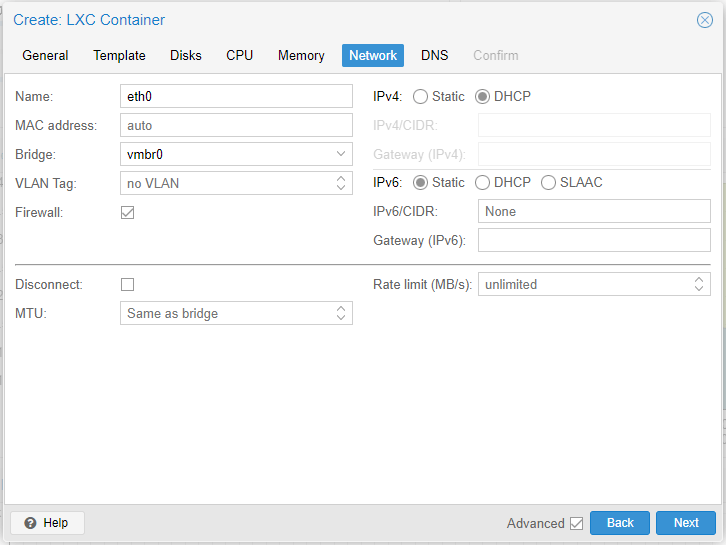
    Now let’s set up a new LXC container for Frigate. I used a Ubuntu 23 template. The container must be privileged and have nesting enabled.

    Don’t start the container yet. Edit the container config file (either SSH to your proxmox server, or use the console from the web UI) – change 114 below for whatever the ID is of your new container:

    root@prox:~# nano /etc/pve/lxc/114.conf

    Add these lines to the end of your file:

    lxc.apparmor.profile: unconfined
    lxc.cgroup2.devices.allow: a
    lxc.cgroup2.devices.allow: c 226:0 rwm
    lxc.cgroup2.devices.allow: c 226:128 rwm
    lxc.cgroup2.devices.allow: c 29:0 rwm
    lxc.cgroup2.devices.allow: c 189:* rwm
    lxc.cgroup2.devices.allow: c 120:0 rwm
    lxc.mount.entry: /dev/dri/renderD128 dev/dri/renderD128 none bind,optional,create=file 0, 0
    lxc.mount.entry: /dev/dri dev/dri none bind,optional,create=dir
    lxc.mount.entry: /dev/apex_0 dev/apex_0 none bind,optional,create=file 0, 0
    lxc.mount.entry: /dev/apex_1 dev/apex_1 none bind,optional,create=file 0, 0

    Save the file, now start the container. Once it comes up SSH into the container, do some setup and install docker:

    apt update
    apt upgrade -y
    apt install unattended-upgrades curl -y
    dpkg-reconfigure -pmedium unattended-upgrades
    
    cat <<'EOF' >/etc/apt/apt.conf.d/51my-unattended-upgrades
    Unattended-Upgrade::Allowed-Origins {
            "${distro_id}:${distro_codename}-updates";
    };
    Unattended-Upgrade::AutoFixInterruptedDpkg "true";
    Unattended-Upgrade::MinimalSteps "true";
    Unattended-Upgrade::Remove-Unused-Kernel-Packages "true";
    Unattended-Upgrade::Remove-New-Unused-Dependencies "true";
    Unattended-Upgrade::Remove-Unused-Dependencies "true";
    Unattended-Upgrade::Automatic-Reboot "true";
    Unattended-Upgrade::Automatic-Reboot-Time "02:13";
    EOF
    curl -fsSL https://get.docker.com | sh
    docker run -d -p 9001:9001 --name portainer_agent --restart=always -v /var/run/docker.sock:/var/run/docker.sock -v /var/lib/docker/volumes:/var/lib/docker/volumes portainer/agent:latest
    reboot now

    If that all went well your container will reboot, then you have Docker installed with Portainer agent (if you don’t already have a container that has Portainer installed you can just install portainer-ce instead…) and automatic unattended upgrades for the container.

    Check that /dev/apex0 & /dev/dri/renderD128 are both visible in the container as well.

    Now you can add your new Docker instance to your existing Portainer setup, or fire up the new one you just installed. Add yourself a new stack for Frigate.

    This is my stack config – I’m using a Cloudflare tunnel to access Frigate from anywhere without having to use port forwarding – I really recommend this setup. I limit access using Cloudflare Access and it’s so simple to maintain. If you don’t already use Cloudflare take a look – it’s free for up to 25 users.

    services:
      frigate:
        container_name: frigate
        privileged: true # this may not be necessary for all setups
        restart: always
        image: ghcr.io/blakeblackshear/frigate:latest
        shm_size: "512mb"
        devices:
          - /dev/apex_0:/dev/apex_0
          - /dev/apex_1:/dev/apex_1
          - /dev/dri/renderD128
        volumes:
          - frig-conf:/config
          - frig-media:/media/frigate
          - frig-db:/db
          - type: tmpfs # Optional: 1GB of memory, reduces SSD/SD Card wear
            target: /tmp/cache
            tmpfs:
              size: 1000000000
        ports:
          - "5000:5000"
          - "8554:8554"
          - "8555:8555/tcp"
          - "8555:8555/udp"
        environment:
          FRIGATE_RTSP_PASSWORD: "password"
          PLUS_API_KEY: "your_api_token_if_you_are_a_frigate_plus_user_otherwise_comment_out"
        logging:
          driver: journald
      cloudflared:
        container_name: cloudflared
        image: cloudflare/cloudflared:latest
        restart: unless-stopped
        command: tunnel run
        environment:
          - TUNNEL_TOKEN=yourcloudflaretoken
    
    volumes:
      frig-conf:
      frig-db:
      frig-media:

    Start the stack and you should be able to access Frigate at http://yourcontainername:5000

    Now dive into the configuration editor and get Frigate set up (that’s a whole tutorial in itself!)