If you want to run Frigate NVR, but you don’t want to dedicate a whole PC to it, this guide is for you. Frigate actually runs well on a low-power CPU, provided you have a Coral TPU to run detection. For example, I’m running it on a J4125 4-core CPU that’s also running Openmediavault, Home Assistant and a bunch of other stuff. CPU usage ticks along at barely 20%, and the whole system is using around 15W measured at the wall.
Here’s a quick review of Coral TPUs:
| USB Accelerator | Should work everywhere, but uses more power and has less bandwidth. Ignore Lesson 1 |
| Mini PCIe Accelerator | If you have an older board that has a mini-PCIe slot, this should work. Ignore Lesson 1 |
| M.2 Accelerator A+E key | Might work if your board has an A or E key M.2 slot. Read Lesson 1. |
| M.2 Accelerator B+M key | Might work if your board has an B or M key M.2 slot. Read Lesson 1. |
| M.2 Accelerator with Dual Edge TPU | Might work if your board has an A or E key M.2 slot. If it does, you might only get access to one TPU, or you might get both. Read Lesson 1. |
Lesson 1 – You need an adapter (probably).
On the two motherboards I tried it in, the Google Coral M.2 Accelerator with Dual Edge TPU did not work well in the on-board WiFi M.2 E-key slot. On the Asrock J5040-ITX the Coral works, but only one TPU is detected and there is some incompatibility that causes high CPU usage at idle, and total gridlock with a multicore load. On the N100DC-ITX, the Coral isn’t even detected.
If you’re using a similar board, or your board doesn’t have an M.2 WiFi slot, save yourself the bother and get one of these:
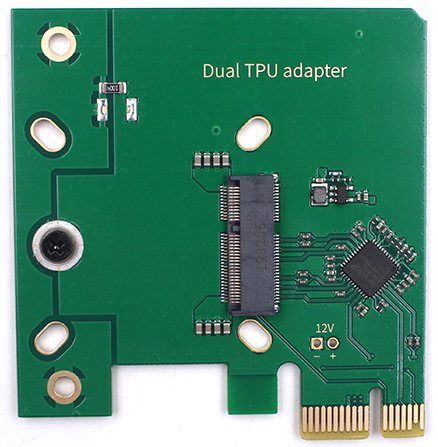
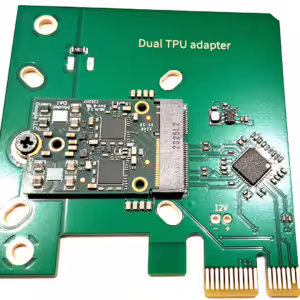
Dual Edge TPU Adapter – PCIe x1 Low Profile
With this adapter you can get access to both the Edge TPUs, even if your motherboard doesn’t support PCIe bifurcation.
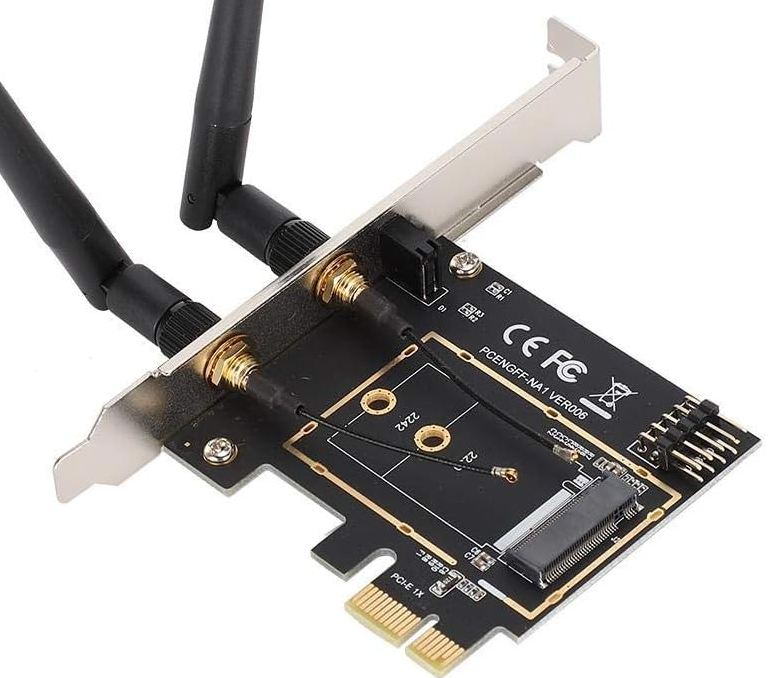
With this adapter you’ll only get access to one TPU, but it’s much cheaper. You can just unscrew the antennas.
Lesson 2 – LXC for the win!
Frigate runs as a Docker container. When I first started using Docker on Proxmox, many people seem to agree that the best / safest way is to spin up a full-fat Virtual Machine, install some flavour of Linux on it, then run Docker under that. In my experience, for Frigate it’s way better to run Docker in an LXC container, and it runs beautifully. If you’re using ZFS you might want to do some research first.
To get this to work, we need to install the Coral driver on the Proxmox host. Note that if you go the VM route, you specifically don’t want to do this, you instead need to pass the raw PCIe device through to the VM guest, and install the driver in the guest OS instead.
The official instructions to install the Coral driver use apt-key to install Google’s package-signing key, which is deprecated in Debian Bookworm (12) on which Proxmox 8 is based. To avoid a warning about this, we instead install the key the new / correct way, then install the Coral driver.
Run the following commands as root on your Proxmox host:
wget -qO - https://packages.cloud.google.com/apt/doc/apt-key.gpg | gpg --no-default-keyring --keyring gnupg-ring:/etc/apt/trusted.gpg.d/google.gpg --import -
rm /etc/apt/trusted.gpg.d/google.gpg~
chmod 644 /etc/apt/trusted.gpg.d/google.gpg
echo "deb https://packages.cloud.google.com/apt coral-edgetpu-stable main" | tee /etc/apt/sources.list.d/coral-edgetpu.list
apt-get update
apt-get install pve-headers gasket-dkms libedgetpu1-std
UPDATE December 2023 …. if you run the above and see errors like this:
make -j4 KERNELRELEASE=6.5.11-4-pve -C /lib/modules/6.5.11-4-pve/build M=/var/lib/dkms/gasket/1.0/build……(bad exit status: 2)
Error! Bad return status for module build on kernel: 6.5.11-4-pve (x86_64)
Consult /var/lib/dkms/gasket/1.0/build/make.log for more information.
Error! One or more modules failed to install during autoinstall.
Refer to previous errors for more information.
dkms: autoinstall for kernel: 6.5.11-4-pve failed!
Congratulations! You’ve hit a bug in the current package for Gasket. Your package manager will probably throw lots of errors all the time now, and your Proxmox server will probably hang if you try to reboot it right now (if you have rebooted, use the boot options to boot a previous kernel)!
Unfortunately you’ll need to install gasket from source instead:
apt-get remove gasket-dkms
apt-get install devscripts dh-make dh-dkms git
git clone https://github.com/google/gasket-driver.git
cd gasket-driver
debuild -us -uc -tc -b
cd ..
dpkg -i gasket-dkms_1.0-18_all.deb
Do a quick apt-get update and confirm no errors showing.
END UPDATE
Now reboot your Proxmox box. When it comes back up, check the driver has loaded:
lspci -nn | grep 089a03:00.0 System peripheral [0880]: Global Unichip Corp. Coral Edge TPU [1ac1:089a]
04:00.0 System peripheral [0880]: Global Unichip Corp. Coral Edge TPU [1ac1:089a]ls -l /dev/apex*crw-rw---- 1 root root 120, 0 Jul 20 12:18 /dev/apex_0
crw-rw---- 1 root root 120, 1 Jul 20 12:18 /dev/apex_1Note here that I am using a dual Coral TPU – if you have a single TPU you will only see one entry, and should remove any references to /dev/apex_1 in the instructions below.
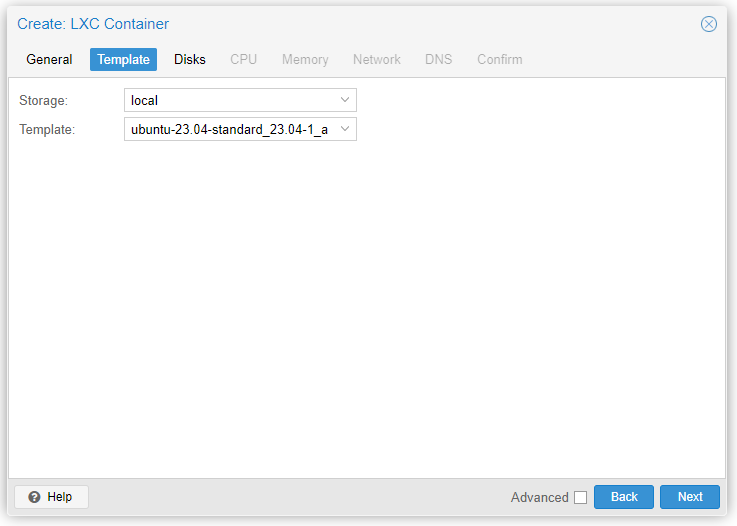
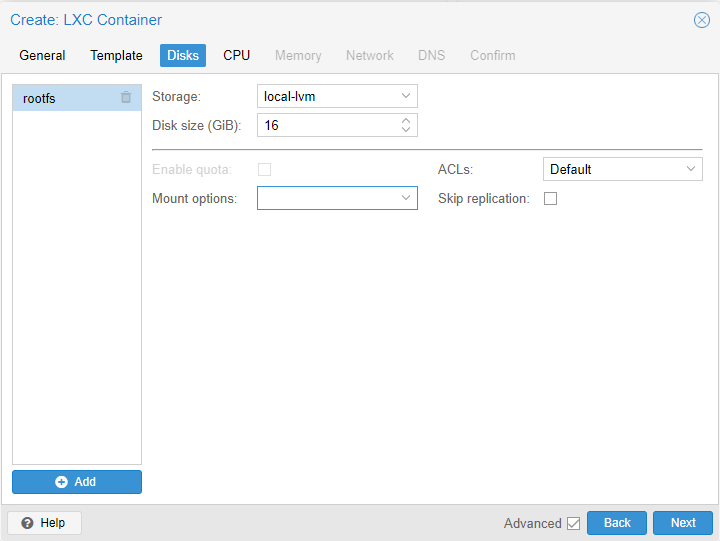
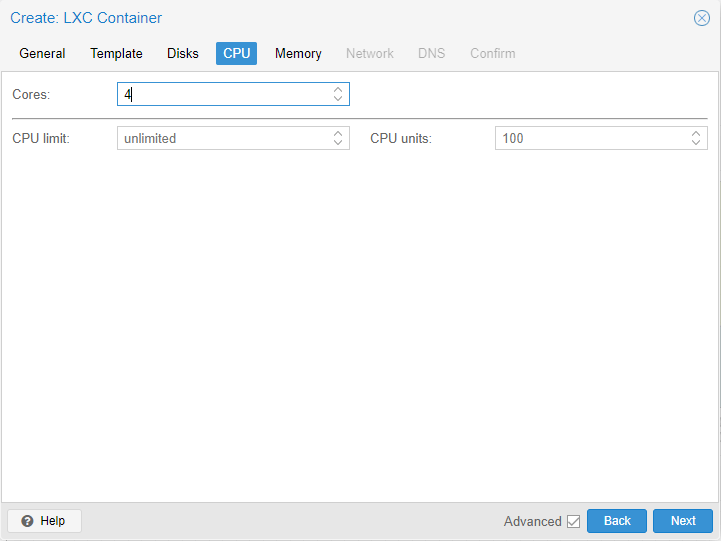
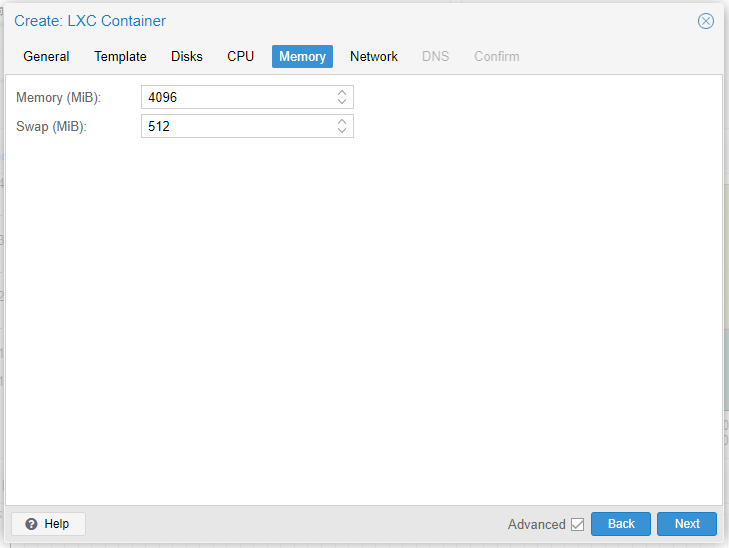
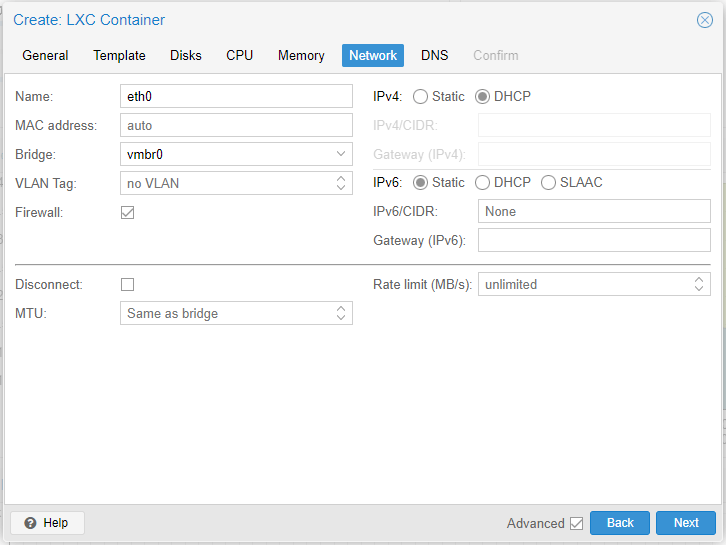
Now let’s set up a new LXC container for Frigate. I used a Ubuntu 23 template. The container must be privileged and have nesting enabled.

Don’t start the container yet. Edit the container config file (either SSH to your proxmox server, or use the console from the web UI) – change 114 below for whatever the ID is of your new container:
root@prox:~# nano /etc/pve/lxc/114.confAdd these lines to the end of your file:
lxc.apparmor.profile: unconfined
lxc.cgroup2.devices.allow: a
lxc.cgroup2.devices.allow: c 226:0 rwm
lxc.cgroup2.devices.allow: c 226:128 rwm
lxc.cgroup2.devices.allow: c 29:0 rwm
lxc.cgroup2.devices.allow: c 189:* rwm
lxc.cgroup2.devices.allow: c 120:0 rwm
lxc.mount.entry: /dev/dri/renderD128 dev/dri/renderD128 none bind,optional,create=file 0, 0
lxc.mount.entry: /dev/dri dev/dri none bind,optional,create=dir
lxc.mount.entry: /dev/apex_0 dev/apex_0 none bind,optional,create=file 0, 0
lxc.mount.entry: /dev/apex_1 dev/apex_1 none bind,optional,create=file 0, 0
Save the file, now start the container. Once it comes up SSH into the container, do some setup and install docker:
apt update
apt upgrade -y
apt install unattended-upgrades curl -y
dpkg-reconfigure -pmedium unattended-upgrades

cat <<'EOF' >/etc/apt/apt.conf.d/51my-unattended-upgrades
Unattended-Upgrade::Allowed-Origins {
        "${distro_id}:${distro_codename}-updates";
};
Unattended-Upgrade::AutoFixInterruptedDpkg "true";
Unattended-Upgrade::MinimalSteps "true";
Unattended-Upgrade::Remove-Unused-Kernel-Packages "true";
Unattended-Upgrade::Remove-New-Unused-Dependencies "true";
Unattended-Upgrade::Remove-Unused-Dependencies "true";
Unattended-Upgrade::Automatic-Reboot "true";
Unattended-Upgrade::Automatic-Reboot-Time "02:13";
EOF
curl -fsSL https://get.docker.com | sh
docker run -d -p 9001:9001 --name portainer_agent --restart=always -v /var/run/docker.sock:/var/run/docker.sock -v /var/lib/docker/volumes:/var/lib/docker/volumes portainer/agent:latest
reboot now
If that all went well your container will reboot, then you have Docker installed with Portainer agent (if you don’t already have a container that has Portainer installed you can just install portainer-ce instead…) and automatic unattended upgrades for the container.
Check that /dev/apex0 & /dev/dri/renderD128 are both visible in the container as well.
Now you can add your new Docker instance to your existing Portainer setup, or fire up the new one you just installed. Add yourself a new stack for Frigate.
This is my stack config – I’m using a Cloudflare tunnel to access Frigate from anywhere without having to use port forwarding – I really recommend this setup. I limit access using Cloudflare Access and it’s so simple to maintain. If you don’t already use Cloudflare take a look – it’s free for up to 25 users.
services:
  frigate:
    container_name: frigate
    privileged: true # this may not be necessary for all setups
    restart: always
    image: ghcr.io/blakeblackshear/frigate:latest
    shm_size: "512mb"
    devices:
      - /dev/apex_0:/dev/apex_0
      - /dev/apex_1:/dev/apex_1
      - /dev/dri/renderD128
    volumes:
      - frig-conf:/config
      - frig-media:/media/frigate
      - frig-db:/db
      - type: tmpfs # Optional: 1GB of memory, reduces SSD/SD Card wear
        target: /tmp/cache
        tmpfs:
          size: 1000000000
    ports:
      - "5000:5000"
      - "8554:8554"
      - "8555:8555/tcp"
      - "8555:8555/udp"
    environment:
      FRIGATE_RTSP_PASSWORD: "password"
      PLUS_API_KEY: "your_api_token_if_you_are_a_frigate_plus_user_otherwise_comment_out"
    logging:
      driver: journald
  cloudflared:
    container_name: cloudflared
    image: cloudflare/cloudflared:latest
    restart: unless-stopped
    command: tunnel run
    environment:
      - TUNNEL_TOKEN=yourcloudflaretoken

volumes:
  frig-conf:
  frig-db:
  frig-media:
Start the stack and you should be able to access Frigate at http://yourcontainername:5000
Now dive into the configuration editor and get Frigate set up (that’s a whole tutorial in itself!)
Leave a Reply