Category: Linux

  • Automatic LUKS unlock with Tang and Clevis

    Automatic LUKS unlock with Tang and Clevis

    Encrypting my Proxmox disks solves one problem, but it creates another: somebody has to enter the passphrase after every restart. Tang and Clevis can handle that automatically while a separate Tang machine is reachable, with an independent passphrase kept for recovery. I’ll set up that network-only route here, then look at what a TPM adds.
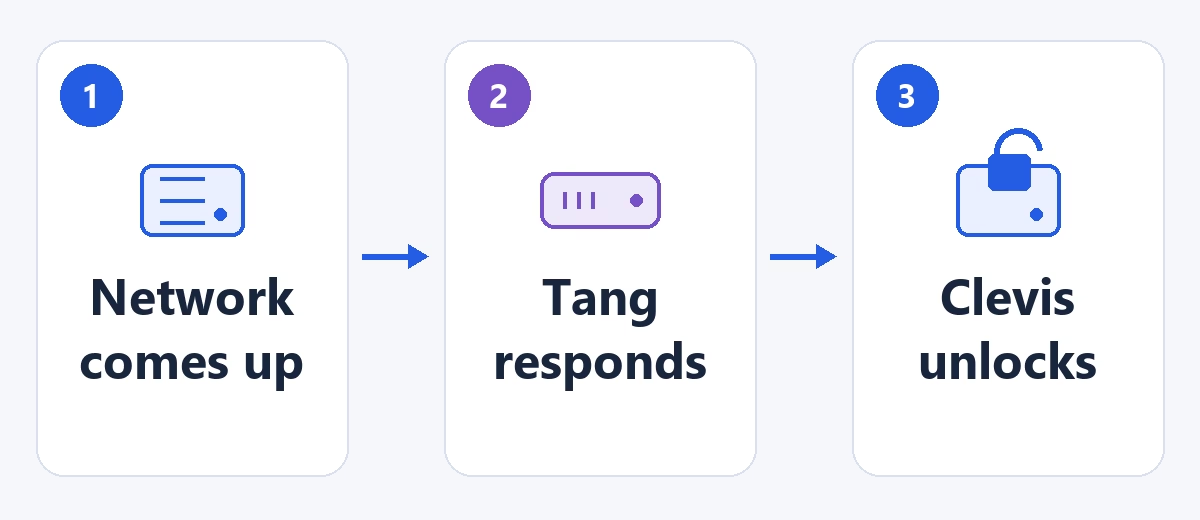
    Early networking starts, Tang supplies cryptographic assistance, then Clevis unlocks the local disk.
    This happens before normal Linux startup. The unlock credential is reconstructed on the client. Tap to enlarge.

    I’m using Debian 13 with initramfs-tools, GRUB and wired DHCP, including the Debian-based Proxmox VE 9 setup from the previous article. Run the commands in a Linux root Bash shell, a stage at a time, and fix any errors before moving on. They change the existing LUKS container and boot files without partitioning or formatting the disk. Have backups and a working console ready, and leave yourself time to watch the reboots.

    This picks up from my fresh encrypted Proxmox installation guide. I covered why I wanted encryption in the first place in part one.

    1. What Tang does (and doesn’t do)

    Tang keeps its own server keys rather than a database of your disk keys. Clevis adds a generated unlock credential and encrypted policy metadata to the LUKS header on the client. At boot, the client uses a cryptographic exchange with Tang to recover that credential; the disk’s existing volume key stays the same. The Tang design and Clevis binding manual explain how it fits together.

    The important catch is that being able to reach Tang doesn’t prove this is your computer. Tang normally accepts anonymous clients, so an attacker with the disk and access to your enrolled Tang service can use the binding too. HTTP is supported because the protocol doesn’t send a plaintext disk key, but you still need to authenticate the server advertisement when enrolling. Keep Tang on a controlled private network, with no Internet port forwarding or public access.

    This also leaves the boot environment unauthenticated. Someone who can change early boot and reach Tang may recover the credential before Linux gets anywhere near the login screen. Hiding Tang elsewhere helps with physical theft, but a reachable anonymous service can’t prove that a machine is still at home.

    Put Tang on a separate machine that can boot on its own. Hosting it as a VM on the server it needs to unlock would leave you going round in circles. Think about where you put it too: a little appliance sitting beside the server could easily leave with it.

    2. Prepare a separate Debian Tang server

    Give the separate Tang server a private address that will stay put, and restrict access to the intended private network before starting the listener. On that Debian 13 machine, install the packages and inspect the services:

    apt update
    apt install tang curl jose
    systemctl cat tangd.socket
    systemctl cat 'tangd@.service'
    

    The packaged socket normally listens on port 80; I’m using 7500 here. Run systemctl edit tangd.socket and add this override to bind it to one private address, replacing the example with your server’s real LAN address:

    [Socket]
    ListenStream=
    ListenStream=192.0.2.20:7500
    FreeBind=true
    

    With FreeBind=true, the socket can start before its reserved address is configured during boot. It won’t create the address or fix a changing lease, so the address still needs to be durable. That’s the approach in systemd’s guidance for address-specific sockets.

    systemctl daemon-reload
    systemctl enable --now tangd.socket
    systemctl restart tangd.socket
    curl --fail http://192.0.2.20:7500/adv -o /tmp/tang-advertisement.jws
    jose fmt --json /tmp/tang-advertisement.jws -g payload -y -o- | \
      jose jwk use -i- -r -u verify -o- | jose jwk thp -i- -a S256
    

    Run the fingerprint pipeline at the trusted Tang server console. It extracts the public signing thumbprints from the server’s advertisement using the same JOSE operations as tang-show-keys. That helper requests localhost, so this version adjusts the request for the LAN-only listener. Copy the chosen public signing thumbprint to the client through a separately trusted channel. Fetching it over the same untrusted connection you’re enrolling against doesn’t verify the server. The Tang pin manual covers pinned enrolment.
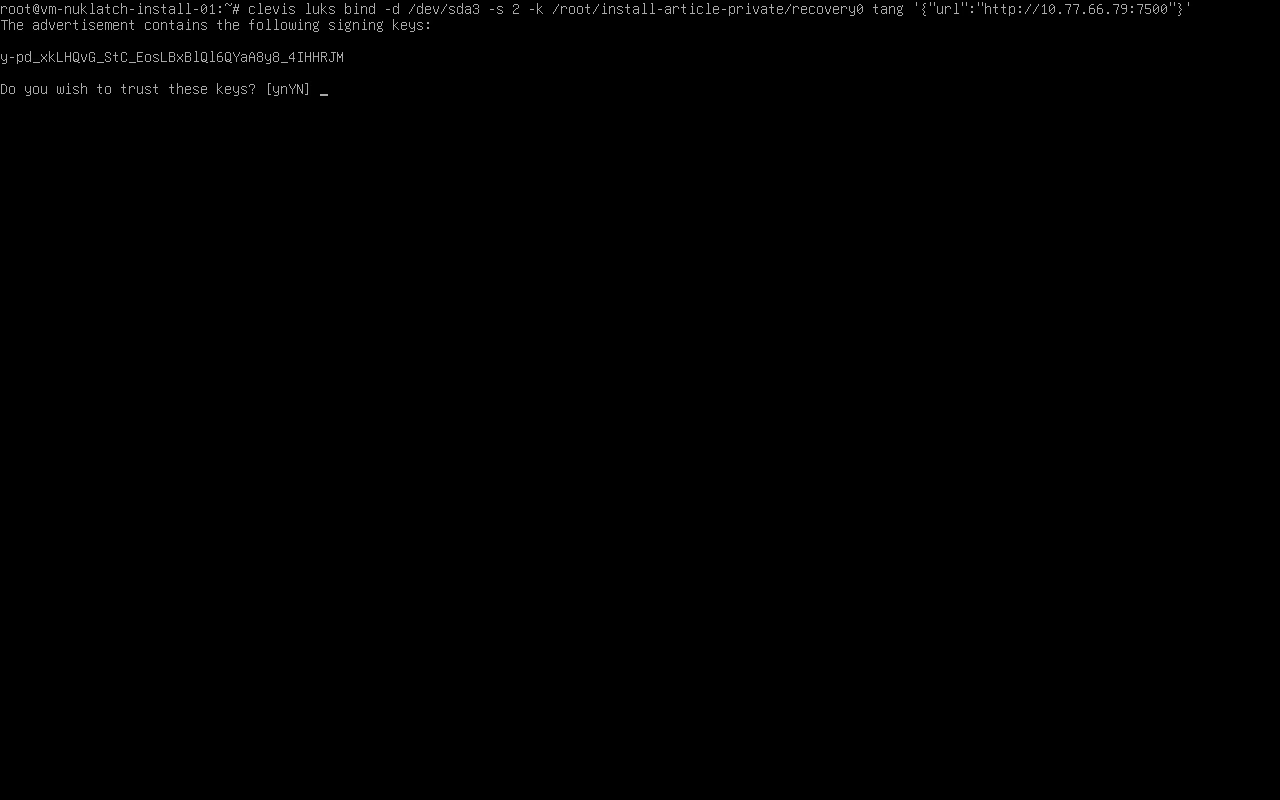
    The actual Tang signing pin and client check.
    The interactive enrollment prompt exposes the public signing fingerprint. Compare it independently; the guide’s command pins the verified value explicitly with thp. Tap to enlarge.

    3. Preserve and test manual recovery first

    Back on the encrypted client, find the outer crypto_LUKS partition, its UUID and a known independent recovery slot. Use the outer partition rather than the decrypted mapper or root LV. Keep a data backup, trusted rescue media and a protected header backup outside the host. You need to be able to get the recovery passphrase without this machine or Tang.

    lsblk -f
    cat /etc/crypttab
    read -r -p 'Outer LUKS device path: ' LUKS_DEVICE
    cryptsetup luksDump "$LUKS_DEVICE"
    read -r -p 'Existing independent recovery slot: ' RECOVERY_SLOT
    cryptsetup open --test-passphrase --key-slot "$RECOVERY_SLOT" "$LUKS_DEVICE" || \
      { printf 'Recovery test failed; stop here.\n' >&2; exit 1; }
    printf 'Recovery slot test succeeded.\n'
    umask 077
    # Mount a separately protected recovery medium here first.
    mountpoint -q /mnt/recovery && \
      cryptsetup luksHeaderBackup "$LUKS_DEVICE" \
        --header-backup-file /mnt/recovery/before-clevis.img || \
      { printf 'Header backup failed; stop here.\n' >&2; exit 1; }
    

    The failure checks exit the root shell. If one trips, fix the problem before continuing in another shell. A successful passphrase test confirms that it matches the slot you selected; keep at least one usable credential throughout. Header backups hold sensitive keyslot material, and an old header with a formerly valid passphrase can still decrypt the unchanged data, so protect the old copies too.

    4. Enroll a pinned Tang binding

    apt update
    apt install clevis clevis-luks clevis-initramfs cryptsetup-initramfs curl
    clevis luks list -d "$LUKS_DEVICE"
    

    Note the existing bindings before adding one. Replace the example URL with your durable private Tang endpoint and use the signing thumbprint you checked independently. When prompted, enter an existing LUKS passphrase:

    clevis luks bind -d "$LUKS_DEVICE" tang \
      '{"url":"http://192.0.2.20:7500","thp":"REPLACE_WITH_VERIFIED_SIGNING_THUMBPRINT"}'
    clevis luks list -d "$LUKS_DEVICE"
    cryptsetup luksDump "$LUKS_DEVICE"
    mountpoint -q /mnt/recovery && \
      cryptsetup luksHeaderBackup "$LUKS_DEVICE" \
        --header-backup-file /mnt/recovery/after-clevis.img || \
      { printf 'Updated header backup failed; stop here.\n' >&2; exit 1; }
    

    Don’t add -y to skip advertisement trust. Note the new Clevis slot shown in the listing rather than assuming it will be slot 1. Clevis and your recovery passphrase are separate ways into the same disk. Also avoid debugging commands that print clevis luks pass output: that’s an unlock secret.
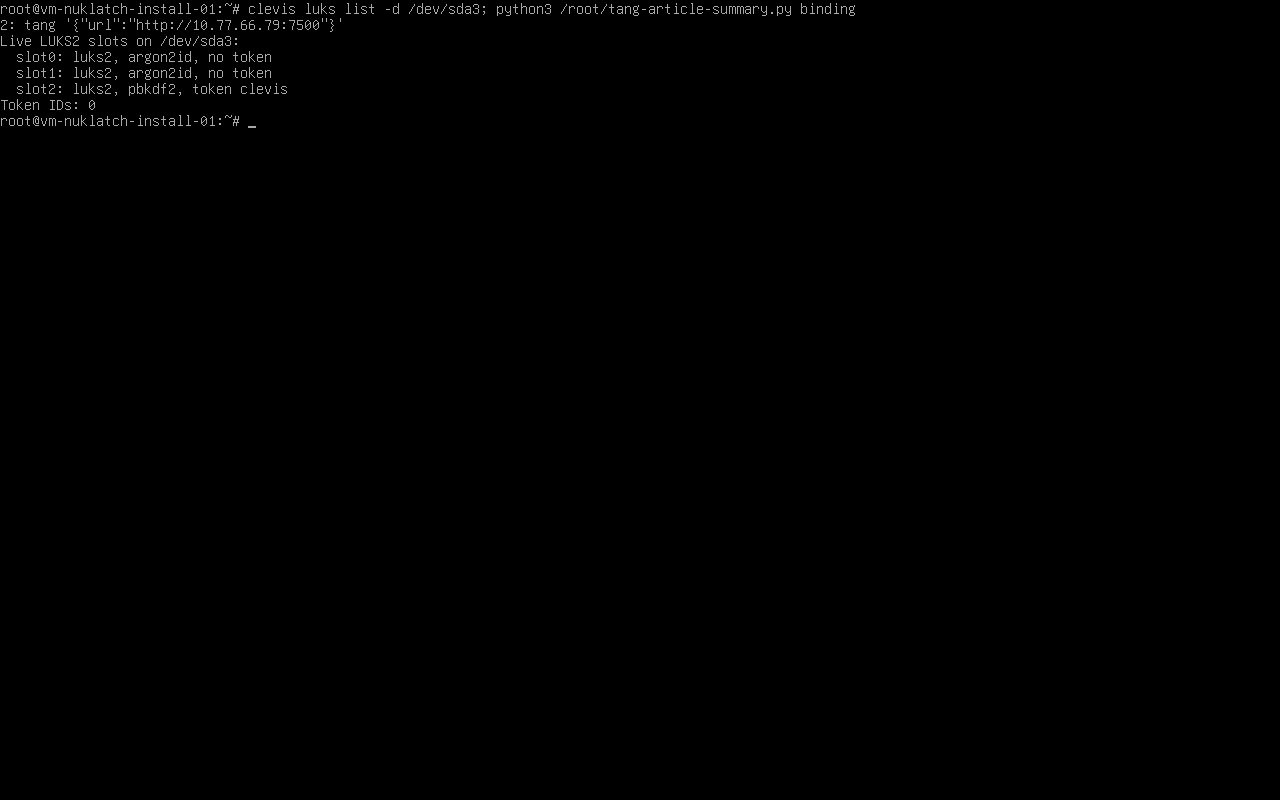
    Actual Clevis binding and retained independent LUKS slots.
    Clevis took slot 2 here, leaving the original independent slots 0 and 1 in place. Token IDs and keyslot numbers are separate identifiers. Tap to enlarge.

    5. Give the initramfs its own network configuration

    Now for the part that needs to work before root is mounted: networking in the initramfs. It’s separate from the Proxmox vmbr0 configuration that loads later. My Debian 13 test VM uses stock Clevis 20 and initramfs-tools 0.148.4. When Clevis finds a Tang binding, it calls the stock network function; with IP unset, that requests DHCP on DEVICE. Choose the physical wired NIC here, since the bridge doesn’t exist yet.

    Check /proc/cmdline, /etc/default/grub, its drop-ins and the existing /etc/initramfs-tools configuration first. If you already have ip=, a nonempty IP= or an early-network DEVICE=, adapt that setup rather than piling another one on top. Leave any existing tang-network file and other features’ boot arguments alone. This example assumes there’s no competing early-network configuration:

    ip -br link
    cat /proc/cmdline
    read -r -p 'Physical early-boot wired interface, for example eno1: ' EARLY_NIC
    readlink -f "/sys/class/net/$EARLY_NIC/device/driver"
    EARLY_CONFIG=/etc/initramfs-tools/conf.d/tang-clevis-article
    if [ -e "$EARLY_CONFIG" ] || [ -L "$EARLY_CONFIG" ]; then
      printf 'Configuration already exists; inspect it instead of overwriting.\n' >&2
      exit 1
    fi
    printf 'DEVICE=%s\n' "$EARLY_NIC" > "$EARLY_CONFIG"
    

    The printf command writes the setting with a real newline. On this test VM I didn’t need a global IP= assignment or a GRUB ip= argument, so there’s no need to add either just for this setup. Check that the initramfs includes the NIC driver and firmware, and reserve a suitable DHCP address where needed. Using Tang’s numeric address avoids needing early DNS as well.

    BOOT_KERNEL=$(uname -r)
    update-initramfs -u -k "$BOOT_KERNEL" || \
      { printf 'Initramfs build failed; stop before reboot.\n' >&2; exit 1; }
    lsinitramfs "/boot/initrd.img-$BOOT_KERNEL" | \
      grep -E 'clevis|cryptroot|tang-clevis-article'
    

    Check the selected image contains the Clevis hooks, cryptroot, the NIC driver and your new configuration. Keep a complete working kernel and recovery boot path, bearing in mind that package operations can regenerate other initrds too. This uses initramfs-tools networking; dracut’s rd.neednet=1 isn’t an equivalent setting.

    6. Try automatic boot, then take Tang away

    Reboot with Tang reachable and watch the console. Root should unlock without a passphrase, the expected kernel should boot, and Proxmox management should come back. On a bridge host, check that early DHCP has handed over properly: the normal address and default route should be on the intended bridge, without an address left on its physical port.

    uname -r
    findmnt /
    lsblk -f
    ip -br address
    ip route
    # On a Proxmox host only:
    if command -v pvesm >/dev/null; then pvesm status; fi
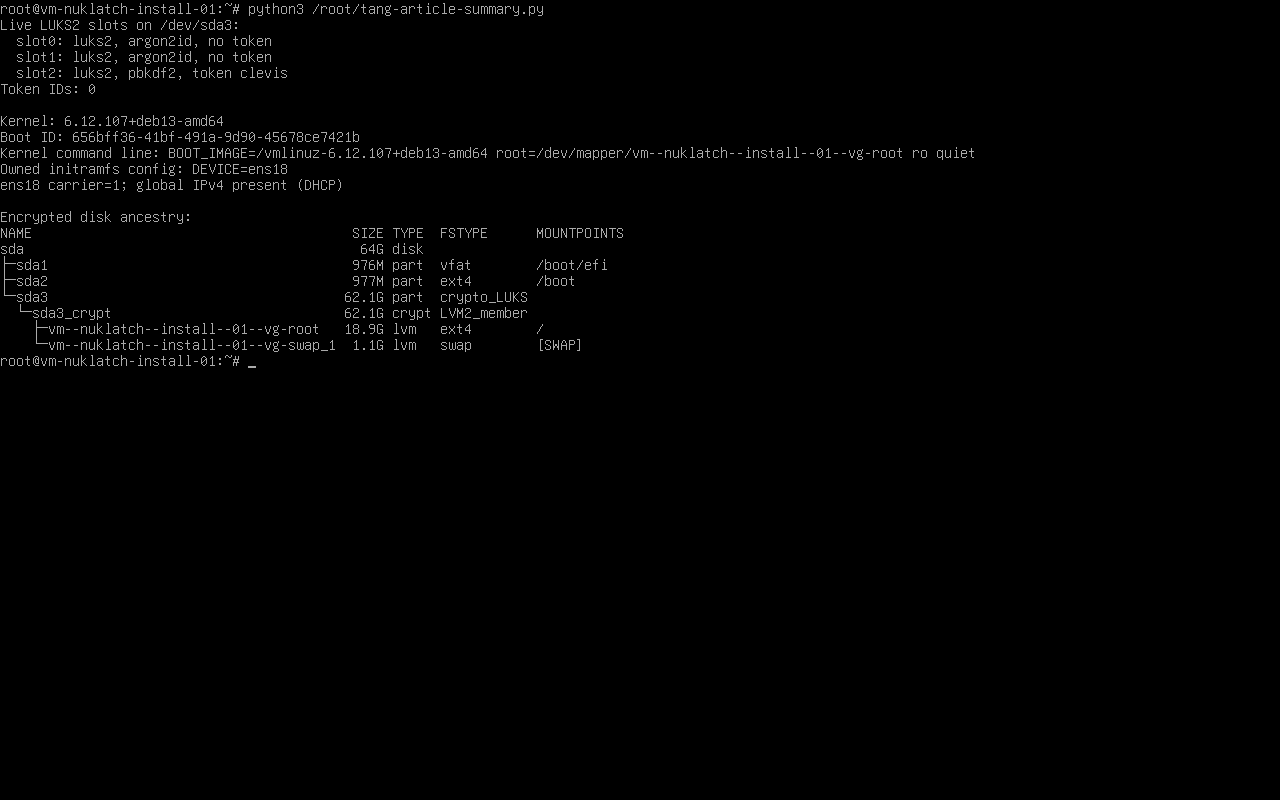
    
    Actual unattended boot and mounted encrypted root.
    Debian booted without a passphrase: root is mounted, DEVICE=ens18 is set, there is no kernel ip= argument, and normal DHCP has taken over. Tap to enlarge.

    Then make Tang unreachable only from this test client and reboot with the console ready. Leave shared Tang services and production bridges running. Automatic unlock should fail; use the independent recovery passphrase and check you can still boot normally. Restore the connection and try automatic boot again. Give it time to retry the network… my tests have taken minutes to reach recovery.
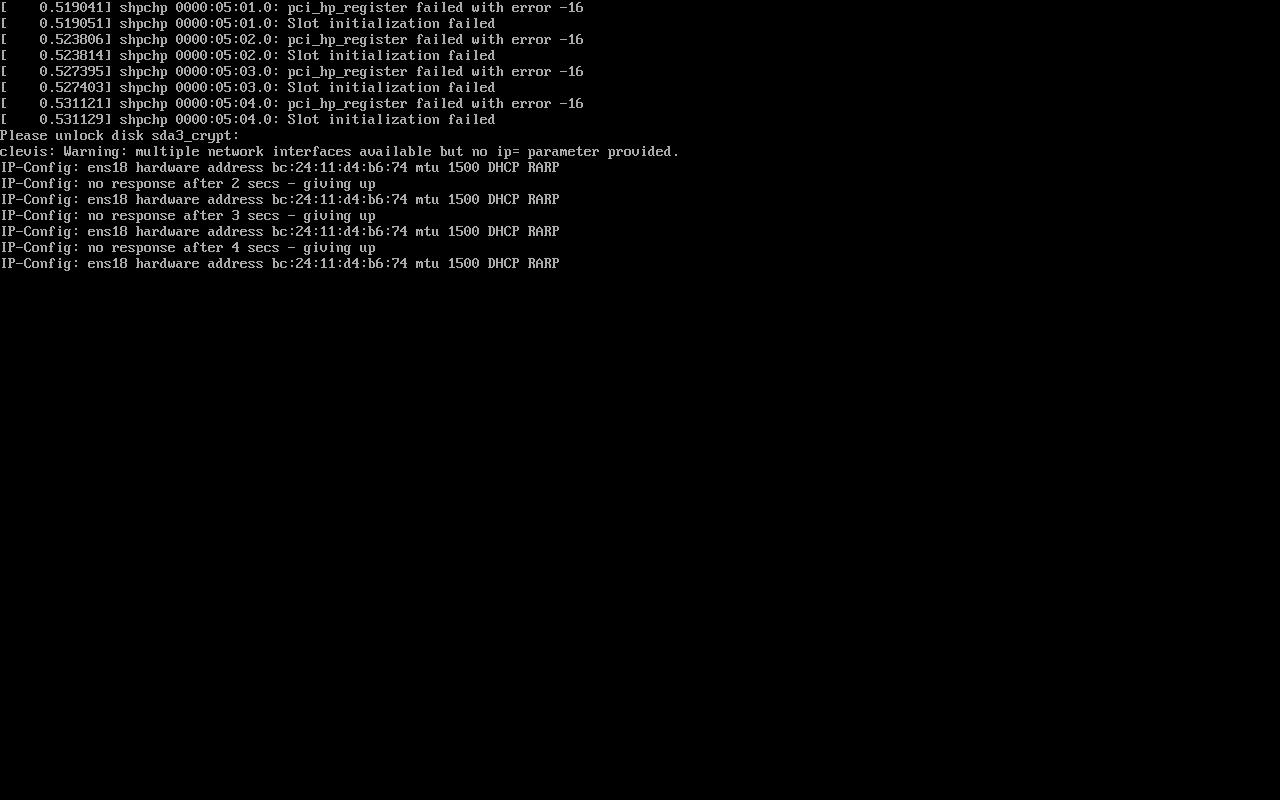
    Manual LUKS prompt, DHCP retries and the observed interface warning during a disconnected-network test.
    With the NIC disconnected, automatic unlock couldn’t finish and the manual prompt remained. I also saw a multiple-interface warning. The DEVICE-only online and recovery tests worked here, but I’d check that warning on another setup. Tap to enlarge.

    For a disposable VM, disconnecting its own virtual NIC makes a straightforward outage test. A firewall rule that only loads in the normal OS may arrive too late to affect the initramfs, leaving you with a failure test that never actually blocked anything.

    If automatic boot fails, work out whether you’re looking at the Tang binding or early networking before changing keyslots. Fetching the advertisement after a normal boot doesn’t tell you whether the initramfs can use the NIC or complete the recovery exchange. Check the console, selected kernel, interface name, DHCP and packed Clevis hooks. Don’t weaken a policy just because a required factor is missing. If you can’t reach recovery through the installed boot path, use trusted rescue media and the independent passphrase. Start by inspecting read-only rather than restoring a header over the live container.
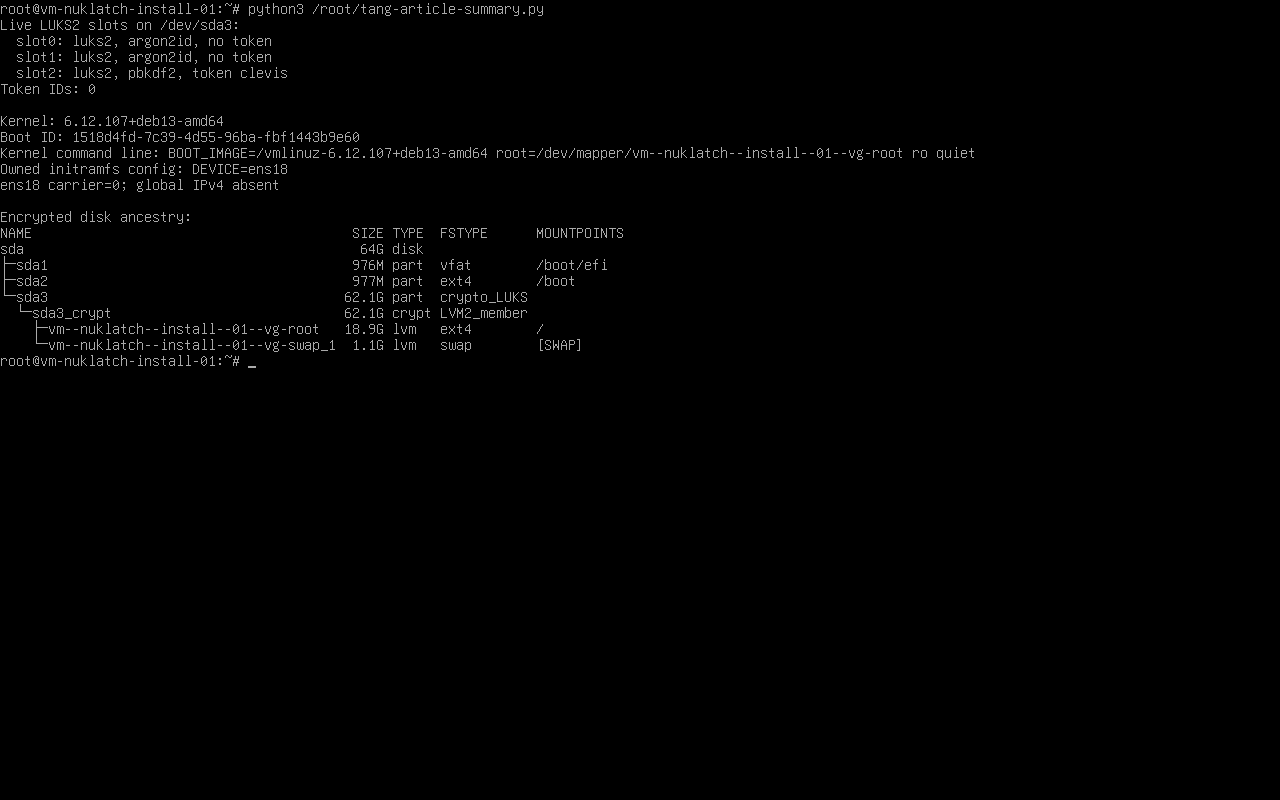
    Mounted encrypted root after independent passphrase recovery with the network disconnected.
    Independent recovery mounted the encrypted root while the NIC stayed disconnected: carrier 0, no IPv4 address. Tap to enlarge.

    If a factor stays unavailable

    • Network or Tang failure: use the console and independent LUKS passphrase, then sort out the network or Tang server. Keep that credential available offline.
    • TPM policy failure after an update: use a retained approved boot image or independent recovery. Check why the policy refused the boot before changing PCR settings or removing a factor.
    • Tang keys lost: the independent passphrase still unlocks the disk. Set up a replacement Tang identity, check its new signing pin, enrol and test the new binding, then remove the old one.

    7. What TPM plus Tang really means
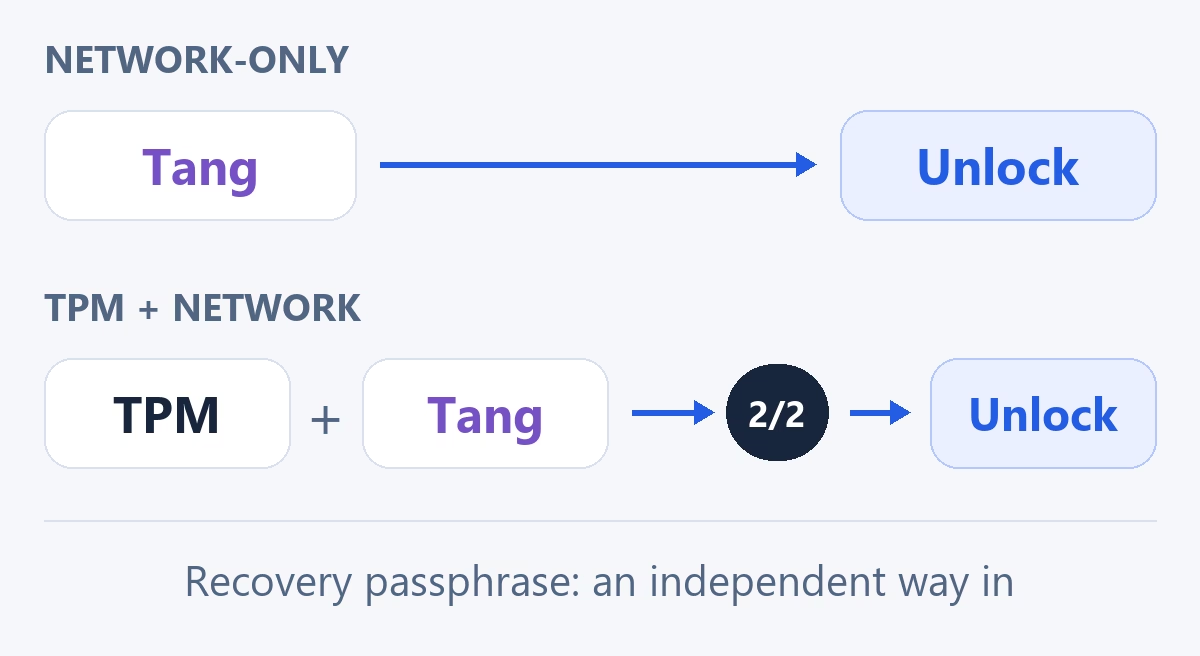
    One automatic route can require Tang only, or both TPM and Tang. Independent recovery remains available.
    Both factors must be required by the same automatic policy. A protected boot chain is also needed for the stronger setup. Tap to enlarge.

    To require the original TPM and Tang, both have to be part of the same policy. Clevis can express that with two shares and a threshold of t:2. It looks like this:

    {
      "t": 2,
      "pins": {
        "tpm2": {"pcr_bank":"sha256", "pcr_ids":"QUALIFIED_PCR_POLICY"},
        "tang": {"url":"http://YOUR_PRIVATE_TANG:7500", "thp":"VERIFIED_THUMBPRINT"}
      }
    }
    

    This shows the policy shape; it isn’t a runnable hardened-root recipe. Separate TPM-only and Tang-only slots give you TPM or Tang. Keeping a network-only slot would also leave a way around the stronger automatic policy. The independent recovery passphrase is still a separate, intentional way in.

    PCR 7 measures Secure Boot policy, but that alone doesn’t authenticate every byte of the initramfs or every kernel argument. In separate Debian 13 VM work, I tested Secure Boot, signed unified kernel images, a signed PCR 11 boot-phase policy, observed PCR 7/12/13 values, separate custody of signing keys, and recovery and update handling. That’s a different stack from this walkthrough, and those tests don’t give me a ready-made migration for Proxmox GRUB, encrypted LVM or physical TPMs. The details are in Clevis thresholds, PCR policy semantics and signed UKI measurements.

    What is taken or reachable? Network-only Correctly combined TPM + Tang
    Disk alone, no Tang access Automatic route unavailable Automatic route unavailable
    Disk + usable Tang, different computer Assume unlock possible Original TPM still required
    Original whole host + usable Tang Automatic factors available Both factors are present; do not promise theft prevention
    Disk and an independent passphrase Recovery unlock works Recovery unlock still works

    The combined column assumes a protected boot chain and no weaker alternative slot. Binding to TPM hardware and protecting boot integrity are separate jobs. You’ll still need normal OS authentication after an automatic boot.

    Taking the whole host takes its TPM too. If the thief also has Tang, or the stolen host can still reach it, both automatic factors are available. Moving just the disk to a different machine is a different situation because the original TPM is missing. That’s why I wouldn’t describe TPM plus Tang as blanket protection against the whole setup being stolen.

    8. Backups, key rotation and removing the binding

    On Debian, Tang’s private keys live under /var/lib/tang. Check the packaged service’s actual path first, especially on another distribution, then back up the whole directory to protected offline storage, including hidden retired keys. Keep the key files out of logs and issues.

    # On the separate Tang server, with protected recovery media mounted:
    umask 077
    mountpoint -q /mnt/recovery && \
      tar -C /var/lib -cpf /mnt/recovery/tang-private-keys.tar tang
    

    Key rotation adds new keys while keeping the old exchange keys available for existing clients. Debian provides /usr/libexec/tangd-rotate-keys -d /var/lib/tang for this. Verify the new advertisements, update bindings and test every client before deleting old keys. Update a pinned old thumbprint deliberately rather than bypassing trust to get past an error. The rotation manual explains why deleting old keys too early breaks existing bindings.

    A copy of Tang’s key directory can act as another Tang identity, so its backups need protecting just as much as the appliance. Keep them away from the client disks and header backups. After a kernel or initramfs update, watch an automatic boot and test recovery with Tang unavailable again before relying on remote restarts.

    If you want to remove automatic unlocking, test the independent recovery slot first. Then remove the Clevis slot you actually found in the listing:

    # Re-enter these public identifiers after a reboot/new root shell.
    lsblk -f
    read -r -p 'Outer LUKS device path: ' LUKS_DEVICE
    cryptsetup luksDump "$LUKS_DEVICE"
    read -r -p 'Independent recovery slot to test: ' RECOVERY_SLOT
    clevis luks list -d "$LUKS_DEVICE"
    cryptsetup open --test-passphrase --key-slot "$RECOVERY_SLOT" "$LUKS_DEVICE" || \
      { printf 'Recovery test failed; do not remove any slot.\n' >&2; exit 1; }
    read -r -p 'Confirmed Clevis slot to remove: ' CLEVIS_SLOT
    clevis luks unbind -d "$LUKS_DEVICE" -s "$CLEVIS_SLOT"
    cryptsetup luksDump "$LUKS_DEVICE"
    

    Inspect /etc/initramfs-tools/conf.d/tang-clevis-article before removing it. Continue only if it still contains just the DEVICE setting added here, then remove that exact file and rebuild the running kernel’s initramfs. This setup didn’t add a GRUB networking argument, so leave any other ip= or IP= settings alone:

    rm -- /etc/initramfs-tools/conf.d/tang-clevis-article
    update-initramfs -u -k "$(uname -r)" || \
      { printf 'Initramfs build failed; stop before reboot.\n' >&2; exit 1; }
    

    Check that a manual-only reboot works, then make a fresh protected header backup. An older header plus the matching Tang keys can still unlock through the old route, because unbinding doesn’t change the volume key. Keep your rescue media and recovery passphrase.
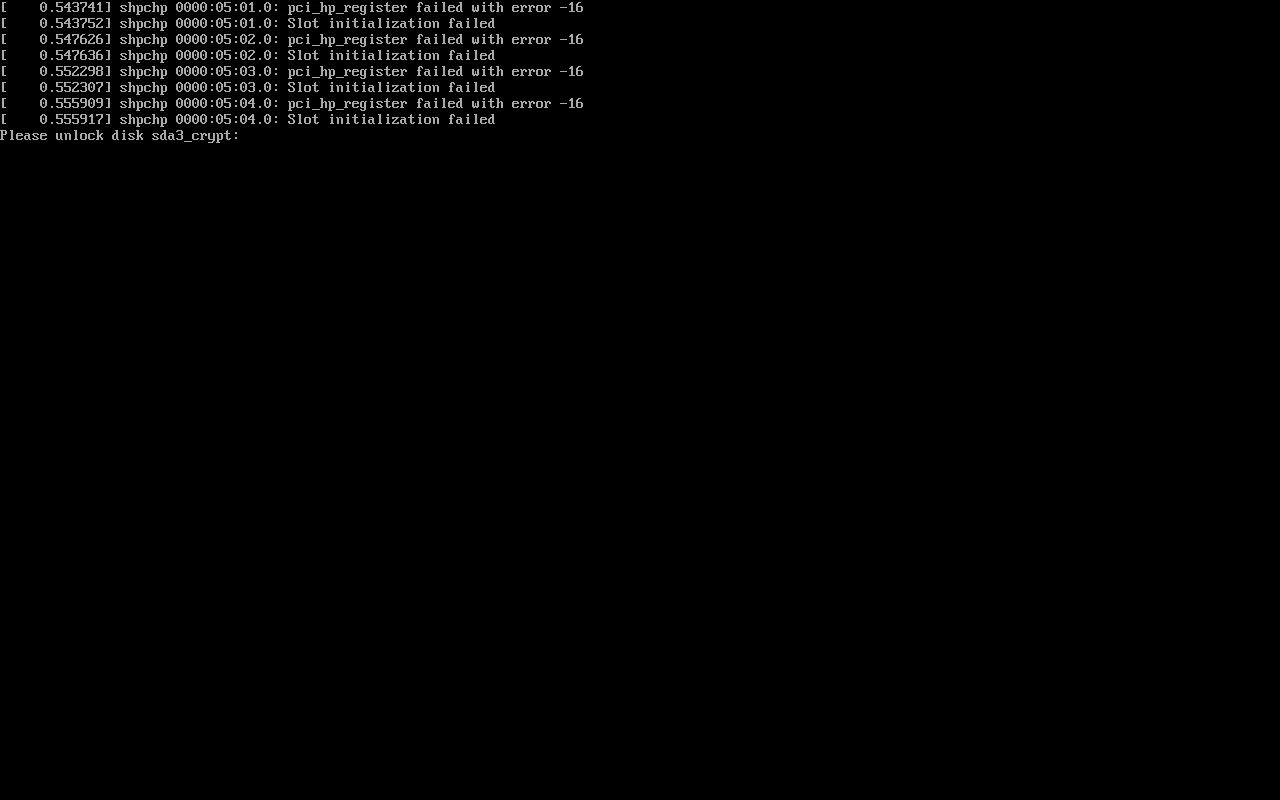
    Manual LUKS passphrase prompt after removal of the owned Clevis binding.
    After removing the automatic route added here, the manual prompt returned and the independent passphrase booted successfully. Tap to enlarge.

    My test VMs ran Debian 13.7 UEFI, encrypted LVM/ext4 root, wired DHCP, Clevis 20-1, Tang 15-2 and initramfs-tools 0.148.4. Pinned enrolment, wrong-pin refusal and the automatic, disconnected-NIC recovery, reconnected and post-removal boots worked. Original slots 0/1 and Tang keys stayed intact; both VMs are stopped. I haven’t tested physical NICs/TPMs, PVE bridge handover, VLANs, bonds or static early networking here. Earlier nested Proxmox tests covered encrypted root and guest storage; the stronger TPM boot stack is separate.
  • Install Proxmox VE on LUKS-encrypted Debian: step by step

    I want the disks in my Proxmox servers to be useless to anyone who walks off with them. Here’s the manual-unlock setup: Proxmox VE 9 on Debian 13, with root, swap and local guest storage inside one LUKS-encrypted container. You enter a passphrase at boot. The EFI System Partition and /boot stay unencrypted.

    This starts with a fresh-disk installation, so choosing the target disk wipes its contents. If you’re rebuilding an existing node, back up the guests to PBS or migrate them elsewhere first, as I covered in part one. I would disconnect unrelated disks where possible, just to make picking the wrong one harder. If the disk previously held sensitive plaintext, consider sanitising it too: creating an encrypted volume won’t erase every old sector. Proxmox’s backup documentation covers guest backup and restore.

    I’m using Proxmox’s official Debian installation route so I can choose the encrypted layout before adding Proxmox’s own packages. Proxmox generally recommends its ISO installer and describes the Debian route for advanced users in Install Proxmox VE on Debian 13 Trixie. The particular LUKS/LVM layout below is my worked example.

    1. Prepare the disk, network and console

    Download the Debian 13 amd64 netinst installer and check Debian’s published checksum. You’ll need an x86-64 machine with virtualisation enabled and a local or out-of-band console. Boot the installer in UEFI mode. I’m following Debian’s GRUB path here; switching to systemd-boot or encrypting /boot needs a different setup.

    For this example I used a 64 GiB disk: 20 GiB of the encrypted volume group for the initial root and swap volumes, then a 24 GiB thin pool for guests. That leaves some space for growth and maintenance. It’s small demonstration sizing, though. Allow more root space on a physical host if you’ll keep logs, ISOs and templates there, and leave room for temporary operations before you start installing.

    Choose a management address that will stay put, along with the gateway, DNS servers and hostname. A DHCP reservation can do that where your network supports it; the bridge example later uses a static address. The hostname needs to resolve to the reachable management address, but you don’t need a public IP. I’ve used pve01.home.arpa and reserved example addresses below, so replace them with your own.

    2. Install Debian with encrypted LVM

    1. Work through language, keyboard and networking. Choose a hostname and your intended local DNS domain.
    2. Set a strong root-account password, separate from the disk-unlock passphrase. Proxmox’s initial root@pam web login uses this account.
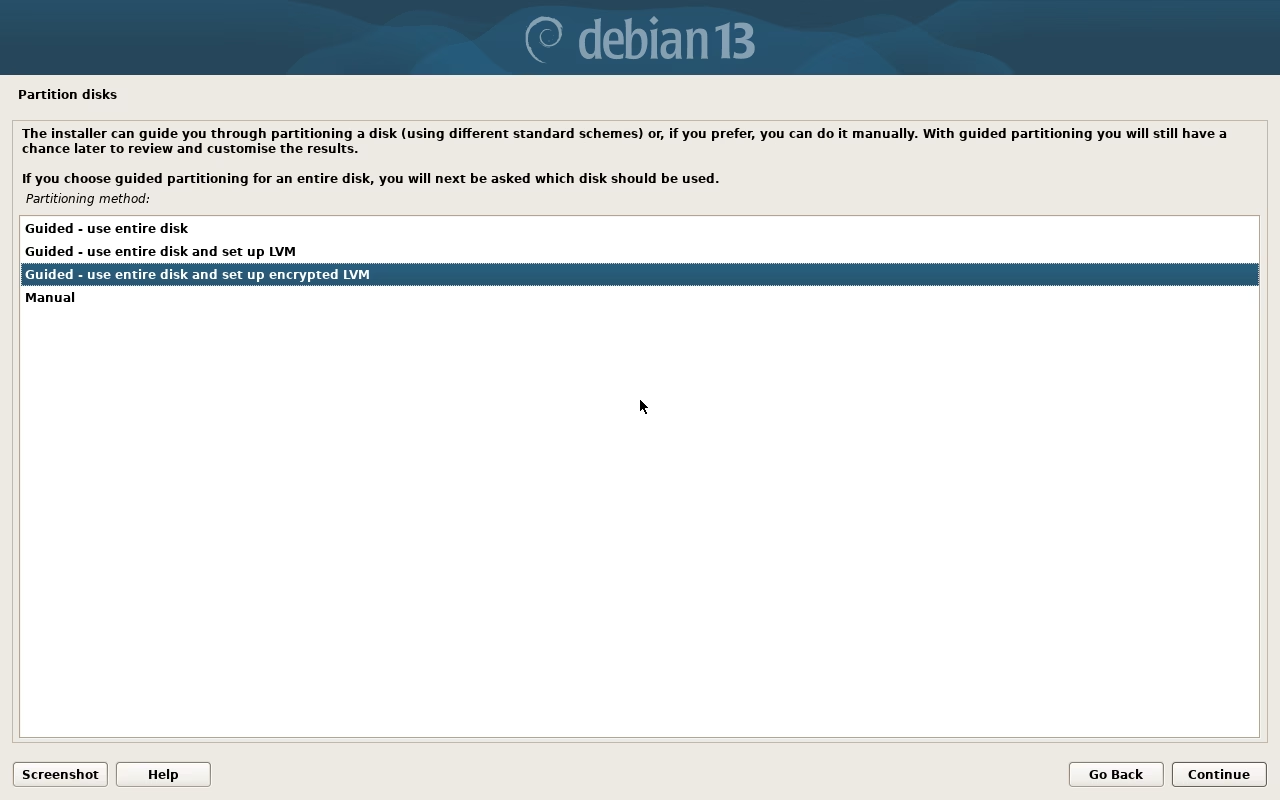
    3. At partitioning, choose Guided — use entire disk and set up encrypted LVM, then select the intended empty target disk.
    4. Select the scheme with all files in one partition. Read every disk-write confirmation: encrypted LVM setup can write destructive changes before the final summary.
    Debian installer: guided encrypted LVM selected.
    Choose encrypted LVM on the correct disk. Tap to enlarge.

    The installer may offer to erase the encrypted area. Let it finish if you’re reusing a disk. I skipped it for these screenshots because this was a newly created, empty virtual disk.

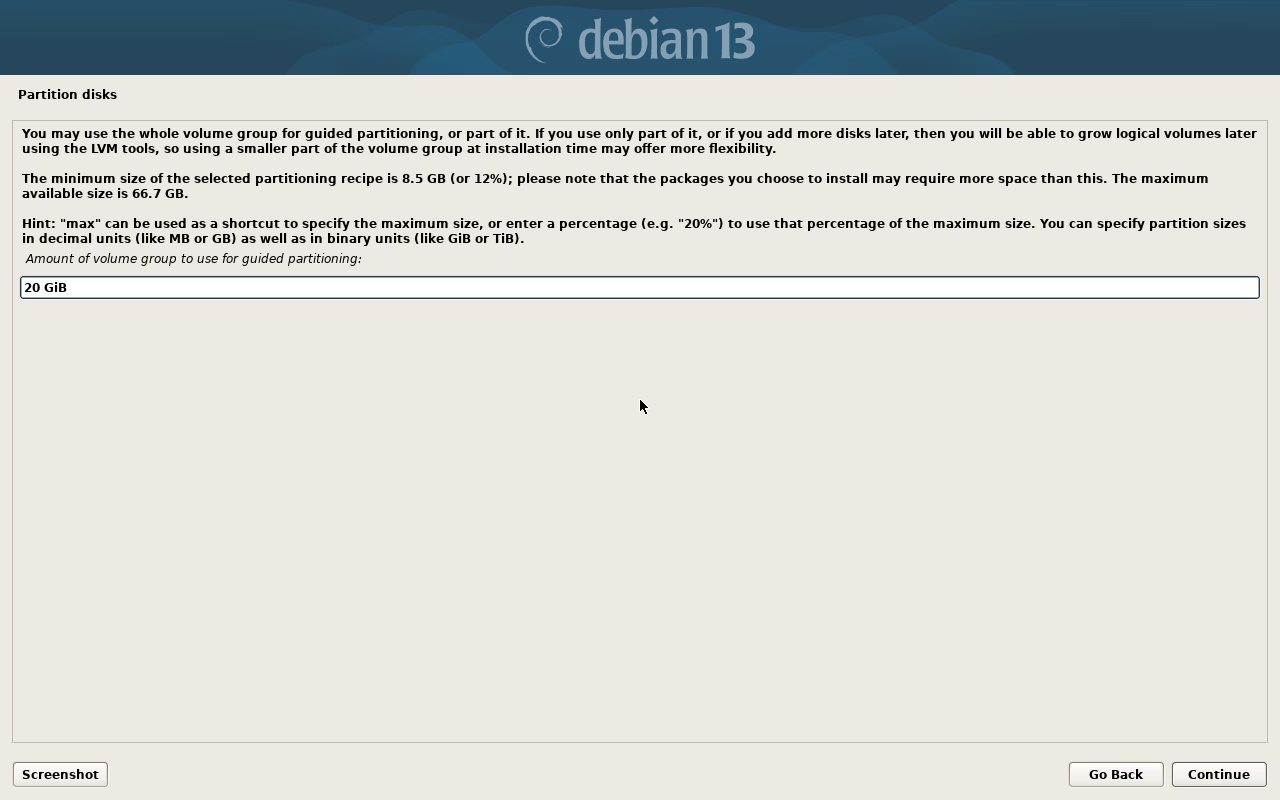
    Choose a strong disk-unlock passphrase and save it somewhere secure. When the installer asks how much of the volume group to use, enter 20 GiB for this example rather than accepting the maximum. That limits the initial logical volumes and leaves the remaining capacity as free extents for later.

    20 GiB selected for initial logical volumes.
    Allocate only part of the volume group now; keep room for guests. Tap to enlarge.

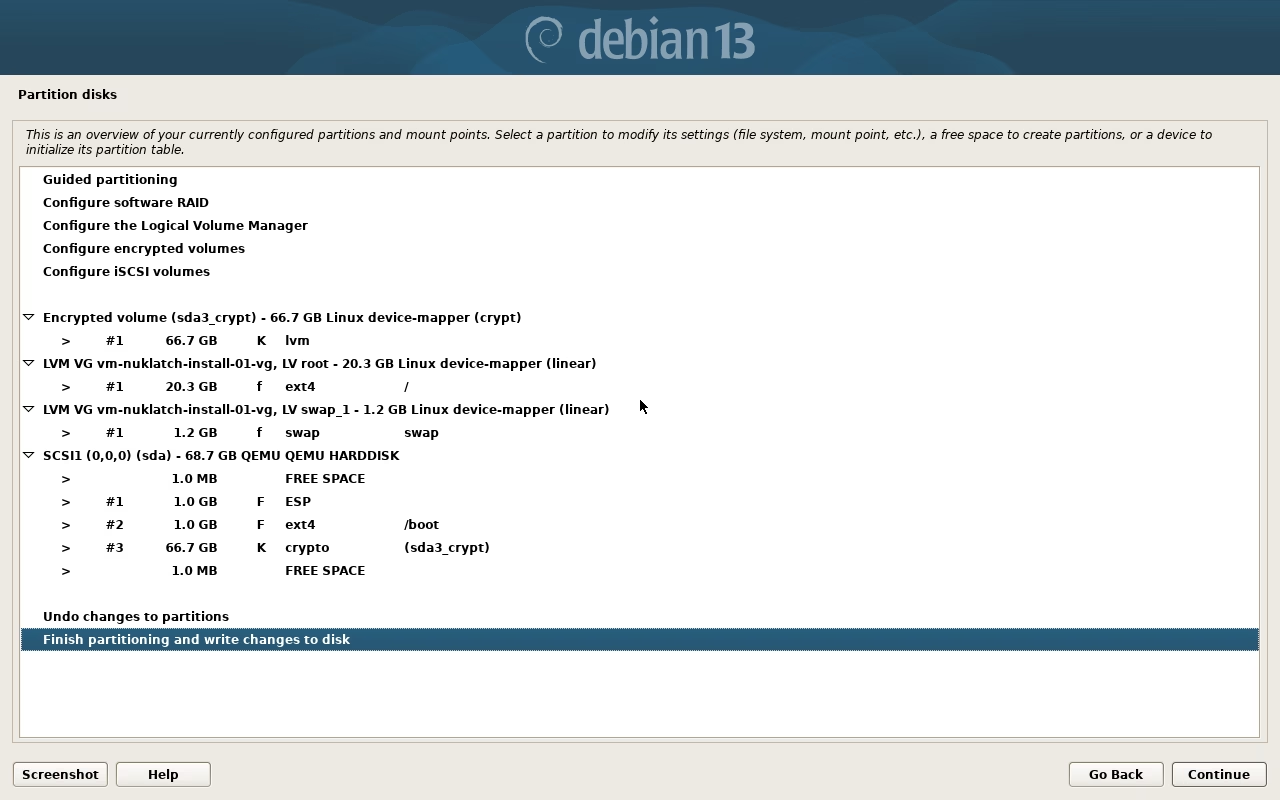
    Check the partition summary before accepting it. You should have an unencrypted EFI System Partition and /boot, then an encrypted device holding the LVM root and swap volumes. Root mounts at /. If you’re following the thin-pool step later, don’t let root take all the space. The volume names and root/swap split can vary, so note what your installer creates. Debian’s partitioning instructions cover the guided and manual options.

    ESP and boot remain clear; root and swap are inside the encrypted LVM mapping.
    The final layout: clear boot partitions, encrypted root and swap. Tap to enlarge.

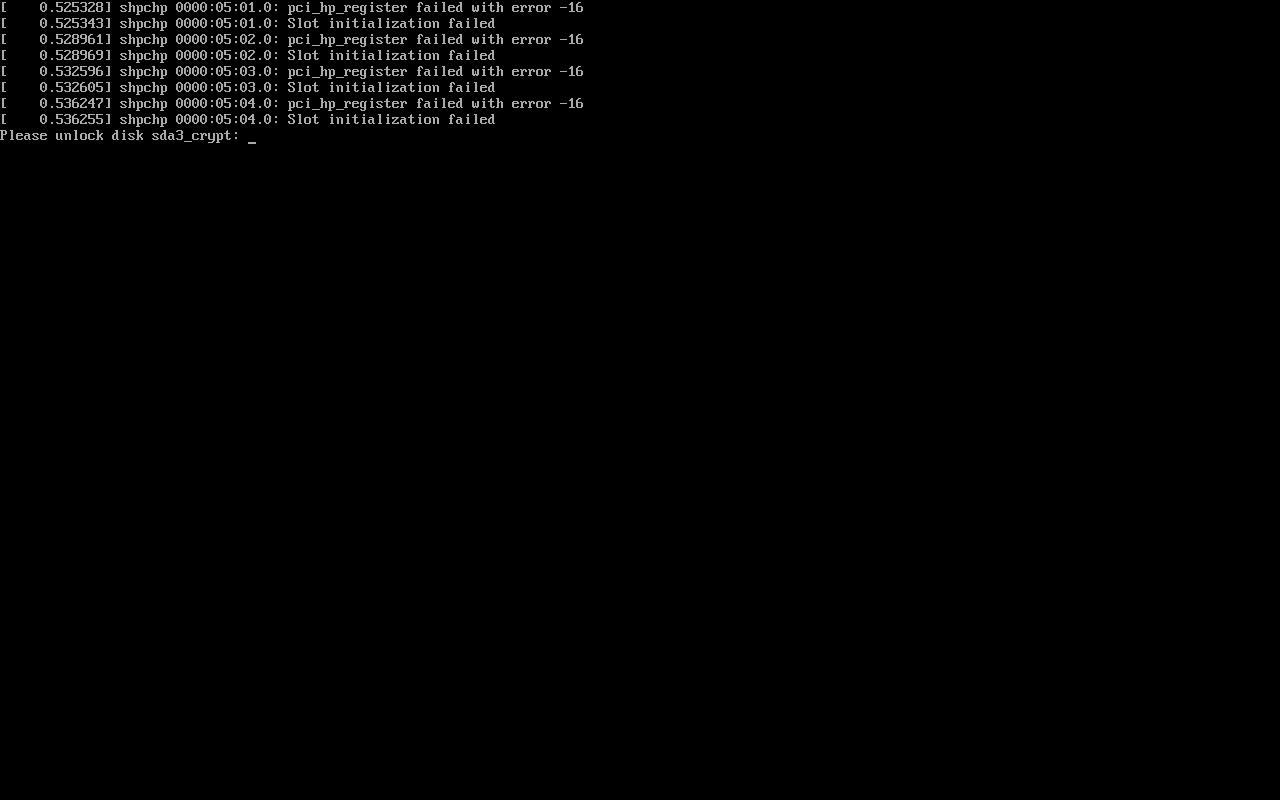
    Choose a working Debian mirror, then install the SSH server and standard system utilities. There’s no need for a desktop. If you finish without a mirror, sort out the Debian Trixie, updates and security repositories before the APT steps below. Finish the install, remove the installation medium and reboot. Enter the LUKS passphrase at the console; this first boot checks that Debian can unlock and mount root.

    Actual installed Debian boot waiting for the sda3_crypt passphrase.
    First boot pauses here until the encrypted disk is unlocked. Tap to enlarge.

    3. Check the base installation and hostname

    Become root with su -, or sudo -i if your account has sudo. The commands below run in a root Bash shell. Work through them a stage at a time and sort out any errors before moving on. First, have a look at what Debian installed:

    test -d /sys/firmware/efi && echo 'Booted using UEFI'
    cat /etc/os-release
    lsblk -o NAME,SIZE,TYPE,FSTYPE,MOUNTPOINTS
    vgs
    lvs
    ip -br address
    ip route
    hostname -f
    
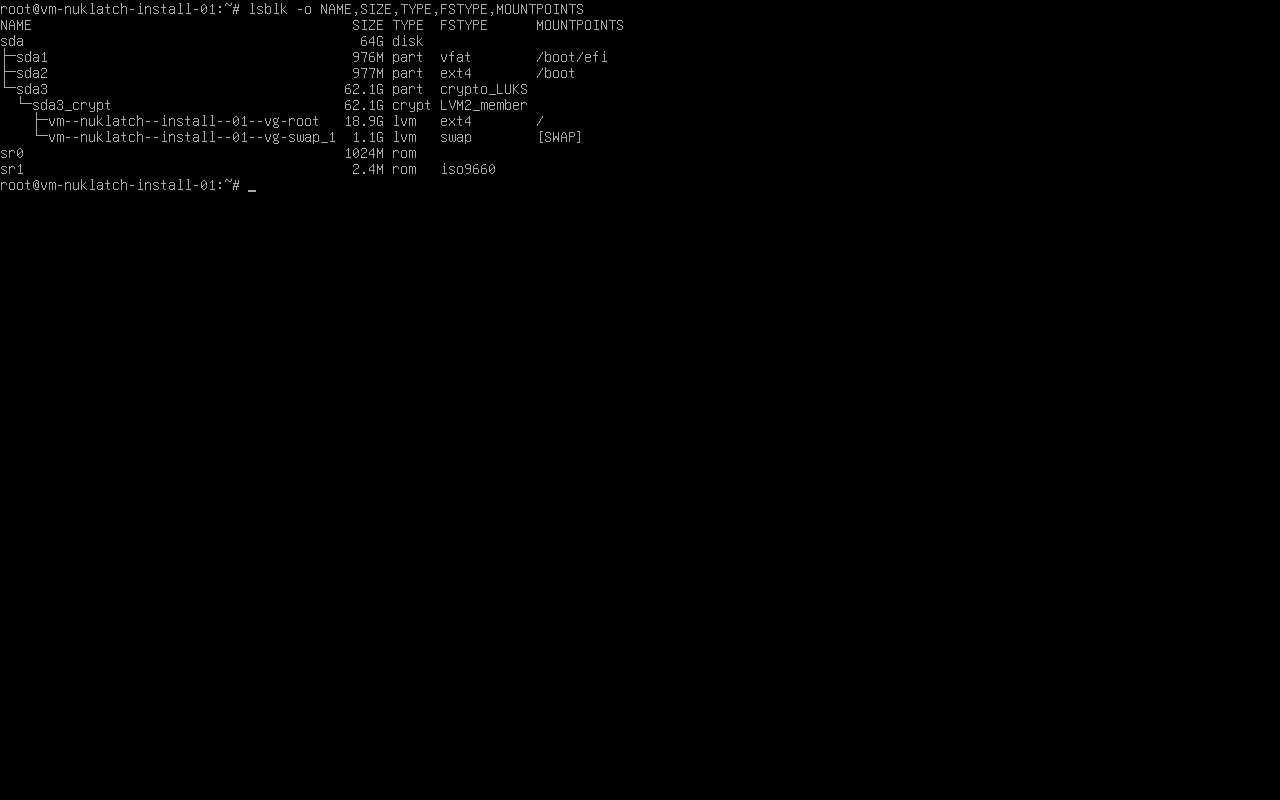
    Actual lsblk output showing root and swap beneath the LUKS mapping.
    Read the tree from sda3 through sda3_crypt to root and swap. Tap to enlarge.

    In the device tree, root and swap should sit beneath the encrypted mapping. Check that vgs shows enough free space for your thin pool. If it doesn’t, fix the layout while the installation is still empty.

    In /etc/hosts, map the node name to its management address and keep the localhost entry. Replace the node’s 127.0.1.1 entry if it has one. For example:

    127.0.0.1 localhost
    192.0.2.10 pve01.home.arpa pve01
    

    Keep the IPv6 localhost entries you need, replace the example address and names, then check they resolve:

    hostname -f
    getent ahostsv4 pve01.home.arpa
    

    4. Add the Proxmox repository and boot its kernel

    Leave Debian’s Trixie, updates and security repositories enabled. I’m adding Proxmox’s no-subscription repository here, which Proxmox describes as suitable for testing and non-production use. For production, use the enterprise repository with a suitable subscription. The definitions and keyring instructions are in Package Repositories.

    apt update
    apt install ca-certificates wget
    wget https://enterprise.proxmox.com/debian/proxmox-archive-keyring-trixie.gpg \
      -O /usr/share/keyrings/proxmox-archive-keyring.gpg
    sha256sum /usr/share/keyrings/proxmox-archive-keyring.gpg
    

    Check the downloaded keyring against the checksum in the official repository documentation. When I drafted this, the bootstrap SHA256 was 136673be77aba35dcce385b28737689ad64fd785a797e57897589aed08db6e45. If a fresh download differs, check the official value before carrying on. Once the keyring package owns the file, legitimate package updates can change its checksum.

    cat > /etc/apt/sources.list.d/proxmox.sources <<'EOF'
    Types: deb
    URIs: http://download.proxmox.com/debian/pve
    Suites: trixie
    Components: pve-no-subscription
    Signed-By: /usr/share/keyrings/proxmox-archive-keyring.gpg
    EOF
    apt update
    apt full-upgrade
    apt install proxmox-default-kernel
    systemctl reboot
    

    After the reboot, unlock the disk again and check the running kernel. It should end in -pve before you install the rest of Proxmox:

    uname -r
    

    If it doesn’t, select the installed Proxmox kernel in GRUB and sort out the boot selection first. Keep the Debian kernel for now as a fallback.

    5. Install the platform and configure its bridge

    apt install proxmox-ve postfix open-iscsi chrony ifupdown2
    

    Choose the Postfix settings that suit your notifications. Afterwards, check the repositories and disable enterprise entries you can’t access, including Ceph’s if present. Remove any duplicates and get a clean apt update before continuing.

    Next comes the bridge that connects the guests. From the console, edit /etc/network/interfaces using your actual wired interface name. Put the host address and default gateway on vmbr0, leaving the physical interface in manual mode. All the addresses in this 192.0.2.0/24 example need replacing:

    auto lo
    iface lo inet loopback
    
    iface eno1 inet manual
    
    auto vmbr0
    iface vmbr0 inet static
        address 192.0.2.10/24
        gateway 192.0.2.1
        bridge-ports eno1
        bridge-stp off
        bridge-fd 0
    
    source /etc/network/interfaces.d/*
    

    Remove the old uplink’s conflicting DHCP or static definitions, checking included files too. Keep any IPv6 configuration you need and make sure DNS still works. If you use a DHCP reservation, adapt the bridge configuration and keep the hostname mapping consistent rather than copying this static stanza. Keep the console open while applying it… losing SSH halfway through a network change is no fun.

    ifreload -a
    systemctl is-enabled networking
    ip -br address
    ip route
    getent ahostsv4 deb.debian.org
    

    If networking is unexpectedly disabled, find out why before rebooting. Check management access from another machine too. Proxmox recommends ifupdown2; its network documentation explains how the traditional ifdown/ifup approach can disconnect guests when cycling a bridge.

    6. Create encrypted local guest storage

    The guest thin pool goes inside the encrypted volume group. Check with pvs and lsblk that its physical volume is the decrypted LUKS mapping, then get the VG name from vgs. Don’t guess it, or create a second data pool or local-lvm storage ID if either already exists. I’m creating 24 GiB here, with space left for extension, metadata and repairs:

    vgs
    pvs -o pv_name,vg_name,pv_size,pv_free
    lvs
    pvesm status
    read -r -p 'Encrypted volume group name from vgs: ' VG
    lvcreate --type thin-pool -L 24G -n data "$VG"
    pvesm add lvmthin local-lvm --vgname "$VG" --thinpool data \
      --content images,rootdir
    pvesm status
    lvs -a -o lv_name,vg_name,lv_size,segtype,data_percent,metadata_percent,devices
    

    Leave the thin pool unformatted and unmounted. ISOs and templates can stay on directory storage under encrypted root; guest disks and container filesystems go in the thin pool. Keep an eye on data and metadata usage, because thin provisioning won’t conjure up more disk space. Proxmox’s LVM-thin documentation has more detail.

    7. Add and test a recovery credential

    Before putting guests on this, I want another way back into the disk. LUKS encrypts the data with a volume key, and its header holds protected copies of that key in keyslots. Your passphrase opens one of those copies. Adding a recovery passphrase gives you another route to the same data without rewriting the disk.

    Either ordinary LUKS passphrase can unlock the whole container. Adding one doesn’t require two people to unlock it, separate the guests or change the data-encryption key. Pick a distinct recovery passphrase and keep it securely outside this host.

    Find the outer LUKS partition using lsblk -f and /etc/crypttab. That’s the partition to enter below, rather than its decrypted mapper or an LV. First mount a separately protected recovery medium at /mnt/recovery:

    lsblk -f
    cat /etc/crypttab
    read -r -p 'Outer LUKS partition, for example /dev/nvme0n1p3: ' LUKS_DEVICE
    cryptsetup luksDump "$LUKS_DEVICE"
    umask 077
    mountpoint -q /mnt/recovery && \
      cryptsetup luksHeaderBackup "$LUKS_DEVICE" \
        --header-backup-file /mnt/recovery/host-header-before.img && \
      cryptsetup luksAddKey "$LUKS_DEVICE"
    cryptsetup luksDump "$LUKS_DEVICE"
    

    This chain only adds the key after it has checked the recovery medium is mounted and saved the header. If it fails, stop and fix it before testing or removing slots. luksAddKey asks for an existing passphrase, then the new one. Check the updated slot list: the installer commonly starts at slot 0, but use the slot numbers you actually see. Enter the new passphrase interactively to test its slot:

    read -r -p 'New recovery keyslot number from luksDump: ' RECOVERY_SLOT
    cryptsetup open --test-passphrase --key-slot "$RECOVERY_SLOT" "$LUKS_DEVICE"
    echo "Test exit status: $?"
    mountpoint -q /mnt/recovery && cryptsetup luksHeaderBackup "$LUKS_DEVICE" \
      --header-backup-file /mnt/recovery/host-header-after.img
    

    A zero test status means it worked. Keep the original passphrase and test that independently as well. Treat header backups as sensitive recovery material; they aren’t backups of your data. An old header and a passphrase that worked when it was saved can still unlock the disk after you’ve removed that passphrase from the live header, so protect old copies too. The cryptsetup manuals cover adding keys, testing a specific slot and header backups.

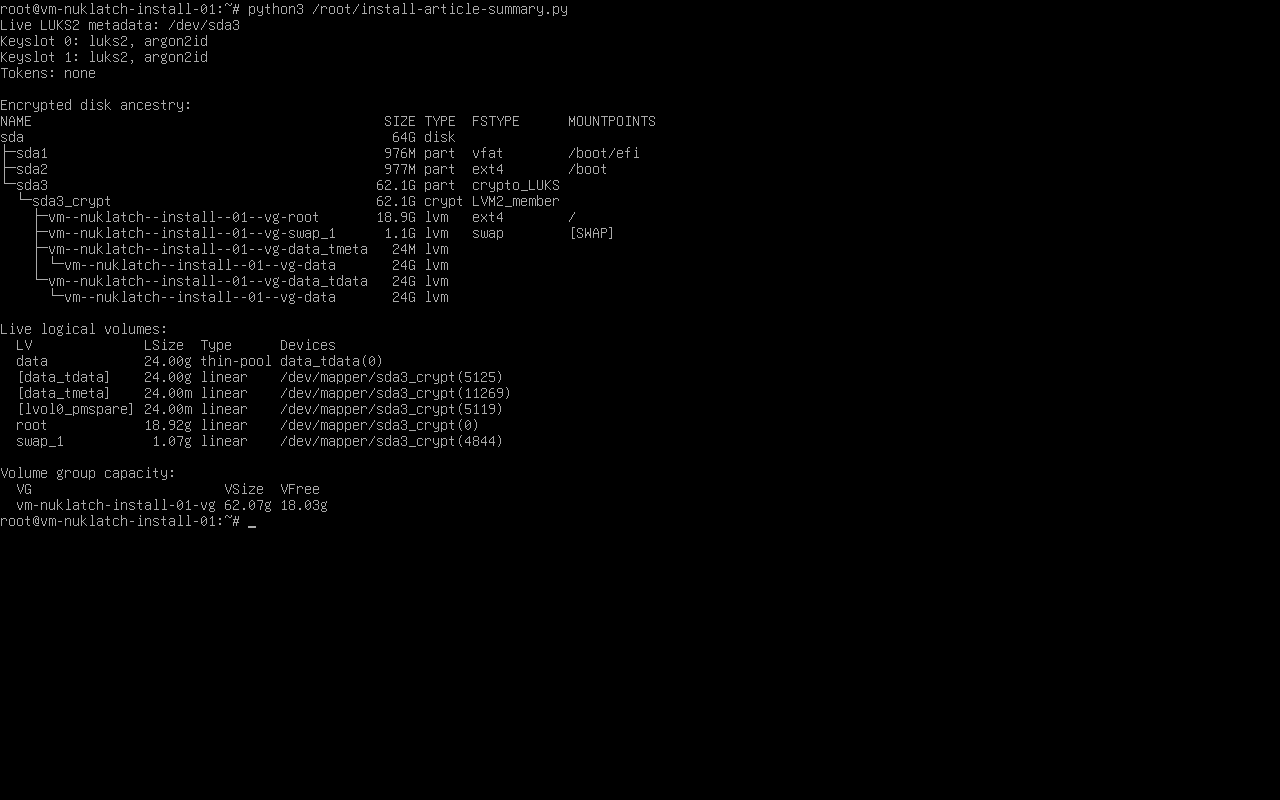
    Actual LUKS2 keyslots 0 and 1 and encrypted thin-pool ancestry.
    Two alternative unlock credentials; guest-pool data and metadata stay beneath LUKS. This is live filtered metadata, not secret key material. Tap to enlarge.

    You can remove an old passphrase if you no longer need it, but test every credential you’re keeping first. Don’t remove the last working key. Run this interactively and enter the old passphrase you want to remove:

    cryptsetup luksRemoveKey "$LUKS_DEVICE"
    

    Don’t pipe in the passphrase or use batch mode, as that can suppress the last-key warning. After removal, test the retained slots again and save a fresh protected header backup. The removal manual explains the risk.

    8. Reboot and verify the finished host

    Before adding guests, reboot again with the console available. This time, use the recovery passphrase, check the Proxmox kernel and network, then open https://YOUR-MANAGEMENT-ADDRESS:8006/. A fresh install normally has a locally generated certificate, so check you’ve reached your own host. Log in as root using the Linux PAM realm and root-account password (the account password, rather than the LUKS passphrase you entered at boot).

    uname -r
    pveversion -v
    lsblk -f
    pvesm status
    systemctl --no-pager --full status pveproxy
    

    Once the checks pass, you can tidy up the Debian kernels if you want to. List the installed kernel packages and remove only the exact Debian packages you’re retiring, then run update-grub. Avoid wildcards and keep a working Proxmox kernel. Check whether os-prober is installed too; remove it if this dedicated host doesn’t need it.

    That leaves the host and local guest storage encrypted, with a passphrase needed after every restart. Once the host is unlocked, encryption won’t stop an administrator or an attacker who controls it. The clear boot partitions also leave boot tampering outside this setup; verified boot needs separate work. I’ll tackle automatic network-based unlocking separately, because its early network setup is another stage again from the Proxmox bridge.


    I took these screenshots on a fresh Debian 13.7 amd64 UEFI VM: manual root unlocking, two independently tested passphrase slots and a 24 GiB thin pool beneath LUKS worked. I tested the second passphrase against its slot, but didn’t boot with it separately. The mirror was unreachable, so I couldn’t rerun the documented Proxmox package, bridge and storage-registration steps on this VM; earlier BIOS-based testing covered Proxmox boot and encrypted guest storage. I haven’t tested every hardware or boot combination.

  • Why I’m encrypting my Proxmox homelab

    Why I’m encrypting my Proxmox homelab

    My homelab lives in the garage. Handy for keeping the fan noise out of the house, but garages aren’t exactly Fort Knox… If somebody walks off with a server, losing the box is annoying enough without handing over all the data as well. Think passport scans, tax records, personal documents and backups full of account credentials. Quite a useful haul for somebody who fancies a bit of identity theft.

    Enter LUKS. What are we encrypting?

    LUKS is the usual Linux route to disk encryption. While the volume is locked, somebody with the disk can’t just plug it into another machine and browse through it. The interesting bit with Proxmox is deciding where to put the encryption:

    Data driveLocks that drive. Host OS and other storage stay outside.
    Inside a VMLocks the guest volume. Host files and host-side RAM snapshots stay outside.
    Under LVMLUKS covers host root + swap + guest volumes in that group. Other disks and boot partitions stay outside.

    LVM organises storage; it doesn’t encrypt it. For this setup I want LUKS underneath LVM, with the host root, swap and guest volumes inside it. Encrypting just the VM storage pool leaves the host’s own files sitting outside, including the configs I’d rather not give away.

    How would I actually set this up?

    If you’re building a new node, sort this out at installation time. Install a minimal Debian base with encrypted LVM, then put Proxmox on top. Much easier than trying to squeeze encryption into an existing boot disk later.

    Already running Proxmox? I’d back up the VMs and containers to PBS somewhere outside that node and check I can restore them, or migrate them to another suitable node while keeping the backups. Grab the host’s network and storage configs too, and don’t forget bind mounts or passthrough data that the guest backups might miss. Then rebuild the empty node and bring everything back.

    Retrofitting LUKS can be possible, depending on the disk layout, but it’s fiddly and a fairly unpleasant place to discover you’ve made a mistake. I’d rather start fresh.

    What happens when you turn it on?

    Once the root volume is encrypted, Proxmox can’t just boot straight up. A small early-boot environment starts first and waits for the disk passphrase. This is before the host and its guests start, and it’s separate from your normal Proxmox login:

    Manual encrypted-root boot
    1 · Power on
    Early boot starts.
    2 · Wait for you
    Root is still locked.
    3 · Unlock
    Supply passphrase.
    4 · Proxmox
    Host, then guests.
    Illustrative console
    Unlock cryptroot:
    Enter passphrase: ▌

    A slight catch with “full OS encryption”: the boot files normally stay unencrypted. Protecting those against somebody fiddling with them is where boot integrity, Secure Boot and TPMs come in. And after the disk has unlocked, you’re still relying on the OS and account security as usual.

    Great. Until it reboots while you’re away.

    A kernel update needs a reboot, or a power cut outlasts the UPS. The power comes back… and the server just sits at that prompt. No NAS, no VMs, and possibly no Home Assistant or cameras until you get a console and type the passphrase.

    Update / power cut / restart
    Power returns → unlock prompt → guests wait.

    Sticking an unprotected key alongside the encrypted data rather defeats the point. What I want is for the server to unlock itself at home, but stay locked when somebody carries it away. That does depend on what the unlock service checks and whether the thief takes that too, so there’s a bit more to it than “on my network = safe”.

    That’s where Tang and Clevis come in. First I’ll build the encrypted Debian/Proxmox base, then get automatic network unlock working, with a recovery passphrase for the inevitable day something else on the network decides not to play.

    And yes, I still need backups! Encryption won’t bring a dead disk back, and any copies outside this encrypted volume need their own protection.

  • CWWK i3-N305 NAS mini-ITX board

    CWWK i3-N305 NAS mini-ITX board

    I’ve been keeping an eye for a while on new boards based on the Intel N305. I’m a great fan of the Alder Lake N100, so a similarly low-powered offering with double the core count is too good to pass up. Recently this popped up on AliExpress:

    CWWK 12th Generation I3-N305 N100 2 Intel I226-V 2.5G NAS Motherboard 6 SATA3.0 6-disk Soft Router 1*DDR5 4800MHZ Firewall

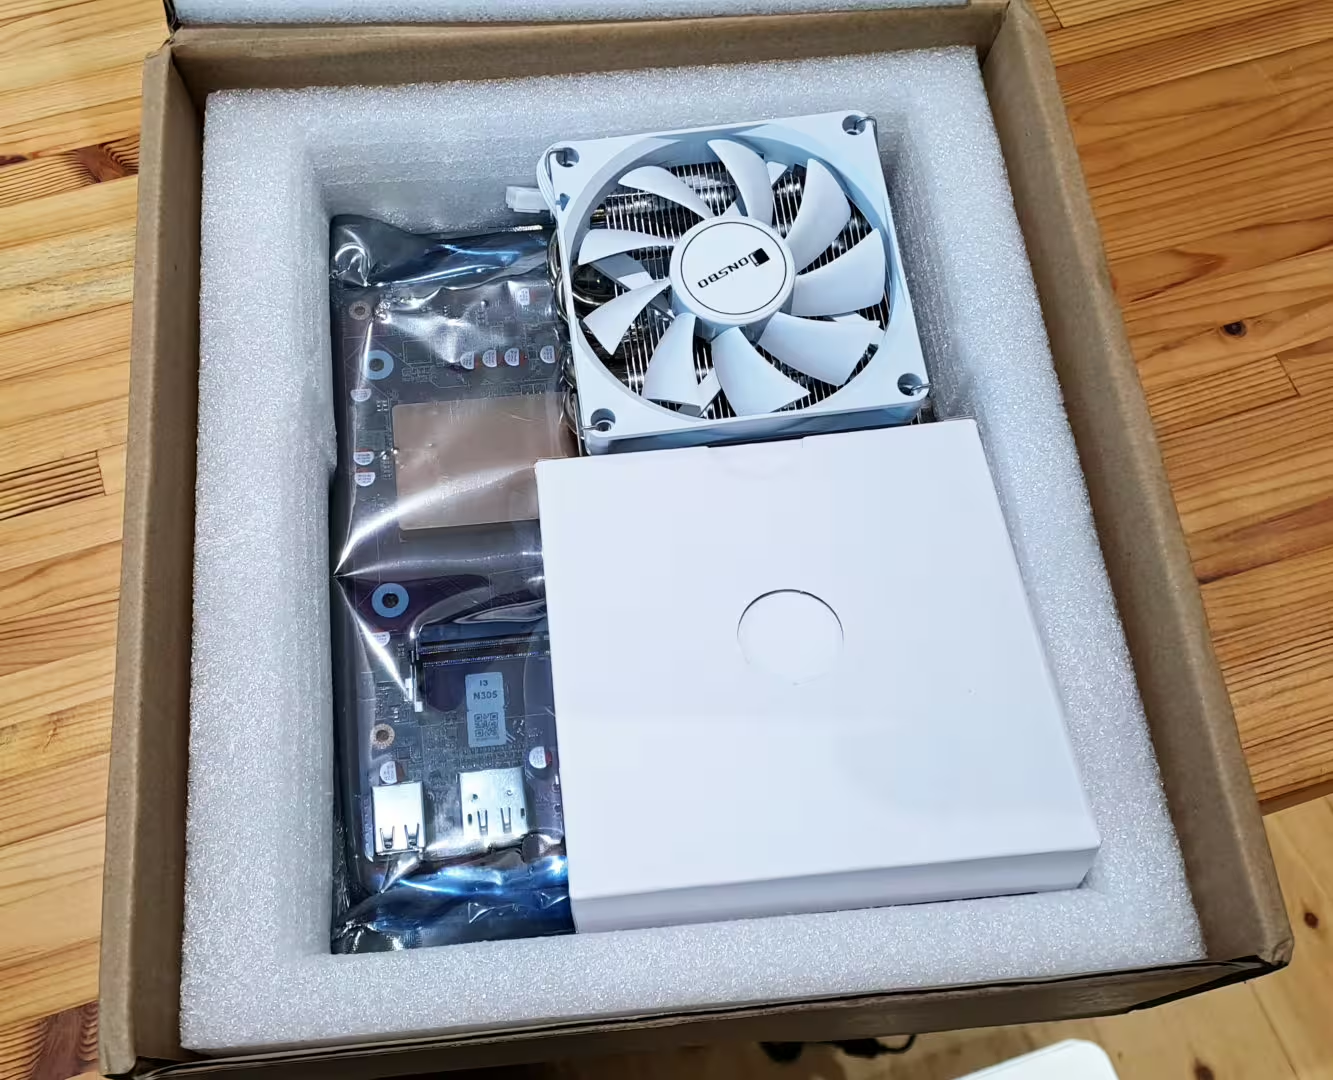
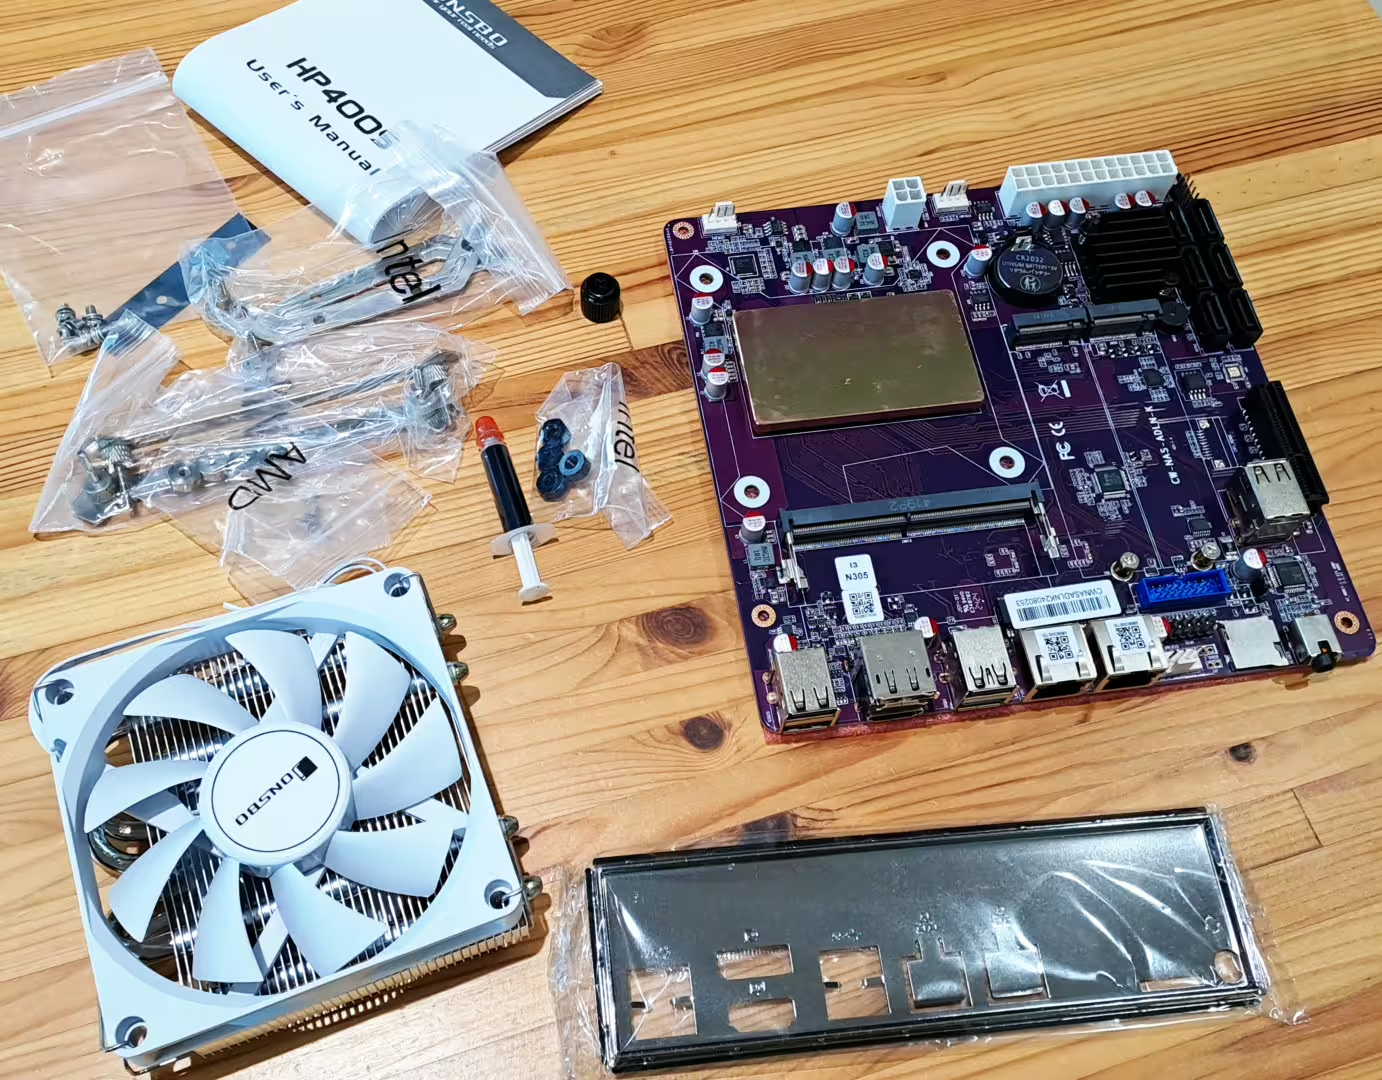
    My what a lot of words! Since I already have the CWWK “Crazy” N100 mini-computer, I obviously hit buy on this near instantly. Not long (and one customs charge) after, this turned up on my doorstep:

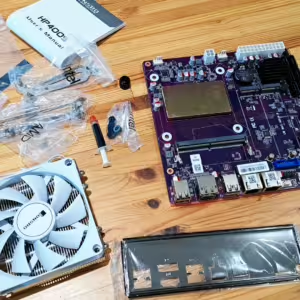
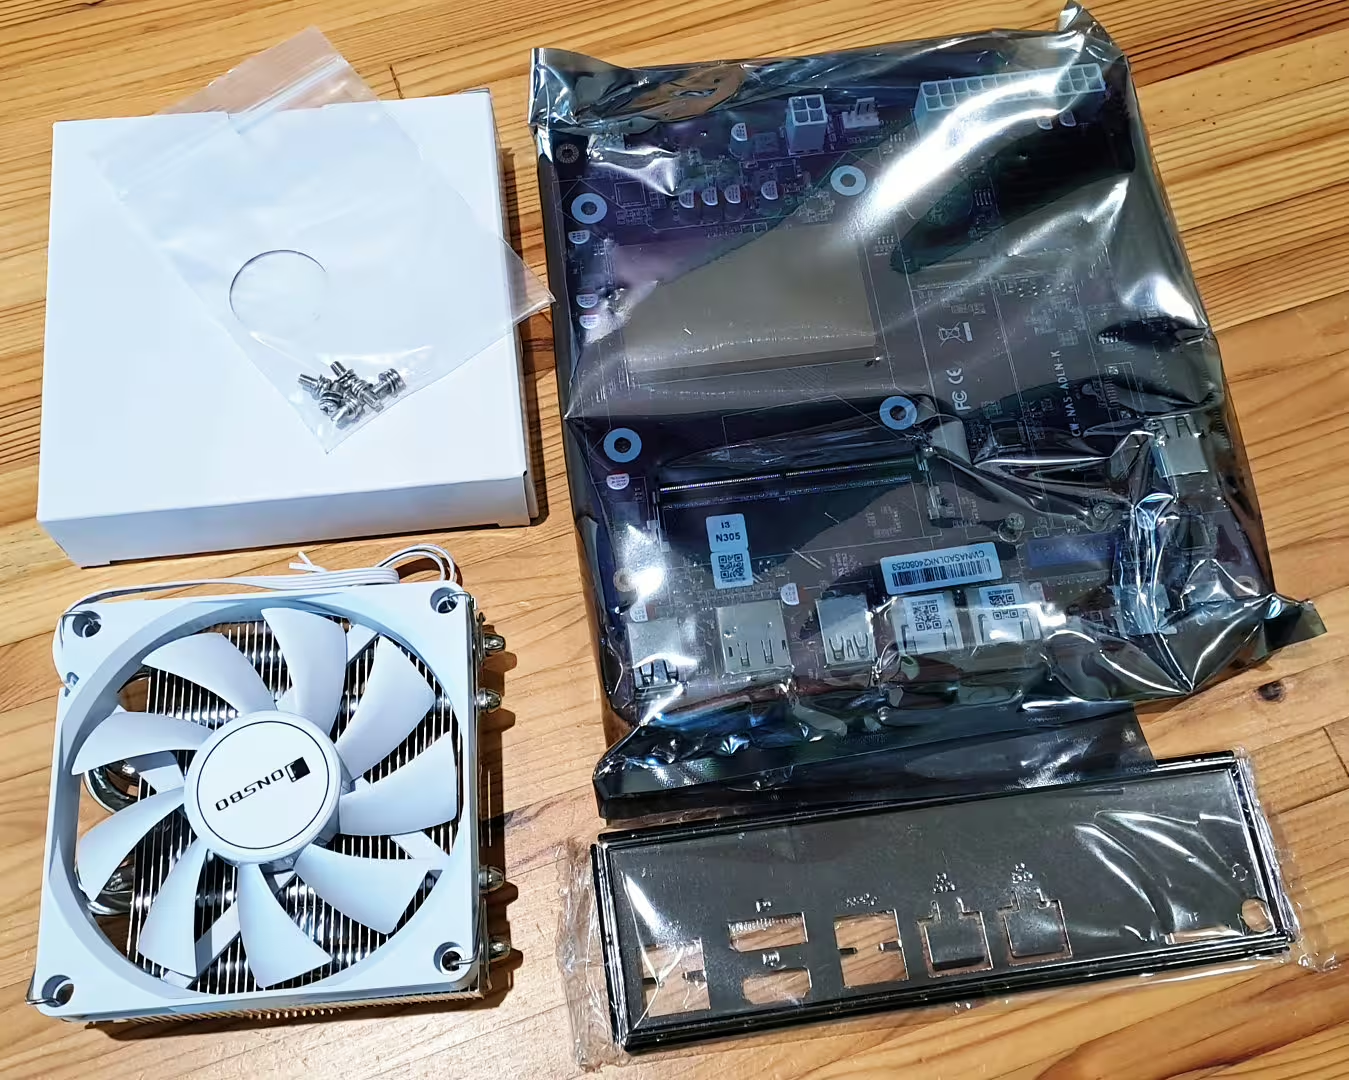
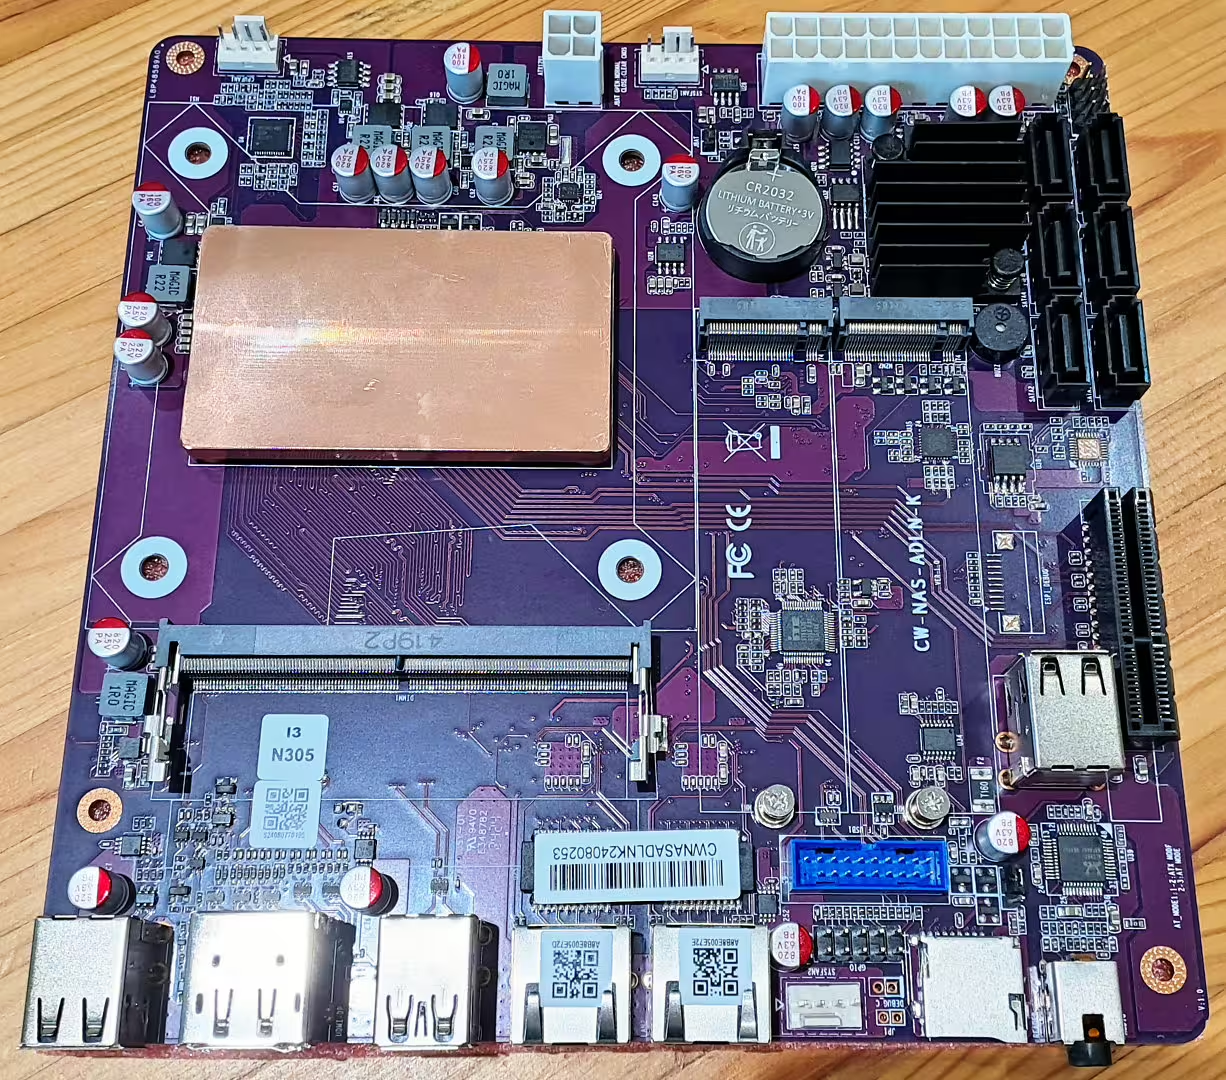
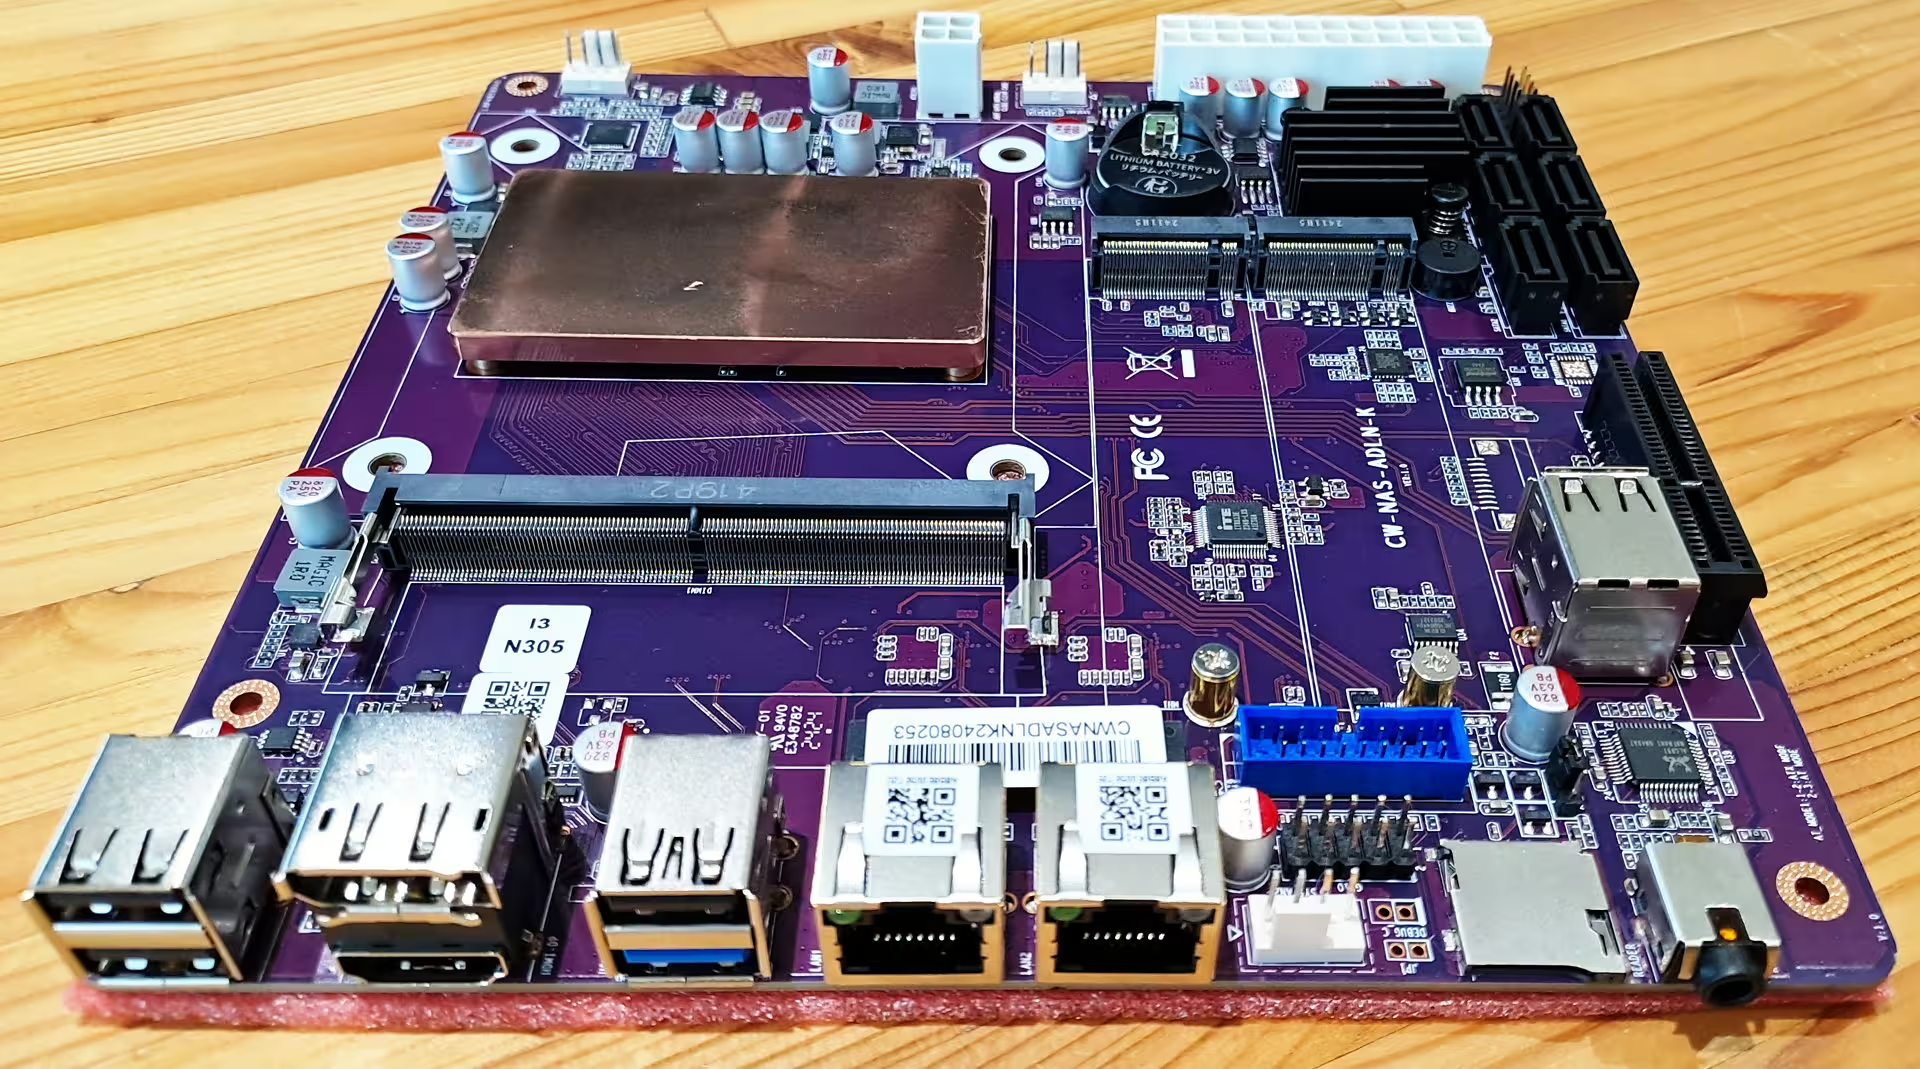
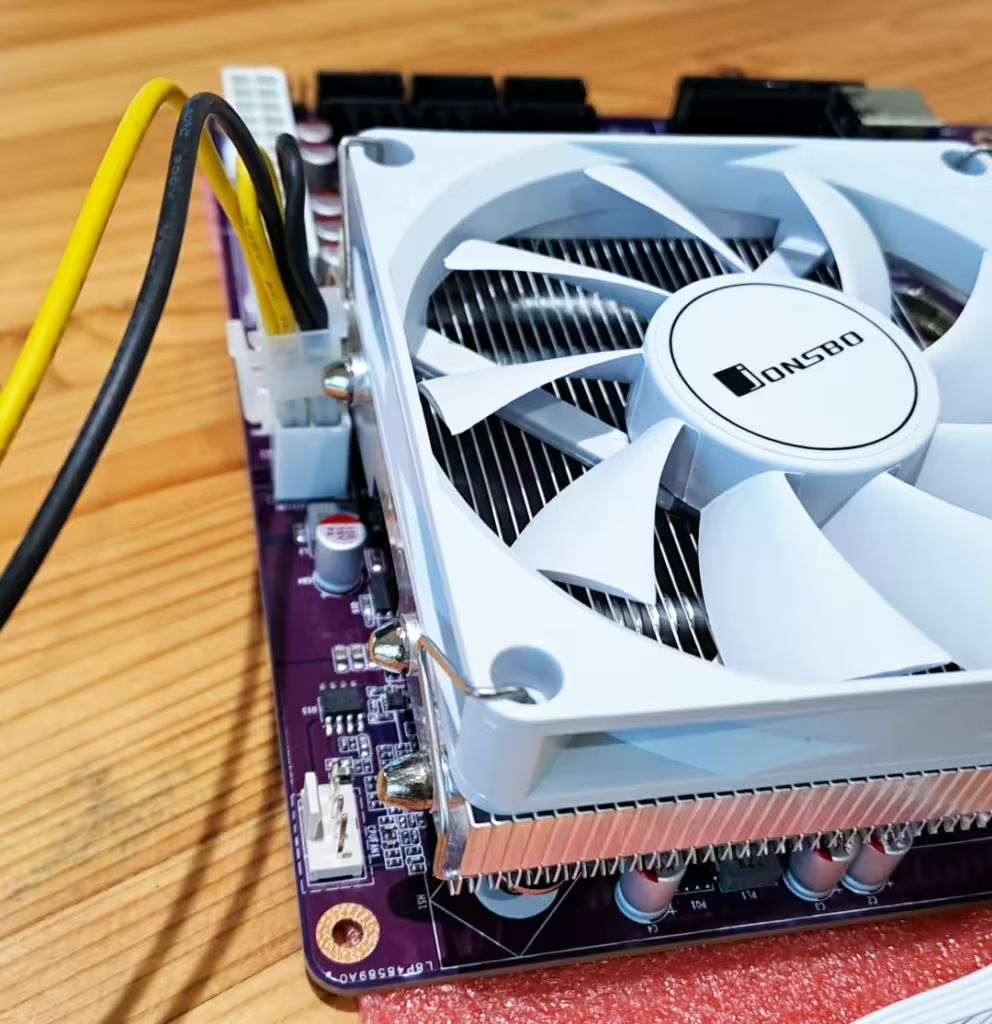
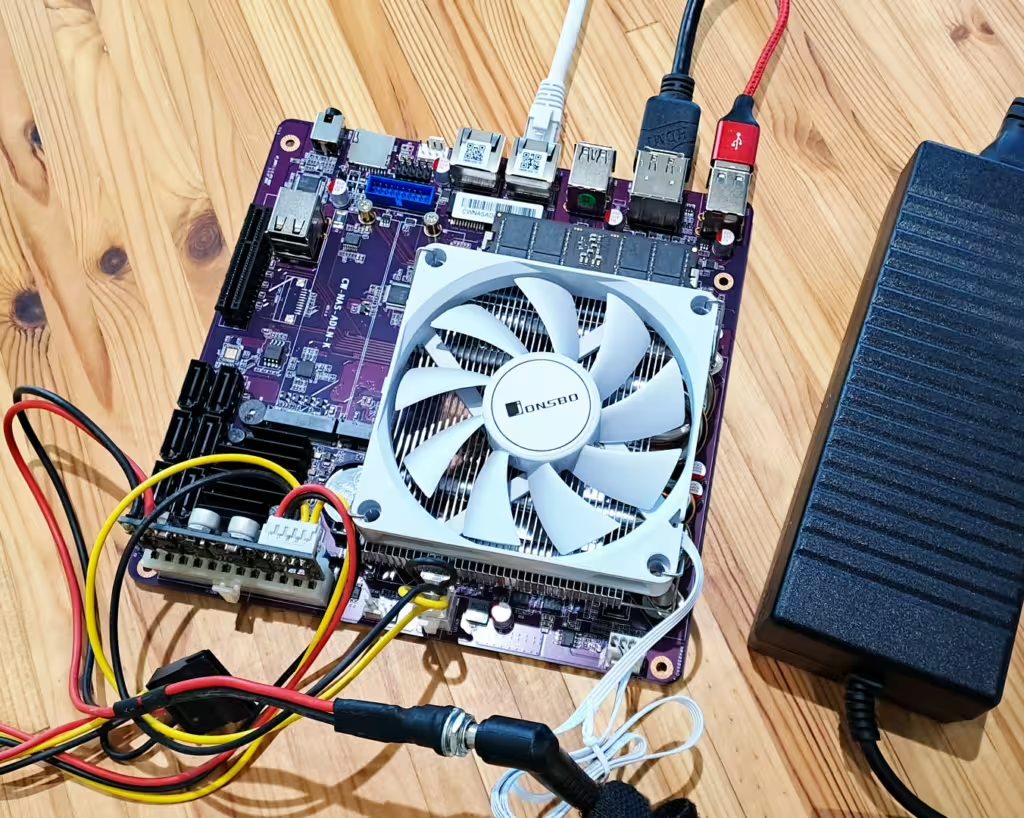
    I love this – it’s my kinda tech. You get a manual … for the cooler, but not for the motherboard. The processor is hidden under a shiny copper block. You get two NVMe ports, 1 PCIe and a bunch of SATA if that’s your thing.

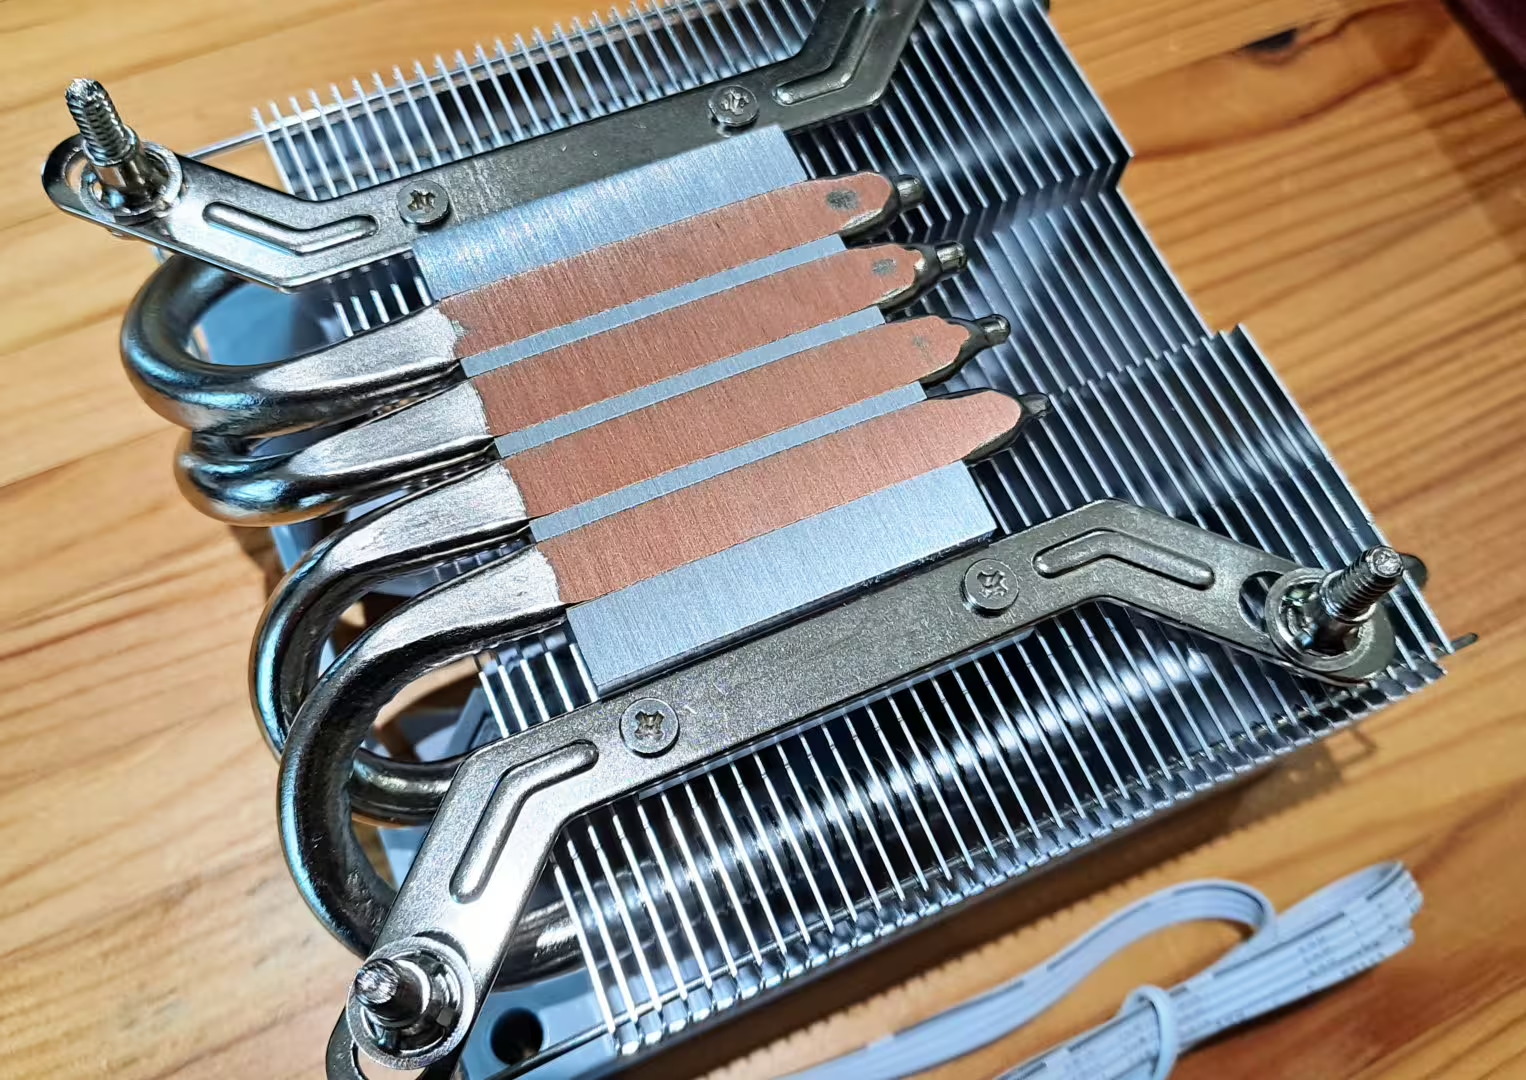
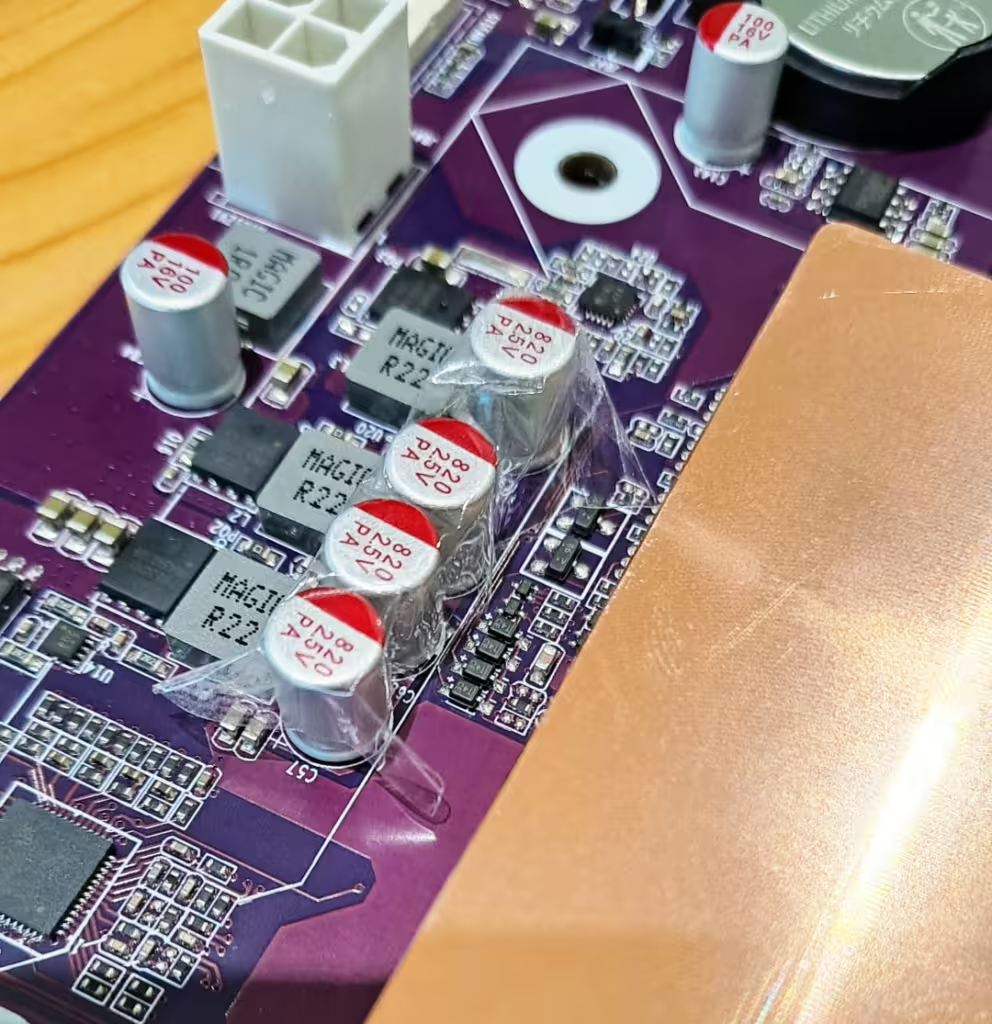
    First challenge – mount the cooler. This is actually not very obvious, I think CWWK bundled this without a lot of thought. It does fit but only really one way around, because the cooler fouls on some capacitors or blocks the power header in other orientations, and you have to figure that for yourself.

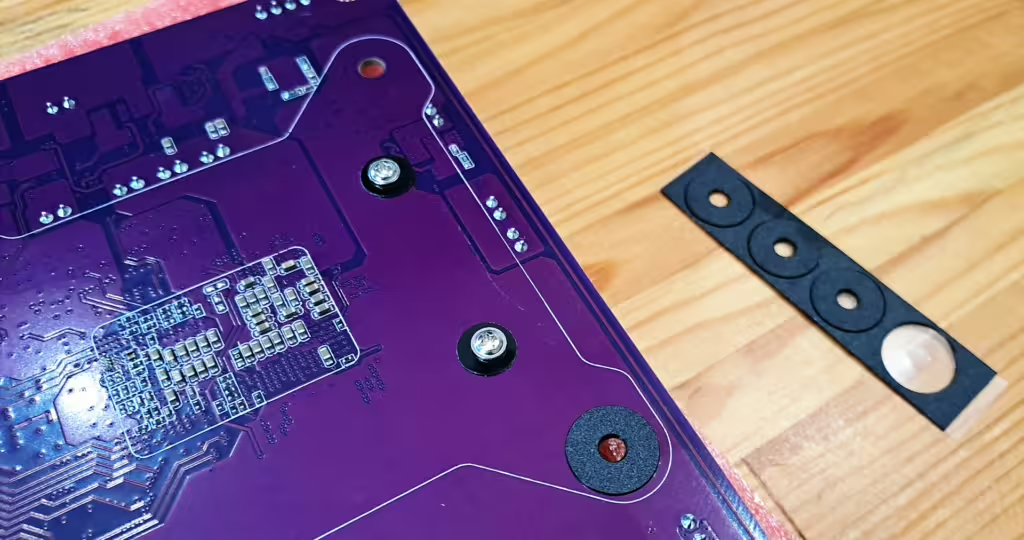
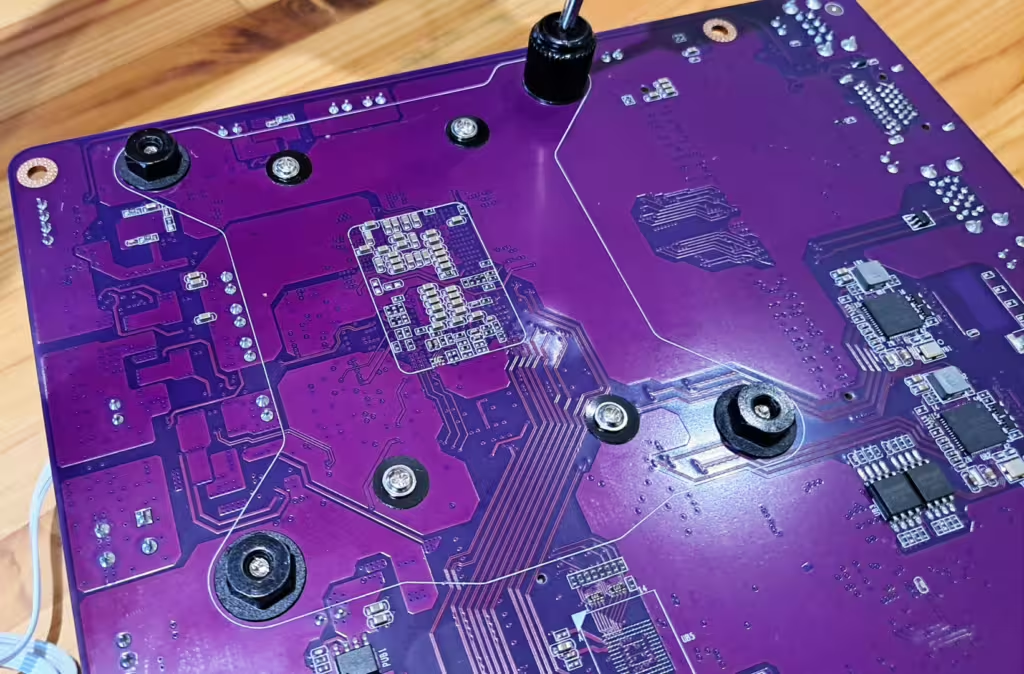
    Even the way around that it does fit it’s almost touching a bunch of capacitors, so I added some tape to insulate. Next up add some insulating pads to the back of the board and install the cooler. There is some thermal paste supplied, which is a nice touch.
    There’s a nifty little tool supplied to help you tighten the nuts. As there’s no metal back-plate here it’s best not to tighten these fully as it bends the board. Thermals aren’t a huge issue for this processor and there is a massive contact surface to the copper spreader anyway, so really not an issue.

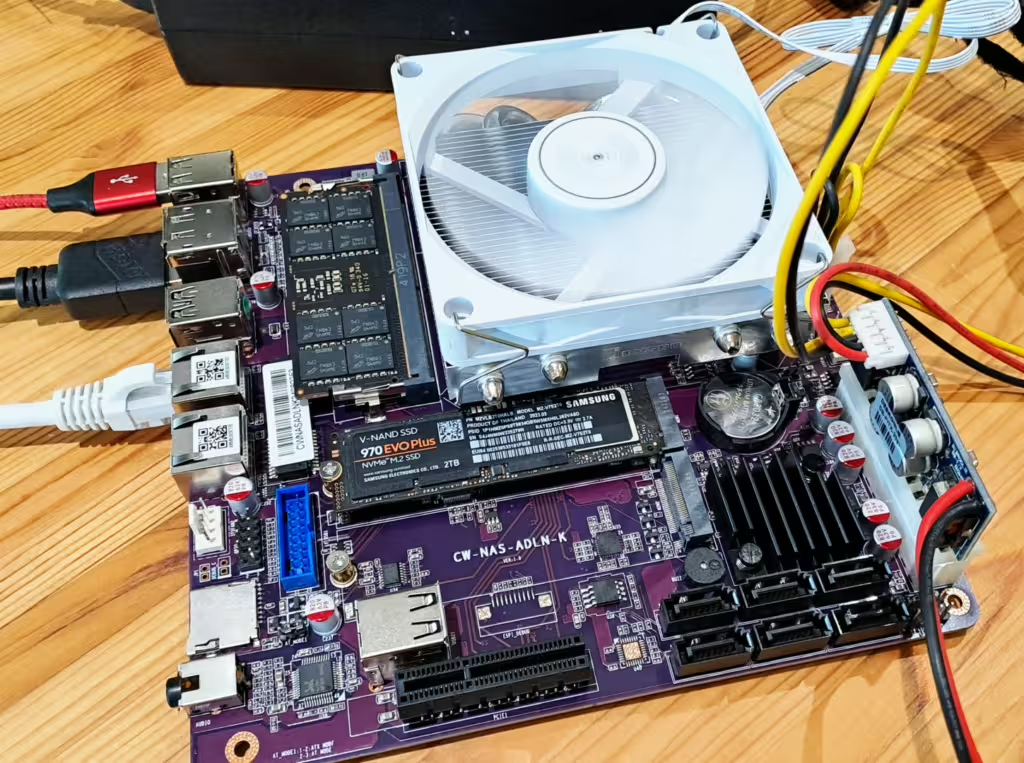
    With the cooler installed, I added a picoPSU and a 32Gb DDR5 stick.

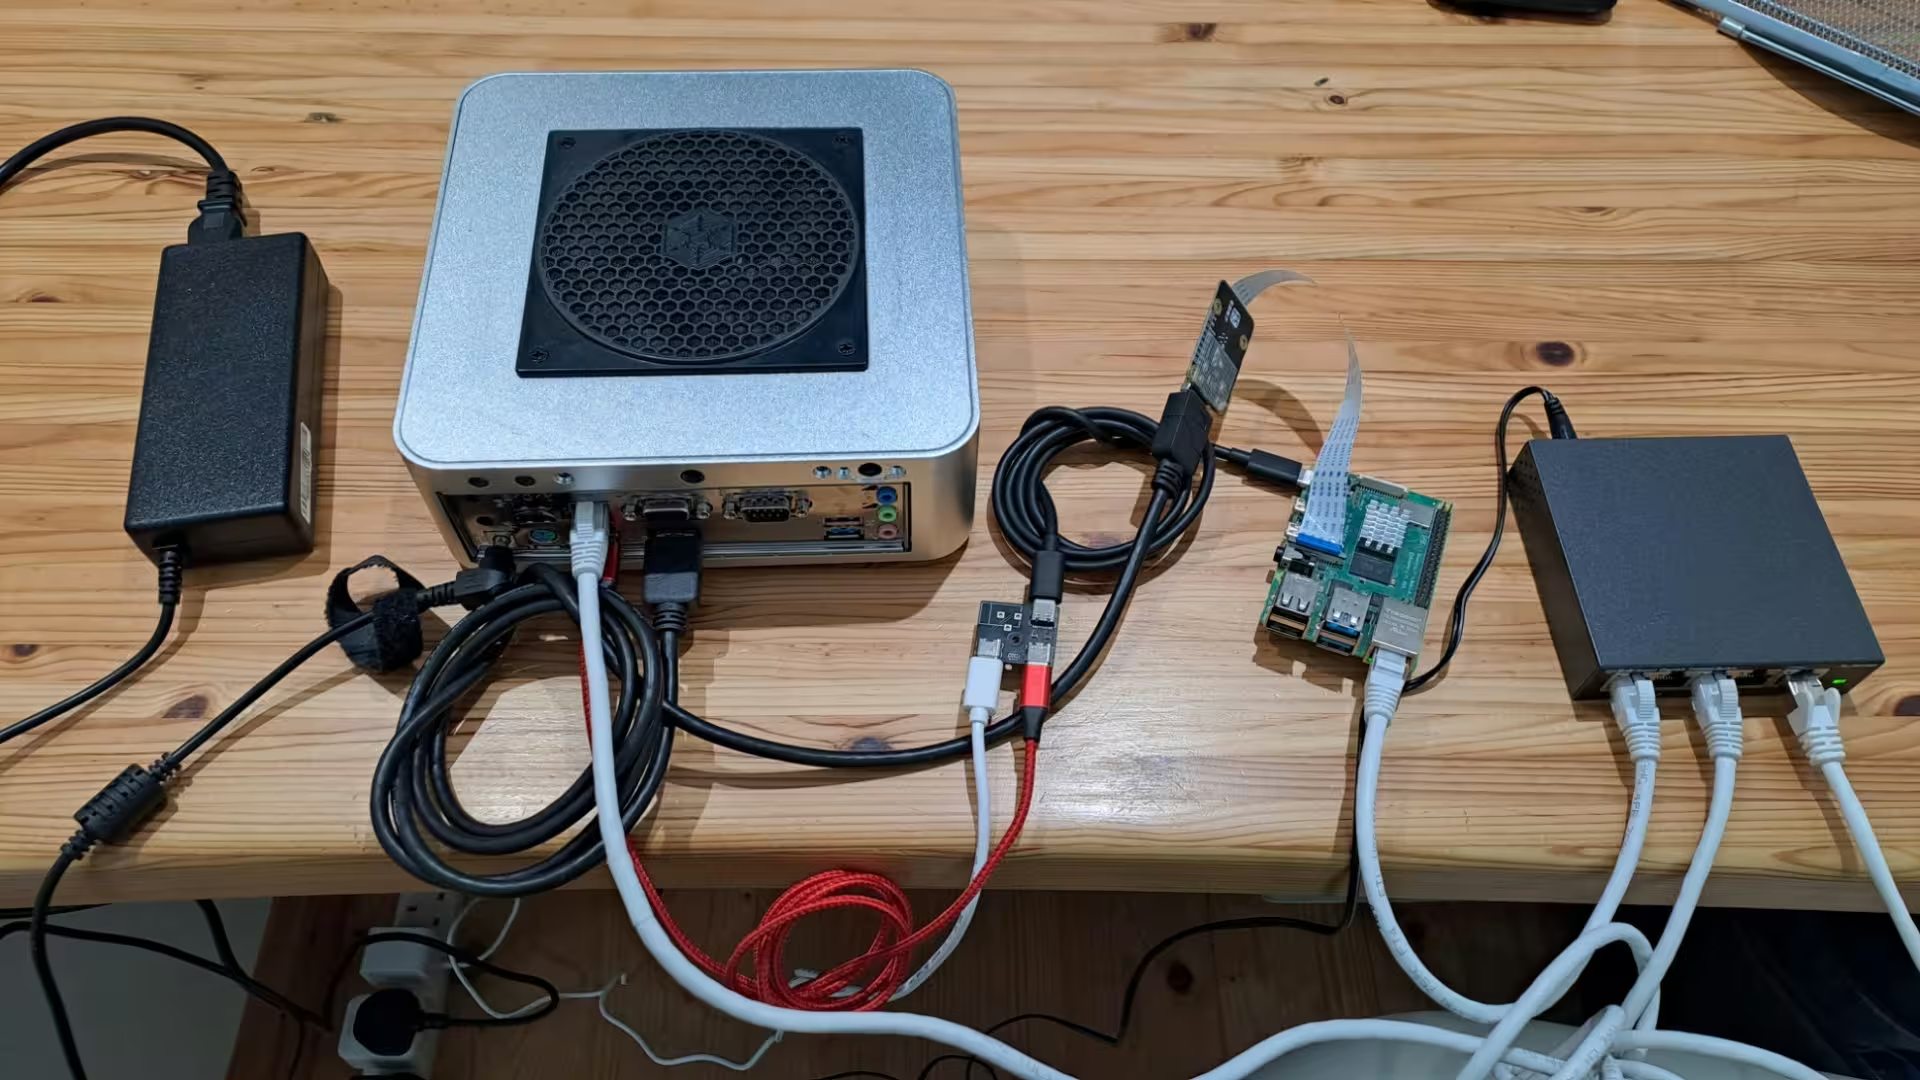
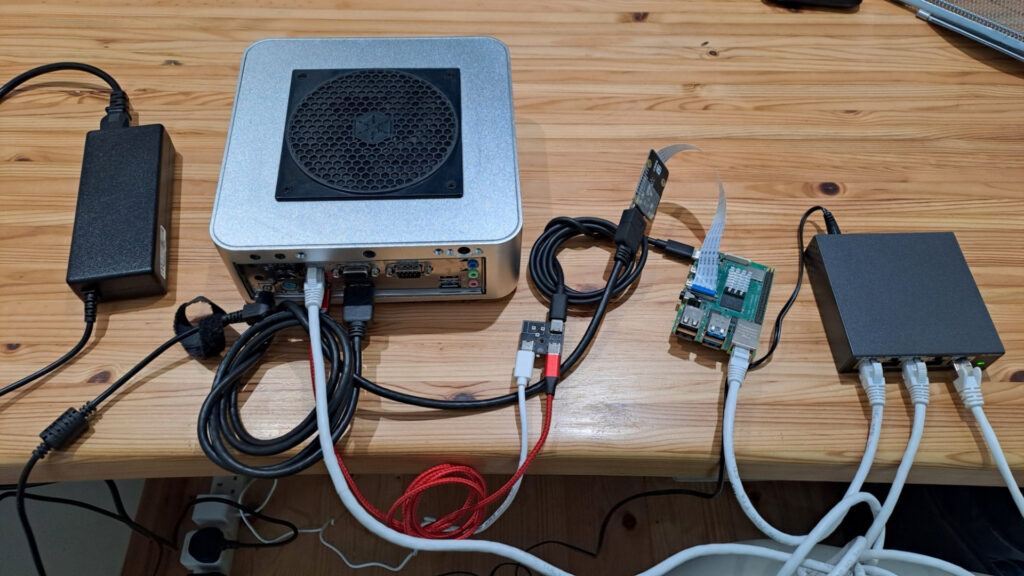
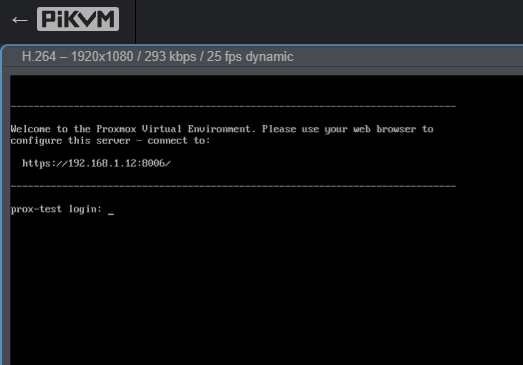
    Popping a 2Tb NVMe drive in and connecting up my PiKVM, I’m ready for a headless install:

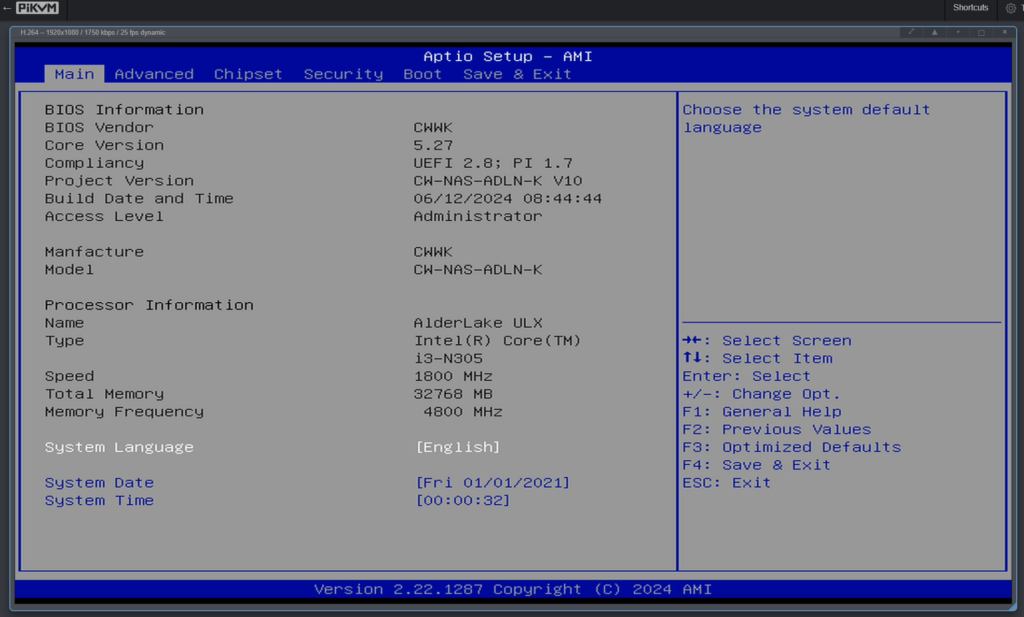
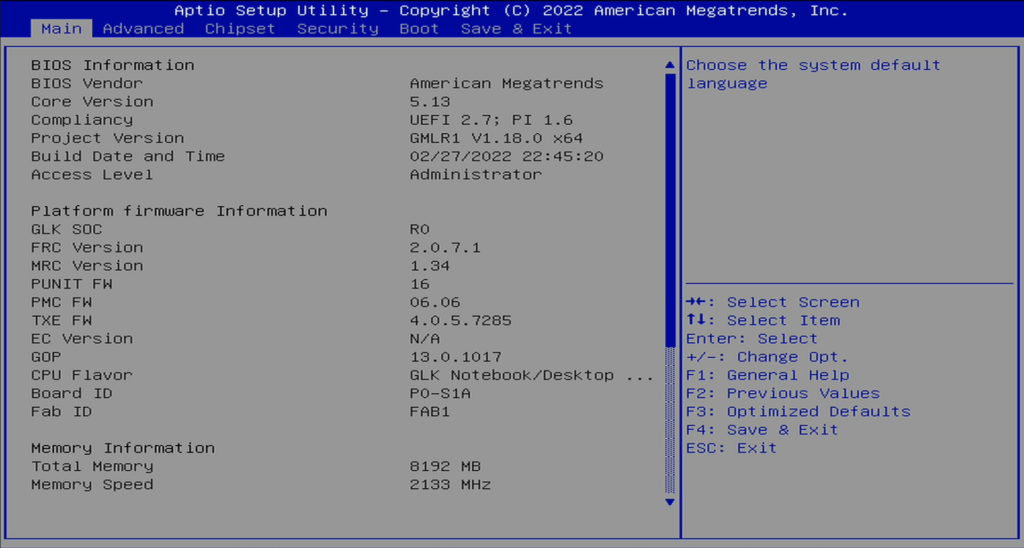
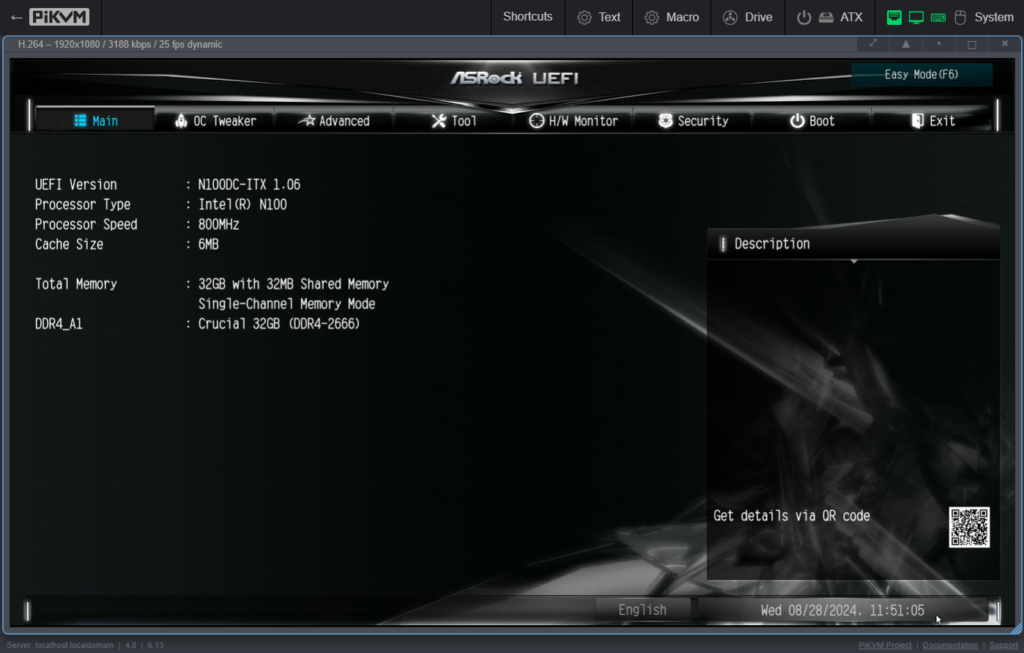
    First boot takes a loooooong time. So much so I thought the board was DOA, but it turns out it’s normal. When you chuck in new memory or reset the CMOS there is a fairly extensive memory training period that takes 2-3 minutes with nothing on the screen. Don’t panic! Eventually we get into the BIOS:

    Now we’re ready for OS install!

    I wanted to link you the board I bought, but it looks like it’s no longer available from the same seller. Searching on AliExpress there are now a LOAD of vendors selling what look to be identical hardware, here is a link to one that’s available with N100 or N305 processor and with or without funky Chinese fans … enjoy!

    *Affiliate link, I get small commission if you buy from this link xxx

  • Mele Quieter 2Q in Proxmox Cluster?

    Mele Quieter 2Q in Proxmox Cluster?

    You might think it a little odd for anyone to get excited about a J4125-based mini-PC in 2024, and you’d be right, but being a couple of generations short of cutting edge doesn’t mean this tiny computer is totally irrelevant.

    There are a few flavours of the Mele Quieter 2Q knocking about but the one on my desk is the model with 8Gb RAM & 128Gb eMMC storage. That’s actually plenty for a basic Windows or Linux install as a useful daily driver, but this PC has a beautiful secret…

    Just pop 4 screws out of the bottom of the standard mini PC and you’ll find there is a very useful and still relevant NVMe slot. Whack in a chunky NVMe SSD and you can use this miniscule, power-sipping PC for a range of purposes:

    Unfortunately there is no similar upgrade path for RAM as it’s soldered on board, but even 8Gb is quite a lot if you don’t run an OS that’s bloated with irrelevant newsfeeds and Angry Birds installs.

    There is a reason I’ve dragged this little wonder-box out of hibernation – I want to take down my main Proxmox node for maintenance and at the moment it’s running quite a few services (including this site). I’m going to use the Mele to make a two-node cluster and migrate some services to it to keep things up and running while I clean up the main box.

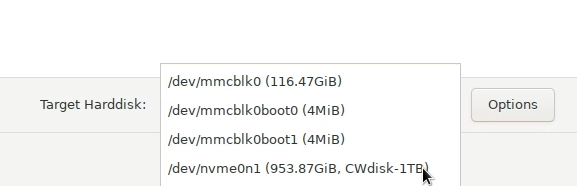
    The Proxmox installer shows the new drive as /dev/nvme0n1. You can see the eMMC device (main chonk and a couple of smaller boot devices):

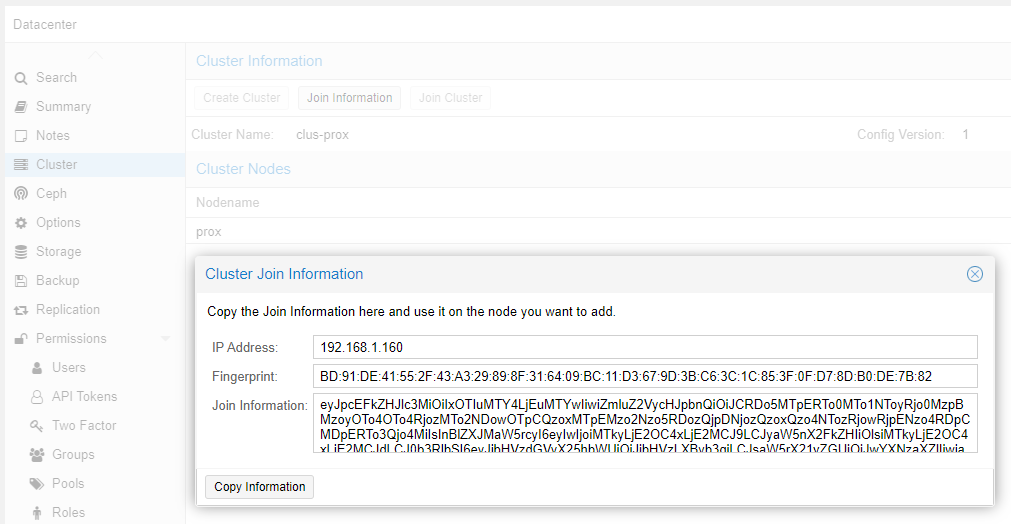
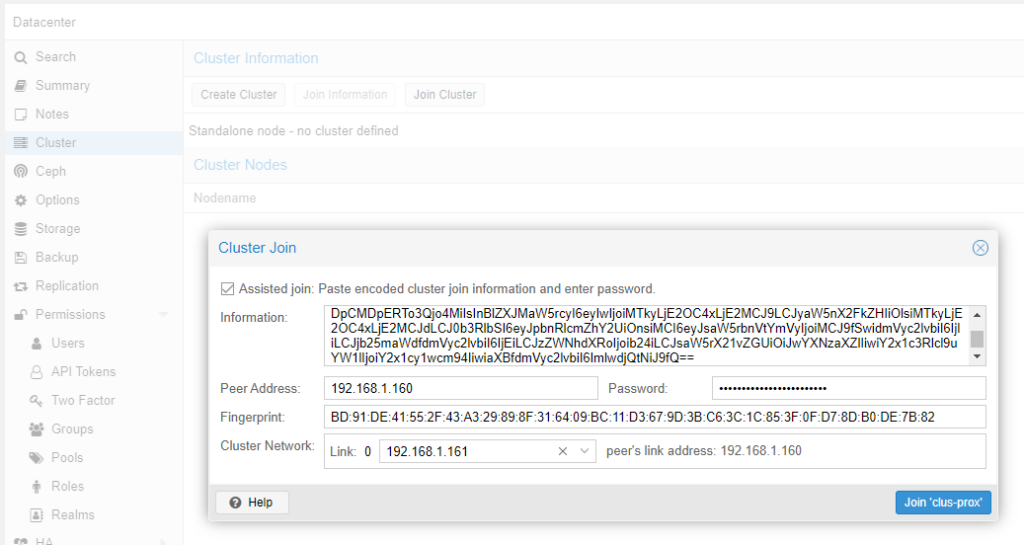
    Install is a breeze as usual, once Proxmox is running I just set up LetsEncrypt to get a certificate, then create a new cluster on the existing Proxmox box, and copy-paste the quick join information from that dialogue to the join dialogue on the new node:

    If you run into any problems with cluster join the first things to check are DNS resolution and the hosts files on each box. If you’re doing something funky like forming a cluster over Tailscale I’d recommend listing every node’s IP in each node’s hosts file. If you’re using a self-signed certificates that are not trusted on all hosts you need to specify the Fingerprint in this dialogue. If you have set up LetsEncrypt to get publicly trusted certs you can leave this blank.

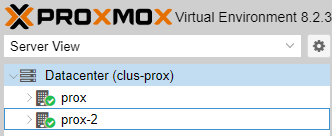
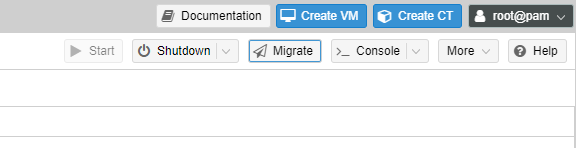
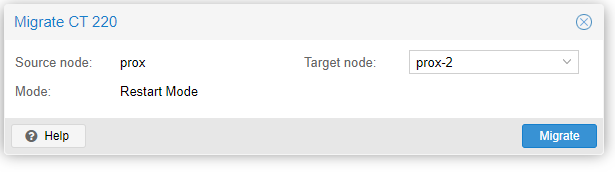
    Nice! That’s my cluster up and running. Now you can manage any node from the UI running on any node, and migrating VMs or containers between nodes is as simple as hitting the Migrate button here:

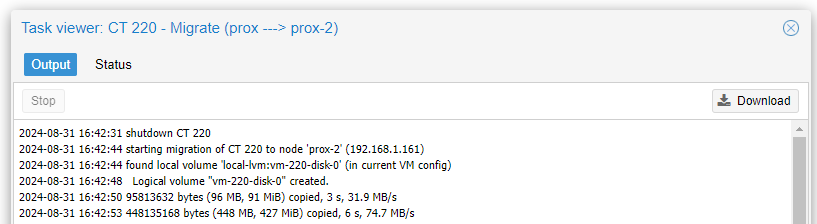
    That’s it! Fun fact – VM migration is pretty much live – the VM continues running right until it switches to the new node, so you get virtually no downtime. LXC containers, though, have to be shut down to migrate so expect some outage while the storage is migrated across.

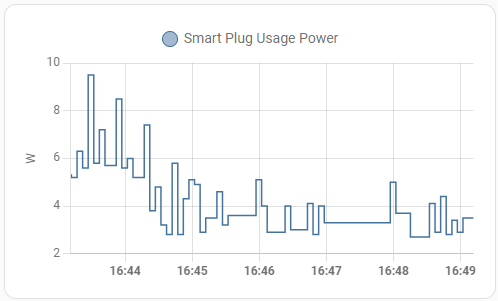
    But now the REALLY impressive thing about the Mele Quieter 2Q – here is the power consumption, measured at the wall. The peak shows the container being migrated over, but it settles under 4W average:

    If you’re going to run something 24/7, it really ought to use as little power as humanly possible, and here the little Mele shows its true strength!

    Final word to the wise

    Proxmox has great support for clustering and resource migration. One thing you need to know though is that a two node cluster isn’t really a cluster and if one node goes down many things stop working. This is because the quorum system used to maintain state between nodes needs a majority (>50%) of nodes online to reach consensus for changes. In a two node cluster one node isn’t enough for this, so the cluster configuration goes read-only. If you hit this situation you can work around by using this command to reduce the required node votes to reach quorum:

    A two-node cluster can also be used to easily migrate VMs between two servers you don’t actually want to cluster in long term – you can actually form the cluster, transfer the VMs and break the cluster afterwards. This is a really easy way to perform hardware upgrades with minimal downtime on a standalone Proxmox install.

    The Mele 2Q seems to be discontinued, but you can check out the new version which has an N100 processor (should be pretty good bang/buck)

    *Affiliate link, I get a small commission if you buy which I will probably spend on cat toys and single board computers.

  • Are you getting enough from your N100 SBC?

    Are you getting enough from your N100 SBC?

    Did you buy yourself a cute little CWWK Crazy? Trying to use it as a server? Do you get the feeling that it’s not quite as powerful as you would expect from the benchmark figures? Well the N100 is an awesome CPU …. but there’s a good reason you’re not getting as much CPU power as benchmarks suggest you should!

    Let me show you why… First install powercap-utils. That’ll help us understand and modify the CPU power settings under Linux:

    apt install powercap-utils -y

    Now let’s see what the default power limits are set to.

    root@prox:~# powercap-info -p intel-rapl
    enabled: 1
    Zone 0
      name: package-0
      enabled: 1
      max_energy_range_uj: 262143328850
      energy_uj: 429781126
      Constraint 0
        name: long_term
        power_limit_uw: 6000000
        time_window_us: 27983872
        max_power_uw: 6000000
      ...

    From the Zome 0 Constraint 0 you can see that the long term power limit is set to 6W.

    Now let’s see what happens to the CPU under sustained load. On my Proxmox setup that’s already running some containers that are reasonably CPU heavy (so already up against the power limit) a 7z benchmark gives us this:

    Intel(R) N100 (B06E0)
    CPU Freq: - - - - - - - - -
    
    RAM size:   31842 MB,  # CPU hardware threads:   4
    RAM usage:    882 MB,  # Benchmark threads:      4
    
                           Compressing  |                  Decompressing
    Dict     Speed Usage    R/U Rating  |      Speed Usage    R/U Rating
             KiB/s     %   MIPS   MIPS  |      KiB/s     %   MIPS   MIPS
    
    22:       2945   177   1621   2866  |      33225   210   1349   2835
    23:       2461   167   1498   2508  |      32143   206   1351   2781
    24:       2593   184   1514   2788  |      29391   193   1336   2580
    

    On the compression benchmark we’re getting about 2600 MIPS. Even with other stuff running that’s not a lot of spare CPU capacity. In another session, let’s check the CPU frequency:

    root@prox:~# cat /proc/cpuinfo | grep Hz
    cpu MHz         : 1200.011
    cpu MHz         : 1200.013
    cpu MHz         : 1199.967
    cpu MHz         : 1200.036

    You can see here the CPU is clocking right down 1.2 GHz to stay inside that 6W power limit. Let’s try doubling that limit:

    powercap-set -p intel-rapl -z 0 -c 0 -l 12000000

    Instantly we can see the base clock goes up to a respectable 2.9GHz

    root@prox:~# cat /proc/cpuinfo | grep Hz
    cpu MHz         : 2900.065
    cpu MHz         : 2900.021
    cpu MHz         : 2900.020
    cpu MHz         : 2900.002

    And we’re now getting 11000 MIPS! A huge improvement!

    Intel(R) N100 (B06E0)
    CPU Freq: - - - - - - - - -
    
    RAM size:   31842 MB,  # CPU hardware threads:   4
    RAM usage:    882 MB,  # Benchmark threads:      4
    
                           Compressing  |                  Decompressing
    Dict     Speed Usage    R/U Rating  |      Speed Usage    R/U Rating
             KiB/s     %   MIPS   MIPS  |      KiB/s     %   MIPS   MIPS
    
    22:      11163   279   3894  10860  |     116822   314   3172   9967
    23:      11398   299   3879  11613  |     111820   306   3160   9675
    24:      10963   298   3954  11788  |     112025   312   3155   9834

    So why is the default power limit so low? Well for a system like the CWWK Crazy that’s intended to be fanless the long term power limit is set pretty low to stop it getting too hot. It’s that simple. And in fact if you run it fanless with a high power limit you will find it gets uncomfortably hot after a while (and potentially will then thermally throttle anyway).

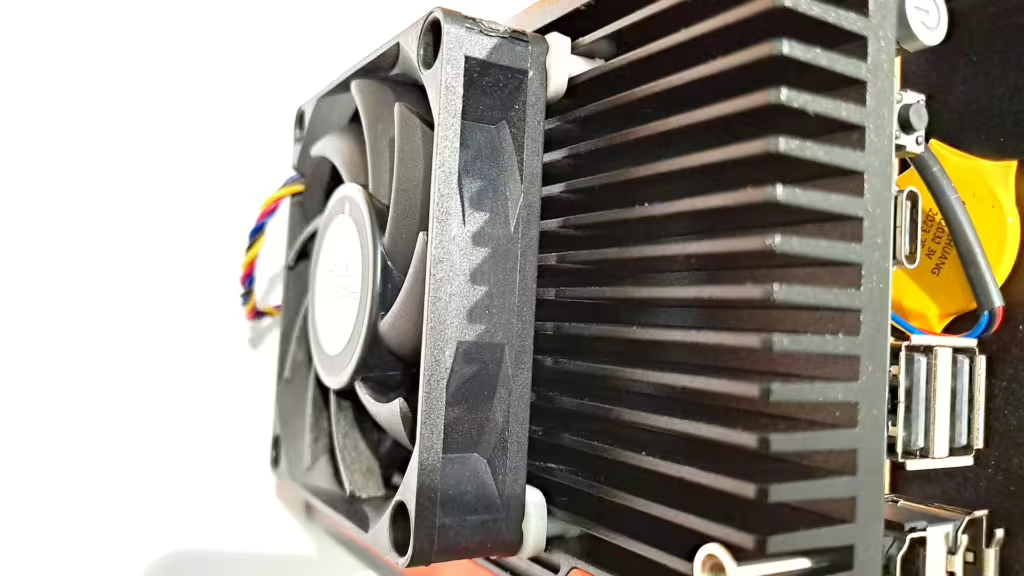
    The addition of one single tiny 80mm fan on the front is all it takes to turn your fanless but very power-limited system into a still-near-silent but way more capable machine. In fact the CWWK Crazy comes with fan headers and cables, and screw mountings for two 80mm fans. I’ve installed a single fan on mine by squishing some small grommets into the cooler fins then screwing the fan into them. It runs pretty well silent and barely gets warm to the touch even under full load:

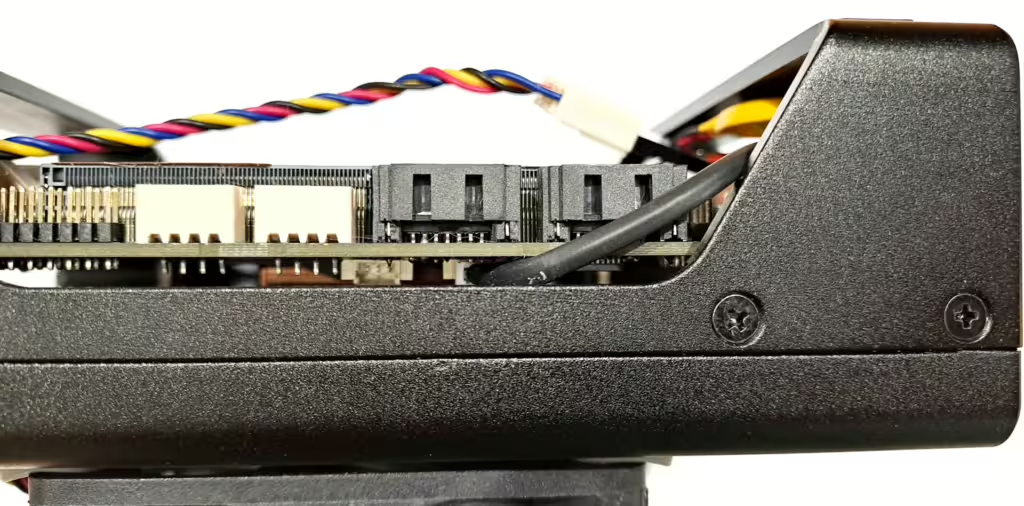
    Hooking up the supplied cable to the fan header is a little bit fiddly though!

    Last words … the command above is not persistent and your power limit will be reset after a reboot. To make it persistant, edit your crontab:

    Then add this line at the bottom:

    @reboot                      /usr/bin/powercap-set -p intel-rapl -z 0 -c 0 -l 12000000 > /dev/null

    Reboot and test, you should be good to go.

    Not got a CWWK Crazy yet? Grab one now!

  • ASRock N100DC-ITX Proxmox Install

    ASRock N100DC-ITX Proxmox Install

    Hello! My name is Roving Climber and I’m a SBC / mini-ITX addict. If you’re reading this you might have the same problem. Symptoms can include a news-feed packed with single-board computers, a collection of every Raspberry Pi ever made, and quite possibly one or more ASRock mini-ITX boards in your possession.

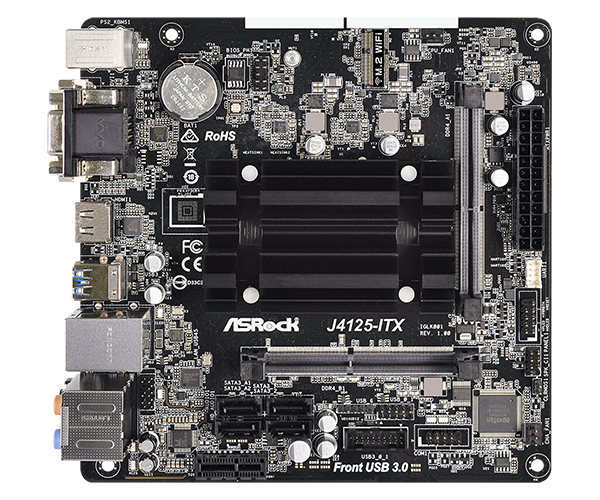
    I’ve built stuff around the ASRock J4125 in the past, it’s an incredible board for a low-power x86 build, and I also have an ASRock J5040 running as my Proxmox Backup Server. Last year the N100DC-ITX came out and I just had to grab one. The stats from CPUBenchmark looked pretty promising … nearly twice as much processing power for a lower TDP. As we all know TDP is a pretty meaningless number these days, but definitely worth a look.

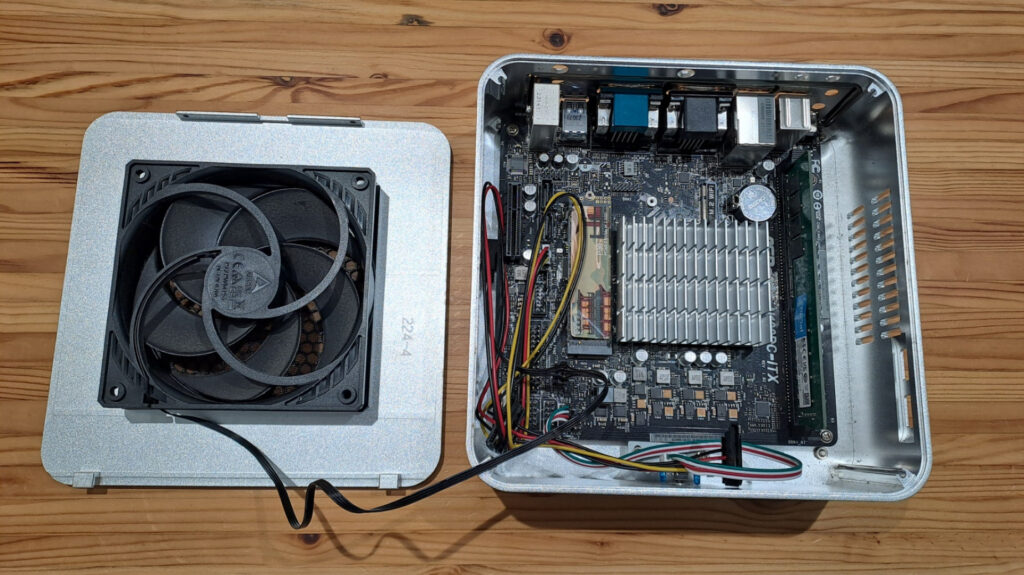
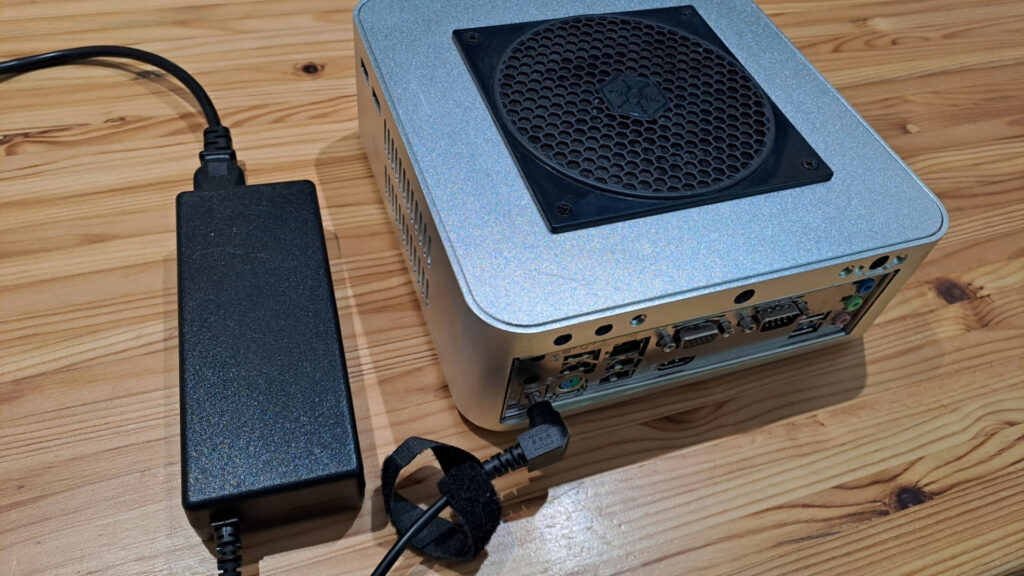
    Here’s the board stuffed into my kinda DIY butchered mini case. The CPU is soldered in and comes with a heatsink pre-installed. I’ve chucked a 32Gb stick of RAM in there and a SSD that was left over after upgrading my CWWK Crazy.

    While it’s a standard mini-ITX form factor, this board has a special trick. If you look closely you’ll see there are no power headers on the board. In fact the N100DC-ITX has a barrel power connector on the back and takes direct 19V DC in from a standard laptop power brick.

    That in itself is pretty cool, because a lot of the time for these mini-ITX boards I would be using a PicoPSU anyway, so having that onboard is a tidy solution. You get power headers straight off the board to power SATA hard drives.

    So let’s get this thing built!

    Now my desk is already full of junk, so I’m going to use a PiKVM setup to build this remotely. I’m also going to run the box off a Salus SP600 smart plug which gives me both remote power control and also power monitoring so we can see how much juice this board drinks.

    Now, if you’re using the default PiKVM setup, the default resolution (defined over EDID to the connected PC) is 1280×720. That doesn’t play very well with the UEFI BIOS or the Proxmox GUI installer, so it’s easiest to switch it to 1080p before you start.

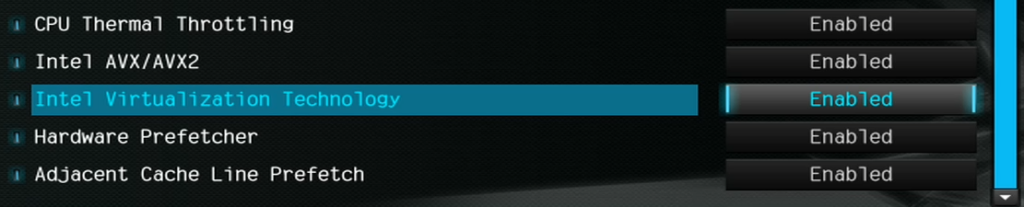
    First thing to do is make sure that virtualization is turned on, should normally be on by default:

    I’ll probably want to use Wake-on-LAN at some point so let’s make sure that’s enabled:

    If you plan to use VT-d to share PCIe device[s] between VMs make sure that’s switched on also (although in my experience it’s not a reliable solution and most of the time you’re better off doing the same thing in LXC which is a much better way to share resources like GPU):

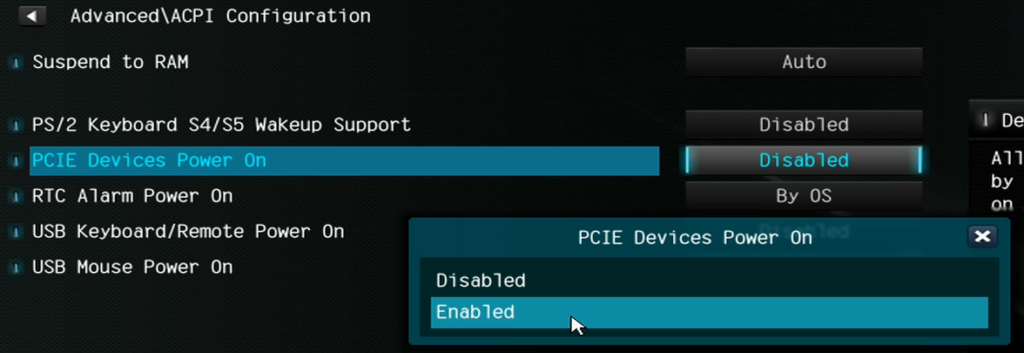
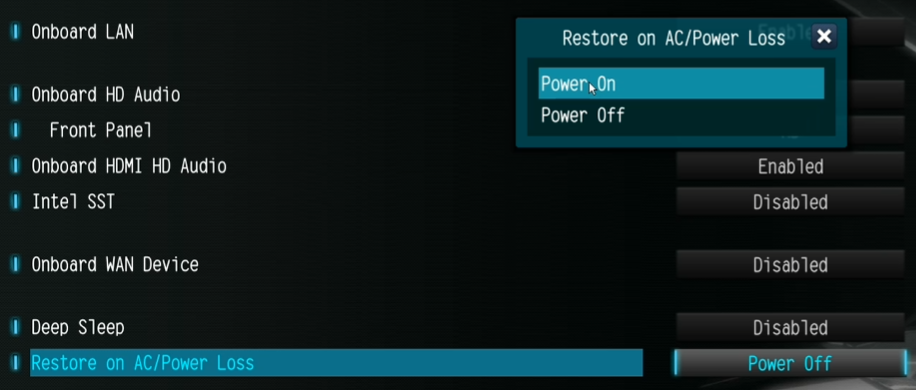
    I’d also advise changing Restore on AC/Power Loss to enabled, this makes sure that the box starts automatically if there is a power outage, which also gives you the ability to hard reset via the smart switch without having to press the power button:

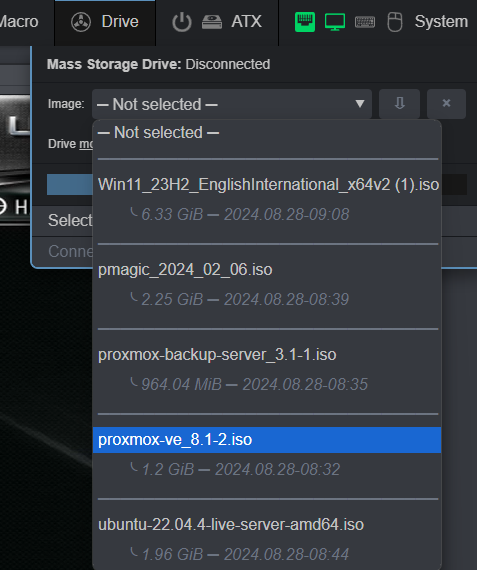
    Now in PiKVM let’s mount the ISO for Proxmox installer:

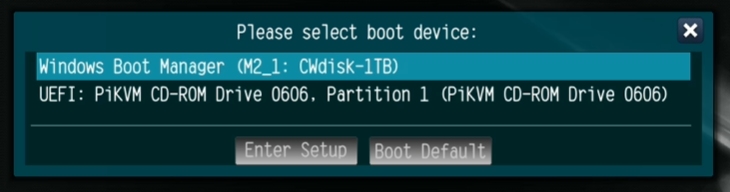
    Reboot and hit F11 on start to bring up the boot menu:

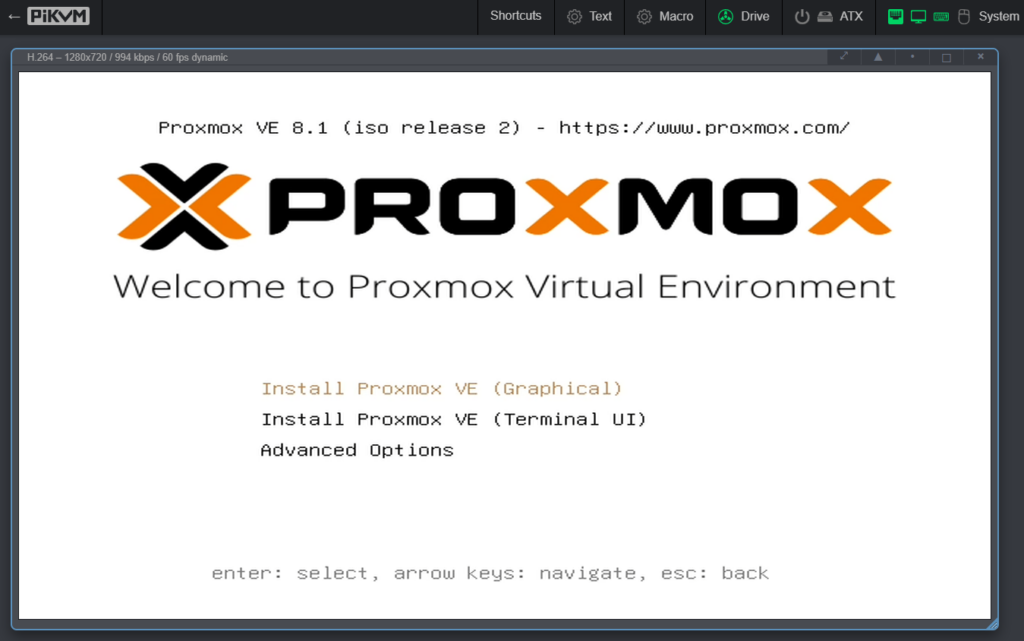
    And we’re straight into the Proxmox installer, yay!

    Installing is pretty much Next, Next, Finish (provided you are happy to wipe whatever disk is in there), so I won’t show you every step:

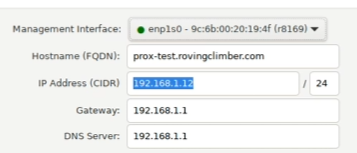
    There’s a clue in the network configuration that we’ll pick up on later … the on-board NIC is shown as r8169.

    Just look at all this lovely stuff you get with Proxmox:

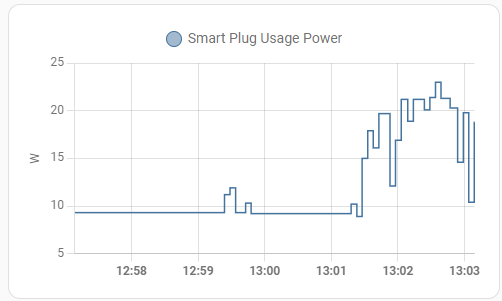
    Now let’s take a quick look at power consumption:

    The whole system is idling around 9W measured at the wall. That’s not quite in the realm of the J4125 but it’s pretty good for any PC!

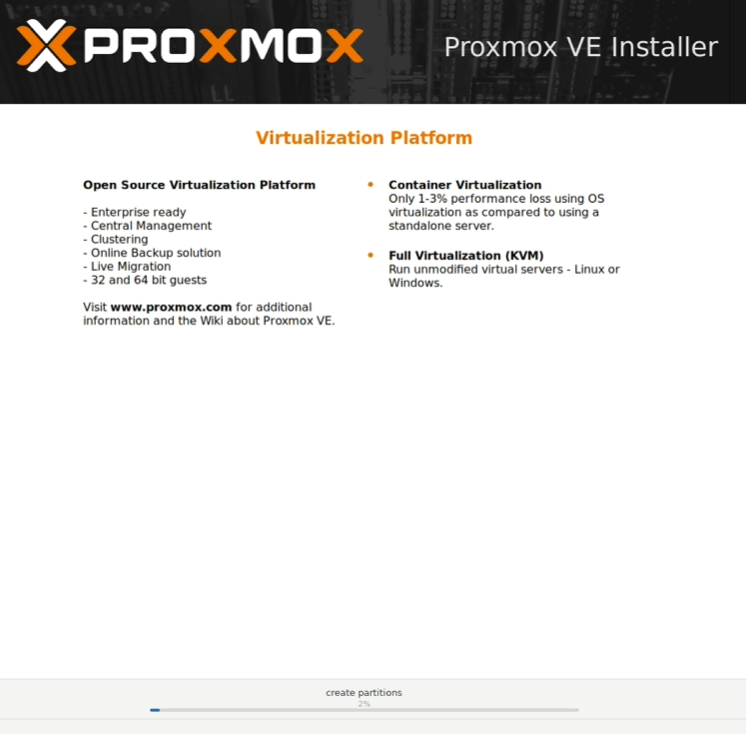
    In a couple of minutes the installer completes and Proxmox reboots:

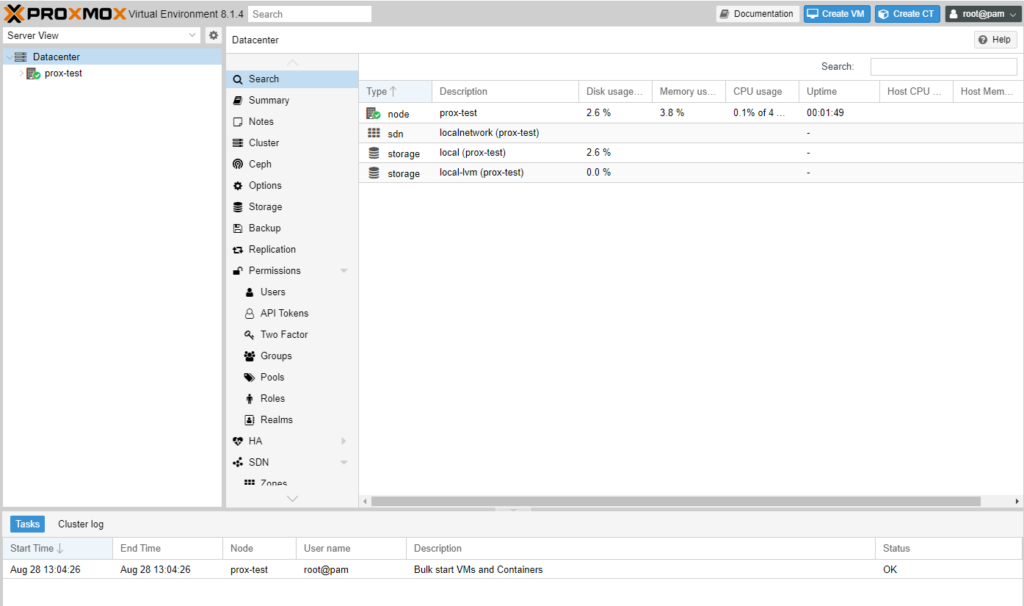
    And there we are, Proxmox up and running!

    Now I mentioned earlier something about the onboard NIC … the N100DC-ITX has an onboard Realtek RTL 8111H, first thing I would recommend is to jump on my other blog post about that, because the default driver that Debian uses works but can cause issues, and you will tear your hair out trying to fix it if you run into that!

    Another slight “annoyance” if you’re using Proxmox just for homelab and you don’t have a subscription (yet) is that by default aptitude is set up to use the enterprise package repositories, which won’t work without a subscription key. You can fix this quickly like this:

    sed -e '/deb/ s/^#*/#/' -i /etc/apt/sources.list.d/pve-enterprise.list
    sed -e '/deb/ s/^#*/#/' -i /etc/apt/sources.list.d/ceph.list
    echo 'deb http://download.proxmox.com/debian/pve bookworm pve-no-subscription' | tee -a /etc/apt/sources.list
    echo 'deb http://download.proxmox.com/debian/ceph-reef bookworm no-subscription' | tee -a /etc/apt/sources.list.d/ceph.list

    Now you should be able to update without errors:

    root@prox-test:~# apt update
    Hit:1 http://security.debian.org bookworm-security InRelease
    Hit:2 http://ftp.uk.debian.org/debian bookworm InRelease
    Hit:3 http://ftp.uk.debian.org/debian bookworm-updates InRelease
    Get:4 http://download.proxmox.com/debian/pve bookworm InRelease [2,768 B]
    Get:5 http://download.proxmox.com/debian/ceph-reef bookworm InRelease [2,738 B]
    Get:6 http://download.proxmox.com/debian/pve bookworm/pve-no-subscription amd64 Packages [336 kB]
    Get:7 http://download.proxmox.com/debian/ceph-reef bookworm/no-subscription amd64 Packages [42.0 kB]
    Fetched 384 kB in 2s (242 kB/s)
    Reading package lists... Done
    Building dependency tree... Done
    Reading state information... Done
    146 packages can be upgraded. Run 'apt list --upgradable' to see them.
    root@prox-test:~# apt upgrade
    Reading package lists... Done
    Building dependency tree... Done
    Reading state information... Done
    Calculating upgrade... Done
    The following NEW packages will be installed:
      proxmox-firewall proxmox-kernel-6.5.13-6-pve-signed proxmox-kernel-6.8 proxmox-kernel-6.8.12-1-pve-signed
      pve-esxi-import-tools python3-pyvmomi
    The following packages will be upgraded:
      base-files bash bind9-dnsutils bind9-host bind9-libs bsdextrautils bsdutils ceph-common ceph-fuse curl
      distro-info-data eject fdisk gnutls-bin grub-common grub-efi-amd64 grub-efi-amd64-bin grub-efi-amd64-signed
      grub-pc-bin grub2-common ifupdown2 krb5-locales ksm-control-daemon less libarchive13 libblkid1 libc-bin libc-l10n
      libc6 libcephfs2 libcryptsetup12 libcurl3-gnutls libcurl4 libfdisk1 libfreetype6 libglib2.0-0 libgnutls-dane0
      libgnutls30 libgnutlsxx30 libgssapi-krb5-2 libgstreamer-plugins-base1.0-0 libk5crypto3 libkrb5-3 libkrb5support0
      libmount1 libnss-systemd libnvpair3linux libopeniscsiusr libpam-systemd libproxmox-acme-perl
      libproxmox-acme-plugins libpve-access-control libpve-apiclient-perl libpve-cluster-api-perl libpve-cluster-perl
      libpve-common-perl libpve-guest-common-perl libpve-http-server-perl libpve-network-perl libpve-notify-perl
      libpve-rs-perl libpve-storage-perl libpython3.11-minimal libpython3.11-stdlib libqt5core5a libqt5dbus5
      libqt5network5 librados2 libradosstriper1 librbd1 librgw2 libseccomp2 libsmartcols1 libssl3 libsystemd-shared
      libsystemd0 libudev1 libunbound8 libuuid1 libuutil3linux libuv1 libzfs4linux libzpool5linux locales lxc-pve lxcfs
      mount nano open-iscsi openssh-client openssh-server openssh-sftp-server openssl postfix proxmox-backup-client
      proxmox-backup-file-restore proxmox-backup-restore-image proxmox-default-kernel proxmox-kernel-6.5
      proxmox-offline-mirror-docs proxmox-offline-mirror-helper proxmox-termproxy proxmox-ve proxmox-widget-toolkit
      pve-cluster pve-container pve-docs pve-edk2-firmware pve-edk2-firmware-legacy pve-edk2-firmware-ovmf pve-firewall
      pve-firmware pve-ha-manager pve-i18n pve-manager pve-qemu-kvm python3-ceph-argparse python3-ceph-common
      python3-cephfs python3-idna python3-rados python3-rbd python3-rgw python3.11 python3.11-minimal qemu-server
      shim-helpers-amd64-signed shim-signed shim-signed-common shim-unsigned spl ssh systemd systemd-boot
      systemd-boot-efi systemd-sysv tar tzdata udev usbutils usrmerge util-linux util-linux-extra zfs-initramfs zfs-zed
      zfsutils-linux
    146 upgraded, 6 newly installed, 0 to remove and 0 not upgraded.
    Need to get 519 MB of archives.
    After this operation, 1,205 MB of additional disk space will be used.
    Do you want to continue? [Y/n]

    If you start really using Proxmox I fully recommend buying a subscription. The community subscription is really very inexpensive and helps to support your access to an enterprise quality product, and also removes the annoying nag on the front page! If you do, remember to switch back to the enterprise repositories for stable updates.

    That’s it for this post, hope you enjoyed!

  • Proxmox Backup Server Wake-on-LAN

    Proxmox Backup Server Wake-on-LAN

    If you’re using Proxmox and you want to back up your VMs & containers there is no better way than Proxmox Backup Server (PBS). If you have a spare PC or motherboard and storage (SSD or spinning rust) you can use it to get regular scheduled backups, whatever retention you need, backup verification, deduplication and all that good stuff. The best bit? You can use if for free (paid support subscriptions available)!

    So, you set up your backup server PC, set a daily backup schedule to run, then what? Your backup takes maybe half an hour each day to run … so for 23.5 hours that backup server is just spinning away burning electricity.

    There is a better way!

    Here’s how you can use Wake-on-LAN (WOL) to automatically wake your backup server and let it shut down gracefully after each backup, saving you electricity and cash.

    Set up PBS

    First we need to set up the backup server for Wake-on-LAN. To do this you will first need to change the BIOS settings. Where the setting is can vary depending on your motherboard’s BIOS, but you’re looking for something that says WOL, wake on LAN or wake on PCI. Turn that stuff on.

    For some network cards, however, that’s not enough. You have to specifically enable wake-on-LAN via the driver before the machine shuts down, or it won’t wake.

    Here’s how you do that. First, install the net-tools package:

    Next we have to create a service that enables wake-on-LAN on the interface when the PC starts up. In this case the interface is called eno1, make sure you change it to whatever yours is called (find out from eg ip a command):

    cat <<'EOF' >  /etc/systemd/system/wol.service
    [Unit]
    Description=Wake-on-LAN for eno1
    Requires=network.target
    After=network.target
    
    [Service]
    ExecStart=/usr/sbin/ethtool -s eno1 wol g
    Type=oneshot
    
    [Install]
    WantedBy=multi-user.target
    EOF
    
    systemctl enable wol.service
    systemctl start wol.service
    systemctl status wol.service

    So that covers the “waking up” bit … now we need to cover the shutdown when backup job is complete. Here’s a script that covers that. It will wait for awhile for a backup job to start, then wait for the job to complete, then once no jobs are running (and no-one logged in) it will do some cleanup tasks (verify all backups and upgrade packages) then shutdown the server:
    cat <<'EOF' > /usr/local/bin/shutdown-nojobs.sh
    #!/bin/bash
    
    # First we wait for the first job to start. We don't want to shut down before the first backup has even started!
    
    echo "Starting script!"
    
    count=0
    
    while [[ $count -lt 5 ]] do
            if [[ $(/sbin/proxmox-backup-manager task list | /bin/grep 'running') == *running* ]]; then
              echo "$(/bin/date +%F_%T) Found a backup job running!"
              count=100
            else
              count=$(( $count+1 ))
              echo "$(/bin/date +%F_%T) Waiting for first backup job to start - count: $count"
            fi
            sleep 10
    done
    
    # Next we wait until we have 20 count of no task running at 5 second intervals (hopefully all jobs completed)
    
    echo "$(/bin/date +%F_%T) Waiting for all jobs to complete"
    
    count=0
    
    while [[ $count -lt 20 ]] do
            if [[ $(/sbin/proxmox-backup-manager task list | /bin/grep 'running') == *running* ]]; then
              echo "$(/bin/date +%F_%T) Found a backup job running."
              count=0
            elif [[ $(/bin/who | /bin/wc -l) != 0 ]]; then
              echo "$(/bin/date +%F_%T) Found a user logged in."
              count=0
            else
              count=$(( $count+1 ))
              echo "$(/bin/date +%F_%T) Idle. Countup (to 20): $count"
            fi
            sleep 5
    done
    
    echo "$(/bin/date +%F_%T) Done. Verifying store."
    
    /sbin/proxmox-backup-manager verify store1 --outdated-after 30
    
    echo "$(/bin/date +%F_%T) Done. Updating packages."
    
    /usr/bin/apt update
    /usr/bin/apt upgrade -y
    echo "$(/bin/date +%F_%T) Done. Shutting down."
    
    /sbin/shutdown now
    EOF
    chmod 770 /usr/local/bin/shutdown-nojobs.sh

    Now we want to make that script run when the PC boots:

    This will open your crontab file with your favourite editor. Add this line to the bottom:

    @reboot /usr/local/bin/shutdown-nojobs.sh >> ~/shutdown-nojobs.txt

    Lastly you need to find the MAC address of the network card in the backup server that will be used to wake the box.

    root@prox-backup:~# ip a
    1: lo: <LOOPBACK,UP,LOWER_UP> mtu 65536 qdisc noqueue state UNKNOWN group default qlen 1000
        link/loopback 00:00:00:00:00:00 brd 00:00:00:00:00:00
        inet 127.0.0.1/8 scope host lo
           valid_lft forever preferred_lft forever
        inet6 ::1/128 scope host noprefixroute
           valid_lft forever preferred_lft forever
    2: eno1: <BROADCAST,MULTICAST,UP,LOWER_UP> mtu 1500 qdisc mq state UP group default qlen 1000
        link/ether a8:a1:59:e1:55:f4 brd ff:ff:ff:ff:ff:ff
        altname enp3s0
        inet 192.168.1.220/24 scope global eno1
           valid_lft forever preferred_lft forever
        inet6 fe80::aaa1:59ff:fee1:55f4/64 scope link
           valid_lft forever preferred_lft forever

    In this example the MAC of our wake-on-lan interface is a8:a1:59:e1:55:f4.

    Now reboot the backup server. It should come up, then shut down again after a short while.

    Note that if you SSH in to the server while it’s up, it won’t shut down until you close the SSH connection, so if you need to do any maintenance on the server that’s an easy way to keep it up.

    Now we need to add some script on the Proxmox server to wake the backup server when a backup job starts.

    First let’s install the wakeonlan package

    You can test waking the backup server like this (replace MAC address of the target server):

    wakeonlan a8:a1:59:e1:55:f4

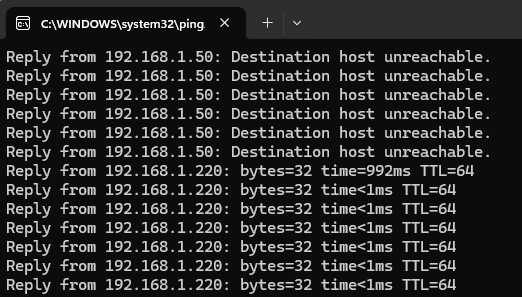
    The backup server should boot:

    Great!

    Now let’s add some automation to your backup job to start the backup server when a job starts. Modify the script below with the MAC address of your server, hostname or IP of the PBS server and name of the backup server datastore as on the proxmox server:

    cat <<'EOF' > /usr/local/bin/vzdump-hook-script
    #!/bin/bash
    
    if [ "$1" == "job-init" ]; then
      /usr/bin/wakeonlan a8:a1:59:e1:55:f4   # <-- edit with mac Address of PBS Server
    
      while [[ $count -lt 30 ]] do
            # if [[ $(/sbin/proxmox-backup-manager task list | /bin/grep 'running') == *running* ]]; then
            if [[ $(/bin/ping pbs.mydomain.com -c 1 | /bin/grep '1 received') == *received* ]]; then  # <-- edit with hostname or static IP of your server
              echo "$(/bin/date +%F_%T) Backup server up!"
              count=100
            else
              count=$(( $count+1 ))
              echo "$(/bin/date +%F_%T) Waiting for backup server up - count: $count"
            fi
            sleep 10
      done
      # Give backup server a chance to get store online
      sleep 10
      # Enable data store
      /usr/sbin/pvesm set pbs-store1 --disable false # <-- edit with name of the datastore on proxmox server
      sleep 10
      echo "Backup datastore status is: $(/usr/sbin/pvesm status 2> /dev/null |grep 'pbs-store1' | awk '{print $3}')" <-- edit with name of the datastore on proxmox server
    
    fi
    
    if [ "$1" == "job-end" ]; then
      sleep 10
      /usr/sbin/pvesm set pbs-store1 --disable true <-- edit with name of the datastore on proxmox server
    fi
    
    exit 0
    EOF

    For the script to run it must be set executable:

    chmod 755 /usr/local/bin/vzdump-hook-script

    Next we need to tell Proxmox to run this hook script each time a backup fires. There are a couple of ways to do this – either add the following line to the global /etc/vzdump.conf configuration where it will apply to all backup jobs, or you can add it in /etc/pve/jobs.cfg where it will apply to only the job[s] you specify. That’s useful for example if you also want to define jobs that back up to locally attached storage.

    script /usr/local/bin/vzdump-hook-script

    Finally, make sure the backup server is shut down then try to run a backup on the Proxmox server. You should see something like this in the backup job log:

    INFO: Sending magic packet to 255.255.255.255:9 with a8:a1:59:e1:55:f4
    INFO: 2024-08-21_10:07:37 Waiting for backup server up - count: 1
    INFO: 2024-08-21_10:07:50 Waiting for backup server up - count: 2
    INFO: 2024-08-21_10:08:00 Backup server up!
    INFO: Backup datastore status is: active
    INFO: starting new backup job: vzdump --storage pbs-store1 --all 1 --fleecing 0 --mailto me@gmail.com --mode snapshot --script /usr/local/bin/vzdump-hook-script --node prox --notes-template '{{guestname}}' --mailnotification always
    INFO: Starting Backup of VM 100 (qemu)
    INFO: Backup started at 2024-08-21 10:08:32
    INFO: status = running
    INFO: VM Name: dt-11
    INFO: include disk 'ide0' 'local-lvm:vm-100-disk-4' 128G
    INFO: exclude disk 'ide2' 'local-lvm:vm-100-disk-6' (backup=no)
    INFO: include disk 'efidisk0' 'local-lvm:vm-100-disk-2' 528K
    INFO: include disk 'tpmstate0' 'local-lvm:vm-100-disk-5' 4M
    INFO: backup mode: snapshot
    INFO: ionice priority: 7
    INFO: creating Proxmox Backup Server archive 'vm/100/2024-08-21T09:08:32Z'
    INFO: enabling encryption
    .
    .
    .
    .
    .
    INFO: Finished Backup of VM 430 (00:00:04)
    INFO: Backup finished at 2024-08-21 01:49:03
    INFO: Backup job finished successfully
    INFO: notified via target `<me@gmail.com>`
    TASK OK

    Nice work! Enjoy your new automated, energy-saving backup solution!

  • Proxmox 8 / Debian 12 with Realtek RTL8111H NIC

    Proxmox 8 / Debian 12 with Realtek RTL8111H NIC

    TL;DR A default Proxmox 8 / Debian 12 install uses the wrong module for the RTL8111H – we need to build & install the correct module

    I came across this problem using Proxmox on the Asrock J4125-ITX / J5040-ITX / N100 series boards. These are great boards to run a low-power mini server, they run Proxmox really very well, but a default install will leave you thinking the onboard NIC is faulty. Here’s why.

    The Realtek RTL8111H NIC used on the Asrock boards is a cheap but capable Gigabit Ethernet (10/100/1000M) PCI Express device. Now I’ve used boards with on-board Realtek NICs for years without incident on Windows machines, but turns out Linux support for some of these chipsets is sub-optimal.

    So you’ve done a default install of Proxmox. Your network is up, you have an IP, everything’s working, right? Wrong!
    02:00.0 Ethernet controller [0200]: Realtek Semiconductor Co., Ltd. RTL8111/8168/8411 PCI Express Gigabit Ethernet Controller [10ec:8168] (rev 15)
    ...
    Kernel driver in use: r8169
    Kernel modules: r8169

    When we take a look at the RealTek website, we can see that the R8169 is part of a family of Realtek NICs sharing the same driver:
    RTL8110S/RTL8169S/RTL8110SB/RTL8169SB/RTL8110SC/RTL8169SC

    Now we know that our board is, in fact, sporting an RTL8111H, which isn’t in that list.

    A little sleuthing and we can find a similar, but different family containing:
    RTL8111B/RTL8111C/RTL8111D/RTL8111E/RTL8111F/RTL8111G(S)/RTL8111H(S)//RTL8118(A)(S)/RTL8119i/RTL8111L/RTL8111K
    RTL8168B/RTL8168E/RTL8168H
    RTL8111DP/RTL8111EP/RTL8111FP
    RTL8411/RTL8411B

    There’s another clue on that page in the driver name: GBE Ethernet LINUX driver r8168 … So Linux has chosen the wrong kernel module to support this hardware. It sort-of works, because the hardware is kinda similar, which is hella confusing, but you’ll run into all sorts of nasty behaviour if you don’t fix it.

    RealTek supply a drivers for kernel up to v6.8, Proxmox 8 currently uses 6.8.8-4-pve and it’s working fine. Go ahead, download the file (behind a captcha, so you’ll need to use a browser):

    GBE Ethernet LINUX driver r8168 for kernel up to 6.8, v8.053.00, 2024/04/18
    https://www.realtek.com/Download/List?cate_id=584

    You should get a file named r8168-8.053.00.tar.bz2. Copy it to /tmp on the Proxmox / Debian box (I used scp for this, if you’re coming from a Windows box WinSCP is a great option).

    If you’ve just installed Proxmox and you don’t have a subscription, you’ll need to change to the free repositories. Don’t do this if you do have a subscription – instead enter your key in the Proxmox UI to enable the enterprise repositories.

    echo "deb http://download.proxmox.com/debian/ceph-quincy bookworm no-subscription" > /etc/apt/sources.list.d/ceph.list
    echo "deb http://download.proxmox.com/debian/pve bookworm pve-no-subscription" > /etc/apt/sources.list.d/pve-enterprise.list

    Do a quick update and install headers and build essentials

    apt update
    apt upgrade
    apt install pve-headers build-essential

    Next let’s extract the driver package

    cd /tmp
    tar xf r8168-8.053.00.tar.bz2
    cd r8168-8.053.00/

    Let’s check the module compiles OK:

    If everything goes right you should get the following with no major errors:

    make -C src/ modules
    make[1]: Entering directory '/tmp/r8168-8.053.00/src'
    make -C /lib/modules/6.8.8-4-pve/build M=/tmp/r8168-8.053.00/src modules
    make[2]: Entering directory '/usr/src/linux-headers-6.8.8-4-pve'
    CC [M] /tmp/r8168-8.053.00/src/r8168_n.o
    CC [M] /tmp/r8168-8.053.00/src/r8168_asf.o
    CC [M] /tmp/r8168-8.053.00/src/rtl_eeprom.o
    CC [M] /tmp/r8168-8.053.00/src/rtltool.o
    LD [M] /tmp/r8168-8.053.00/src/r8168.o
    MODPOST /tmp/r8168-8.053.00/src/Module.symvers
    CC [M] /tmp/r8168-8.053.00/src/r8168.mod.o
    LD [M] /tmp/r8168-8.053.00/src/r8168.ko
    BTF [M] /tmp/r8168-8.053.00/src/r8168.ko
    Skipping BTF generation for /tmp/r8168-8.053.00/src/r8168.ko due to unavailability of vmlinux
    make[2]: Leaving directory '/usr/src/linux-headers-6.8.8-4-pve'
    make[1]: Leaving directory '/tmp/r8168-8.053.00/src'

    If all looks good, we can run the convenience script from RealTek that will unload the r8169 module and install the newly compiled one in its place.

    For the next step you will want to be on a physical console or IP KVM on the box … you’re going to be replacing the network card driver, which will drop connectivity, so don’t try to do this over an SSH connection (unless you’ve installed a second NIC for the purpose)!

    chmod 755 autorun.sh
    ./autorun.sh
    Check old driver and unload it.
    rmmod r8169
    Build the module and install
    Skipping BTF generation for /tmp/r8168-8.053.00/src/r8168.ko due to unavailability of vmlinux
    Warning: modules_install: missing 'System.map' file. Skipping depmod.
    Backup r8169.ko
    rename r8169.ko to r8169.bak
    DEPMOD 6.8.8-4-pve
    load module r8168
    Updating initramfs. Please wait.
    update-initramfs: Generating /boot/initrd.img-6.8.8-4-pve
    Running hook script 'zz-proxmox-boot'..
    Re-executing '/etc/kernel/postinst.d/zz-proxmox-boot' in new private mount namespace..
    No /etc/kernel/proxmox-boot-uuids found, skipping ESP sync.
    Completed.

    For good measure let’s blacklist the r8169 module to prevent future problems:

    echo "blacklist r8169" >> /etc/modprobe.d/pve-blacklist.conf

    Final check with lspci:

    03:00.0 Ethernet controller [0200]: Realtek Semiconductor Co., Ltd. RTL8111/8168/8411 PCI Express Gigabit Ethernet Controller [10ec:8168] (rev 15)
    ...
    Kernel driver in use: r8168
    Kernel modules: r8168

    Nice!

    Now reboot your box and make sure everything works as it should.

    If you can’t ping etc from the box, check the interface name of the RealTek NIC, it might have changed and you might need to update the bridge-port name for vmbr0

    ....
    2: eno1: mtu 1500 qdisc pfifo_fast master vmbr0 state UP group default qlen 1000
    ....
    nano /etc/network/interfaces
    auto lo
    iface lo inet loopback
    
    iface eno1 inet manual
    
    auto vmbr0
    iface vmbr0 inet static
      address x.x.x.x/24
      gateway x.x.x.x
      bridge-ports eno1
      bridge-stp off
      bridge-fd 0

    That’s it! Enjoy your swanky Proxmox box to the full!

  • Frigate in Proxmox LXC container with Google Coral M.2 Dual Edge TPU

    Frigate in Proxmox LXC container with Google Coral M.2 Dual Edge TPU

    If you want to run Frigate NVR, but you don’t want to dedicate a whole PC to it, this guide is for you. Frigate actually runs well on a low-power CPU, provided you have a Coral TPU to run detection. For example, I’m running it on a J4125 4-core CPU that’s also running Openmediavault, Home Assistant and a bunch of other stuff. CPU usage ticks along at barely 20%, and the whole system is using around 15W measured at the wall.

    Here’s a quick review of Coral TPUs:

    USB AcceleratorShould work everywhere, but uses more power and has less bandwidth. Ignore Lesson 1
    Mini PCIe AcceleratorIf you have an older board that has a mini-PCIe slot, this should work. Ignore Lesson 1
    M.2 Accelerator A+E keyMight work if your board has an A or E key M.2 slot. Read Lesson 1.
    M.2 Accelerator B+M keyMight work if your board has an B or M key M.2 slot. Read Lesson 1.
    M.2 Accelerator with Dual Edge TPUMight work if your board has an A or E key M.2 slot. If it does, you might only get access to one TPU, or you might get both. Read Lesson 1.

    Lesson 1 – You need an adapter (probably).

    On the two motherboards I tried it in, the Google Coral M.2 Accelerator with Dual Edge TPU did not work well in the on-board WiFi M.2 E-key slot. On the Asrock J5040-ITX the Coral works, but only one TPU is detected and there is some incompatibility that causes high CPU usage at idle, and total gridlock with a multicore load. On the N100DC-ITX, the Coral isn’t even detected.

    If you’re using a similar board, or your board doesn’t have an M.2 WiFi slot, save yourself the bother and get one of these:

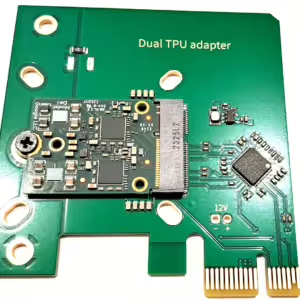
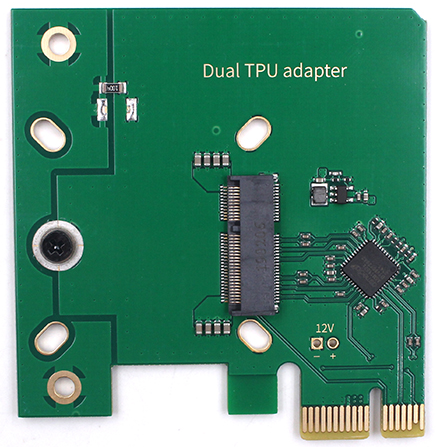
    Dual Edge TPU Adapter

    Dual Edge TPU Adapter – PCIe x1 Low Profile

    With this adapter you can get access to both the Edge TPUs, even if your motherboard doesn’t support PCIe bifurcation.

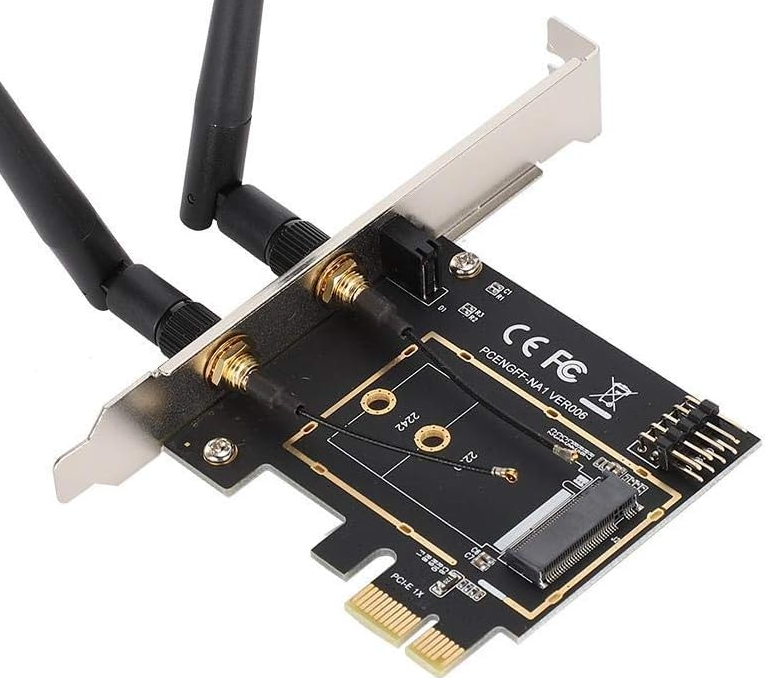
    PCIe to M.2 E-Key

    With this adapter you’ll only get access to one TPU, but it’s much cheaper. You can just unscrew the antennas.

    Lesson 2 – LXC for the win!

    Frigate runs as a Docker container. When I first started using Docker on Proxmox, many people seem to agree that the best / safest way is to spin up a full-fat Virtual Machine, install some flavour of Linux on it, then run Docker under that. In my experience, for Frigate it’s way better to run Docker in an LXC container, and it runs beautifully. If you’re using ZFS you might want to do some research first.

    To get this to work, we need to install the Coral driver on the Proxmox host. Note that if you go the VM route, you specifically don’t want to do this, you instead need to pass the raw PCIe device through to the VM guest, and install the driver in the guest OS instead.

    The official instructions to install the Coral driver use apt-key to install Google’s package-signing key, which is deprecated in Debian Bookworm (12) on which Proxmox 8 is based. To avoid a warning about this, we instead install the key the new / correct way, then install the Coral driver.

    Run the following commands as root on your Proxmox host:

    wget -qO - https://packages.cloud.google.com/apt/doc/apt-key.gpg | gpg --no-default-keyring --keyring gnupg-ring:/etc/apt/trusted.gpg.d/google.gpg --import -
    rm /etc/apt/trusted.gpg.d/google.gpg~
    chmod 644 /etc/apt/trusted.gpg.d/google.gpg
    echo "deb https://packages.cloud.google.com/apt coral-edgetpu-stable main" | tee /etc/apt/sources.list.d/coral-edgetpu.list
    apt-get update
    apt-get install pve-headers gasket-dkms libedgetpu1-std
    make -j4 KERNELRELEASE=6.5.11-4-pve -C /lib/modules/6.5.11-4-pve/build M=/var/lib/dkms/gasket/1.0/build……(bad exit status: 2)
    Error! Bad return status for module build on kernel: 6.5.11-4-pve (x86_64)
    Consult /var/lib/dkms/gasket/1.0/build/make.log for more information.
    Error! One or more modules failed to install during autoinstall.
    Refer to previous errors for more information.
    dkms: autoinstall for kernel: 6.5.11-4-pve failed!

    Congratulations! You’ve hit a bug in the current package for Gasket. Your package manager will probably throw lots of errors all the time now, and your Proxmox server will probably hang if you try to reboot it right now (if you have rebooted, use the boot options to boot a previous kernel)!

    Unfortunately you’ll need to install gasket from source instead:

    apt-get remove gasket-dkms
    apt-get install devscripts dh-make dh-dkms git
    git clone https://github.com/google/gasket-driver.git
    cd gasket-driver
    debuild -us -uc -tc -b
    cd ..
    dpkg -i gasket-dkms_1.0-18_all.deb

    Do a quick apt-get update and confirm no errors showing.

    Now reboot your Proxmox box. When it comes back up, check the driver has loaded:

    03:00.0 System peripheral [0880]: Global Unichip Corp. Coral Edge TPU [1ac1:089a]
    04:00.0 System peripheral [0880]: Global Unichip Corp. Coral Edge TPU [1ac1:089a]
    crw-rw---- 1 root root 120, 0 Jul 20 12:18 /dev/apex_0
    crw-rw---- 1 root root 120, 1 Jul 20 12:18 /dev/apex_1

    Note here that I am using a dual Coral TPU – if you have a single TPU you will only see one entry, and should remove any references to /dev/apex_1 in the instructions below.

    Now let’s set up a new LXC container for Frigate. I used a Ubuntu 23 template. The container must be privileged and have nesting enabled.

    Don’t start the container yet. Edit the container config file (either SSH to your proxmox server, or use the console from the web UI) – change 114 below for whatever the ID is of your new container:

    root@prox:~# nano /etc/pve/lxc/114.conf

    Add these lines to the end of your file:

    lxc.apparmor.profile: unconfined
    lxc.cgroup2.devices.allow: a
    lxc.cgroup2.devices.allow: c 226:0 rwm
    lxc.cgroup2.devices.allow: c 226:128 rwm
    lxc.cgroup2.devices.allow: c 29:0 rwm
    lxc.cgroup2.devices.allow: c 189:* rwm
    lxc.cgroup2.devices.allow: c 120:0 rwm
    lxc.mount.entry: /dev/dri/renderD128 dev/dri/renderD128 none bind,optional,create=file 0, 0
    lxc.mount.entry: /dev/dri dev/dri none bind,optional,create=dir
    lxc.mount.entry: /dev/apex_0 dev/apex_0 none bind,optional,create=file 0, 0
    lxc.mount.entry: /dev/apex_1 dev/apex_1 none bind,optional,create=file 0, 0

    Save the file, now start the container. Once it comes up SSH into the container, do some setup and install docker:

    apt update
    apt upgrade -y
    apt install unattended-upgrades curl -y
    dpkg-reconfigure -pmedium unattended-upgrades
    
    cat <<'EOF' >/etc/apt/apt.conf.d/51my-unattended-upgrades
    Unattended-Upgrade::Allowed-Origins {
            "${distro_id}:${distro_codename}-updates";
    };
    Unattended-Upgrade::AutoFixInterruptedDpkg "true";
    Unattended-Upgrade::MinimalSteps "true";
    Unattended-Upgrade::Remove-Unused-Kernel-Packages "true";
    Unattended-Upgrade::Remove-New-Unused-Dependencies "true";
    Unattended-Upgrade::Remove-Unused-Dependencies "true";
    Unattended-Upgrade::Automatic-Reboot "true";
    Unattended-Upgrade::Automatic-Reboot-Time "02:13";
    EOF
    curl -fsSL https://get.docker.com | sh
    docker run -d -p 9001:9001 --name portainer_agent --restart=always -v /var/run/docker.sock:/var/run/docker.sock -v /var/lib/docker/volumes:/var/lib/docker/volumes portainer/agent:latest
    reboot now

    If that all went well your container will reboot, then you have Docker installed with Portainer agent (if you don’t already have a container that has Portainer installed you can just install portainer-ce instead…) and automatic unattended upgrades for the container.

    Check that /dev/apex0 & /dev/dri/renderD128 are both visible in the container as well.

    Now you can add your new Docker instance to your existing Portainer setup, or fire up the new one you just installed. Add yourself a new stack for Frigate.

    This is my stack config – I’m using a Cloudflare tunnel to access Frigate from anywhere without having to use port forwarding – I really recommend this setup. I limit access using Cloudflare Access and it’s so simple to maintain. If you don’t already use Cloudflare take a look – it’s free for up to 25 users.

    services:
      frigate:
        container_name: frigate
        privileged: true # this may not be necessary for all setups
        restart: always
        image: ghcr.io/blakeblackshear/frigate:latest
        shm_size: "512mb"
        devices:
          - /dev/apex_0:/dev/apex_0
          - /dev/apex_1:/dev/apex_1
          - /dev/dri/renderD128
        volumes:
          - frig-conf:/config
          - frig-media:/media/frigate
          - frig-db:/db
          - type: tmpfs # Optional: 1GB of memory, reduces SSD/SD Card wear
            target: /tmp/cache
            tmpfs:
              size: 1000000000
        ports:
          - "5000:5000"
          - "8554:8554"
          - "8555:8555/tcp"
          - "8555:8555/udp"
        environment:
          FRIGATE_RTSP_PASSWORD: "password"
          PLUS_API_KEY: "your_api_token_if_you_are_a_frigate_plus_user_otherwise_comment_out"
        logging:
          driver: journald
      cloudflared:
        container_name: cloudflared
        image: cloudflare/cloudflared:latest
        restart: unless-stopped
        command: tunnel run
        environment:
          - TUNNEL_TOKEN=yourcloudflaretoken
    
    volumes:
      frig-conf:
      frig-db:
      frig-media:

    Start the stack and you should be able to access Frigate at http://yourcontainername:5000

    Now dive into the configuration editor and get Frigate set up (that’s a whole tutorial in itself!)