Did you buy yourself a cute little CWWK Crazy? Trying to use it as a server? Do you get the feeling that it’s not quite as powerful as you would expect from the benchmark figures? Well the N100 is an awesome CPU …. but there’s a good reason you’re not getting as much CPU power as benchmarks suggest you should!
Let me show you why… First install powercap-utils. That’ll help us understand and modify the CPU power settings under Linux:
From the Zome 0 Constraint 0 you can see that the long term power limit is set to 6W.
Now let’s see what happens to the CPU under sustained load. On my Proxmox setup that’s already running some containers that are reasonably CPU heavy (so already up against the power limit) a 7z benchmark gives us this:
On the compression benchmark we’re getting about 2600 MIPS. Even with other stuff running that’s not a lot of spare CPU capacity. In another session, let’s check the CPU frequency:
So why is the default power limit so low? Well for a system like the CWWK Crazy that’s intended to be fanless the long term power limit is set pretty low to stop it getting too hot. It’s that simple. And in fact if you run it fanless with a high power limit you will find it gets uncomfortably hot after a while (and potentially will then thermally throttle anyway).
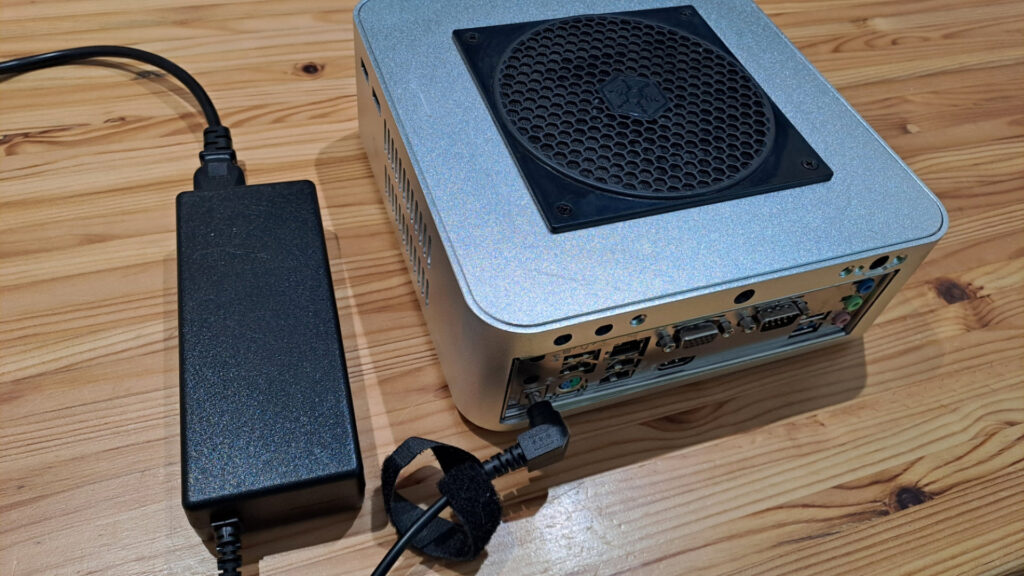
The addition of one single tiny 80mm fan on the front is all it takes to turn your fanless but very power-limited system into a still-near-silent but way more capable machine. In fact the CWWK Crazy comes with fan headers and cables, and screw mountings for two 80mm fans. I’ve installed a single fan on mine by squishing some small grommets into the cooler fins then screwing the fan into them. It runs pretty well silent and barely gets warm to the touch even under full load:
Hooking up the supplied cable to the fan header is a little bit fiddly though!
Last words … the command above is not persistent and your power limit will be reset after a reboot. To make it persistant, edit your crontab:
Hello! My name is Roving Climber and I’m a SBC / mini-ITX addict. If you’re reading this you might have the same problem. Symptoms can include a news-feed packed with single-board computers, a collection of every Raspberry Pi ever made, and quite possibly one or more ASRock mini-ITX boards in your possession.
I’ve built stuff around the ASRock J4125 in the past, it’s an incredible board for a low-power x86 build, and I also have an ASRock J5040 running as my Proxmox Backup Server. Last year the N100DC-ITX came out and I just had to grab one. The stats from CPUBenchmark looked pretty promising … nearly twice as much processing power for a lower TDP. As we all know TDP is a pretty meaningless number these days, but definitely worth a look.
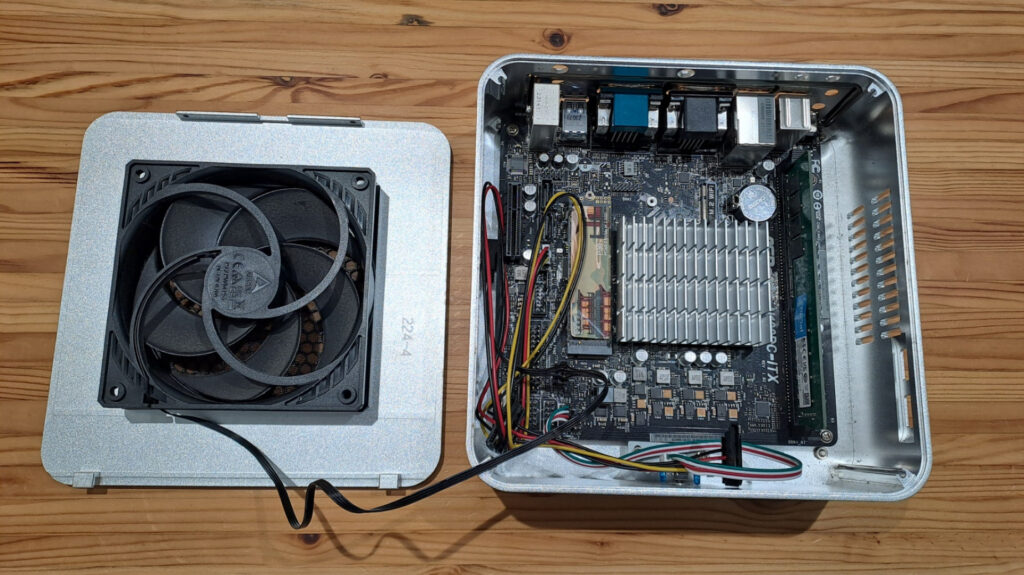
Here’s the board stuffed into my kinda DIY butchered mini case. The CPU is soldered in and comes with a heatsink pre-installed. I’ve chucked a 32Gb stick of RAM in there and a SSD that was left over after upgrading my CWWK Crazy.
While it’s a standard mini-ITX form factor, this board has a special trick. If you look closely you’ll see there are no power headers on the board. In fact the N100DC-ITX has a barrel power connector on the back and takes direct 19V DC in from a standard laptop power brick.
That in itself is pretty cool, because a lot of the time for these mini-ITX boards I would be using a PicoPSU anyway, so having that onboard is a tidy solution. You get power headers straight off the board to power SATA hard drives.
So let’s get this thing built!
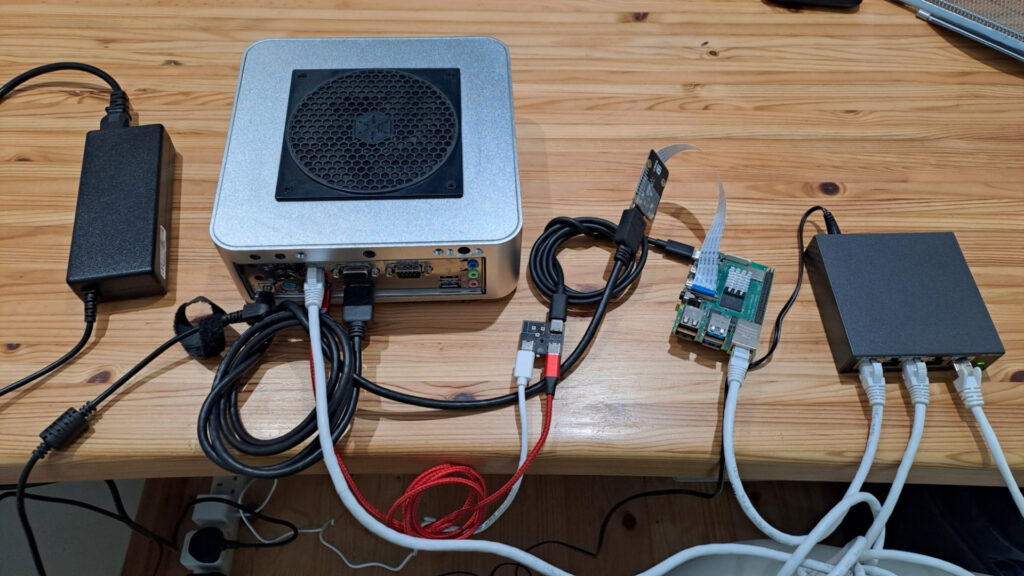
Now my desk is already full of junk, so I’m going to use a PiKVM setup to build this remotely. I’m also going to run the box off a Salus SP600 smart plug which gives me both remote power control and also power monitoring so we can see how much juice this board drinks.
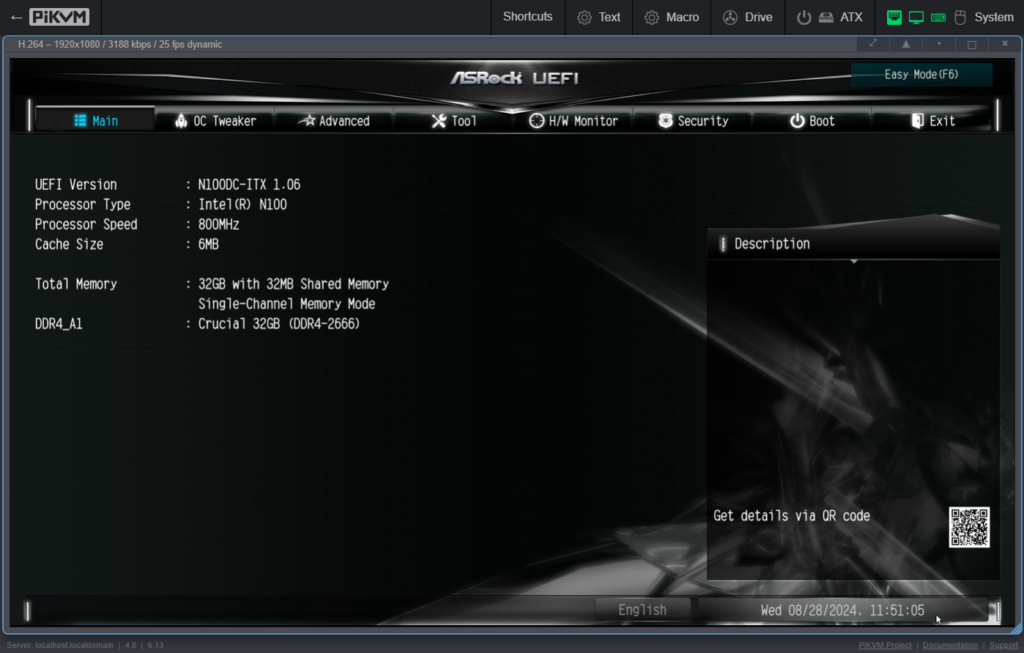
Now, if you’re using the default PiKVM setup, the default resolution (defined over EDID to the connected PC) is 1280×720. That doesn’t play very well with the UEFI BIOS or the Proxmox GUI installer, so it’s easiest to switch it to 1080p before you start.
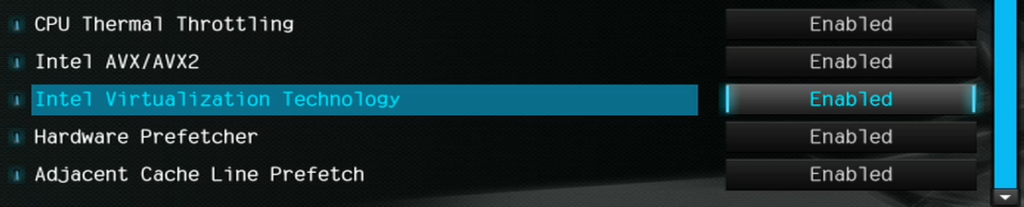
First thing to do is make sure that virtualization is turned on, should normally be on by default:
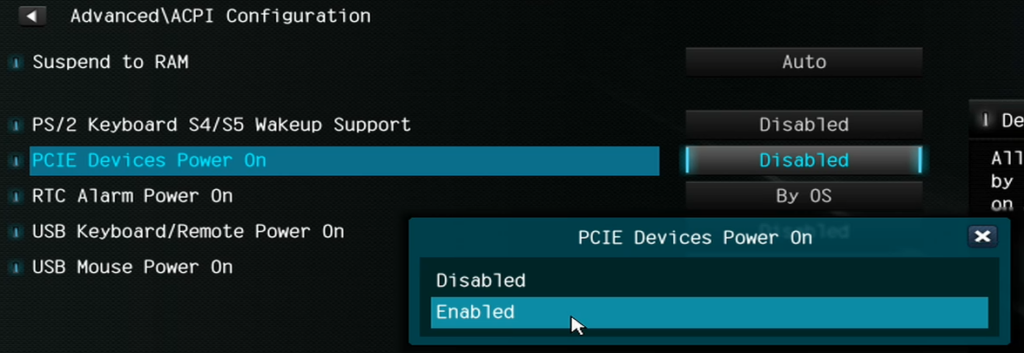
I’ll probably want to use Wake-on-LAN at some point so let’s make sure that’s enabled:
If you plan to use VT-d to share PCIe device[s] between VMs make sure that’s switched on also (although in my experience it’s not a reliable solution and most of the time you’re better off doing the same thing in LXC which is a much better way to share resources like GPU):
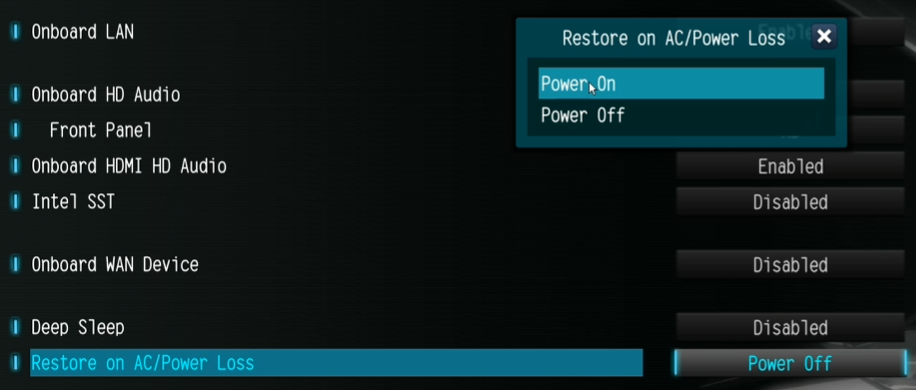
I’d also advise changing Restore on AC/Power Loss to enabled, this makes sure that the box starts automatically if there is a power outage, which also gives you the ability to hard reset via the smart switch without having to press the power button:
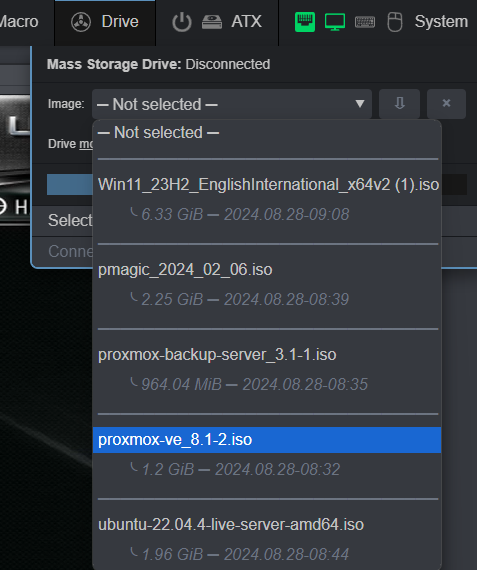
Now in PiKVM let’s mount the ISO for Proxmox installer:
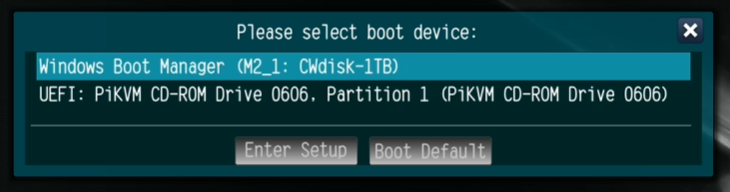
Reboot and hit F11 on start to bring up the boot menu:
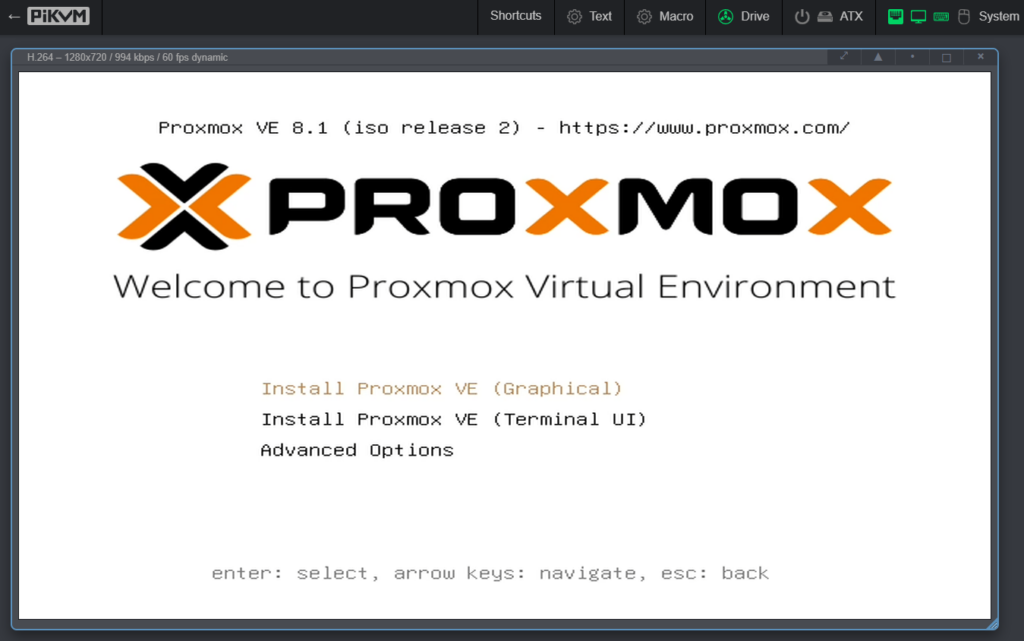
And we’re straight into the Proxmox installer, yay!
Installing is pretty much Next, Next, Finish (provided you are happy to wipe whatever disk is in there), so I won’t show you every step:
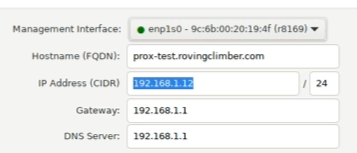
There’s a clue in the network configuration that we’ll pick up on later … the on-board NIC is shown as r8169.
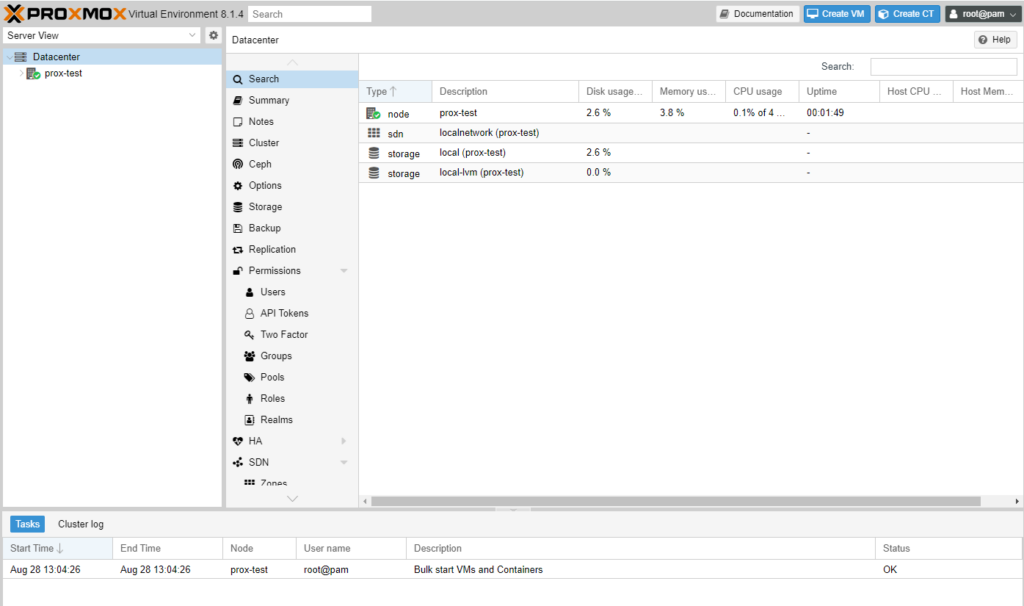
Just look at all this lovely stuff you get with Proxmox:
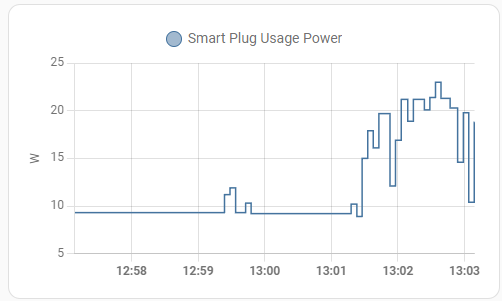
Now let’s take a quick look at power consumption:
The whole system is idling around 9W measured at the wall. That’s not quite in the realm of the J4125 but it’s pretty good for any PC!
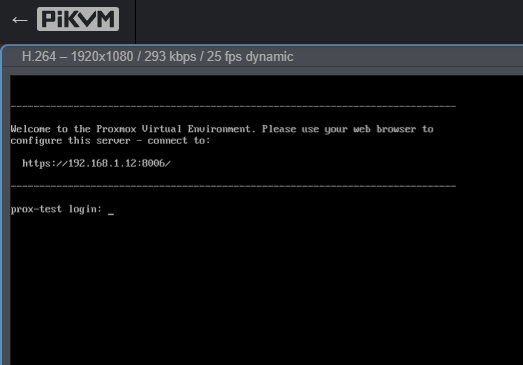
In a couple of minutes the installer completes and Proxmox reboots:
And there we are, Proxmox up and running!
Now I mentioned earlier something about the onboard NIC … the N100DC-ITX has an onboard Realtek RTL 8111H, first thing I would recommend is to jump on my other blog post about that, because the default driver that Debian uses works but can cause issues, and you will tear your hair out trying to fix it if you run into that!
Another slight “annoyance” if you’re using Proxmox just for homelab and you don’t have a subscription (yet) is that by default aptitude is set up to use the enterprise package repositories, which won’t work without a subscription key. You can fix this quickly like this:
sed -e '/deb/ s/^#*/#/' -i /etc/apt/sources.list.d/pve-enterprise.list
sed -e '/deb/ s/^#*/#/' -i /etc/apt/sources.list.d/ceph.list
echo 'deb http://download.proxmox.com/debian/pve bookworm pve-no-subscription' | tee -a /etc/apt/sources.list
echo 'deb http://download.proxmox.com/debian/ceph-reef bookworm no-subscription' | tee -a /etc/apt/sources.list.d/ceph.list
root@prox-test:~# apt update
Hit:1 http://security.debian.org bookworm-security InRelease
Hit:2 http://ftp.uk.debian.org/debian bookworm InRelease
Hit:3 http://ftp.uk.debian.org/debian bookworm-updates InRelease
Get:4 http://download.proxmox.com/debian/pve bookworm InRelease [2,768 B]
Get:5 http://download.proxmox.com/debian/ceph-reef bookworm InRelease [2,738 B]
Get:6 http://download.proxmox.com/debian/pve bookworm/pve-no-subscription amd64 Packages [336 kB]
Get:7 http://download.proxmox.com/debian/ceph-reef bookworm/no-subscription amd64 Packages [42.0 kB]
Fetched 384 kB in 2s (242 kB/s)
Reading package lists... Done
Building dependency tree... Done
Reading state information... Done
146 packages can be upgraded. Run 'apt list --upgradable' to see them.
root@prox-test:~# apt upgrade
Reading package lists... Done
Building dependency tree... Done
Reading state information... Done
Calculating upgrade... Done
The following NEW packages will be installed:
  proxmox-firewall proxmox-kernel-6.5.13-6-pve-signed proxmox-kernel-6.8 proxmox-kernel-6.8.12-1-pve-signed
  pve-esxi-import-tools python3-pyvmomi
The following packages will be upgraded:
  base-files bash bind9-dnsutils bind9-host bind9-libs bsdextrautils bsdutils ceph-common ceph-fuse curl
  distro-info-data eject fdisk gnutls-bin grub-common grub-efi-amd64 grub-efi-amd64-bin grub-efi-amd64-signed
  grub-pc-bin grub2-common ifupdown2 krb5-locales ksm-control-daemon less libarchive13 libblkid1 libc-bin libc-l10n
  libc6 libcephfs2 libcryptsetup12 libcurl3-gnutls libcurl4 libfdisk1 libfreetype6 libglib2.0-0 libgnutls-dane0
  libgnutls30 libgnutlsxx30 libgssapi-krb5-2 libgstreamer-plugins-base1.0-0 libk5crypto3 libkrb5-3 libkrb5support0
  libmount1 libnss-systemd libnvpair3linux libopeniscsiusr libpam-systemd libproxmox-acme-perl
  libproxmox-acme-plugins libpve-access-control libpve-apiclient-perl libpve-cluster-api-perl libpve-cluster-perl
  libpve-common-perl libpve-guest-common-perl libpve-http-server-perl libpve-network-perl libpve-notify-perl
  libpve-rs-perl libpve-storage-perl libpython3.11-minimal libpython3.11-stdlib libqt5core5a libqt5dbus5
  libqt5network5 librados2 libradosstriper1 librbd1 librgw2 libseccomp2 libsmartcols1 libssl3 libsystemd-shared
  libsystemd0 libudev1 libunbound8 libuuid1 libuutil3linux libuv1 libzfs4linux libzpool5linux locales lxc-pve lxcfs
  mount nano open-iscsi openssh-client openssh-server openssh-sftp-server openssl postfix proxmox-backup-client
  proxmox-backup-file-restore proxmox-backup-restore-image proxmox-default-kernel proxmox-kernel-6.5
  proxmox-offline-mirror-docs proxmox-offline-mirror-helper proxmox-termproxy proxmox-ve proxmox-widget-toolkit
  pve-cluster pve-container pve-docs pve-edk2-firmware pve-edk2-firmware-legacy pve-edk2-firmware-ovmf pve-firewall
  pve-firmware pve-ha-manager pve-i18n pve-manager pve-qemu-kvm python3-ceph-argparse python3-ceph-common
  python3-cephfs python3-idna python3-rados python3-rbd python3-rgw python3.11 python3.11-minimal qemu-server
  shim-helpers-amd64-signed shim-signed shim-signed-common shim-unsigned spl ssh systemd systemd-boot
  systemd-boot-efi systemd-sysv tar tzdata udev usbutils usrmerge util-linux util-linux-extra zfs-initramfs zfs-zed
  zfsutils-linux
146 upgraded, 6 newly installed, 0 to remove and 0 not upgraded.
Need to get 519 MB of archives.
After this operation, 1,205 MB of additional disk space will be used.
Do you want to continue? [Y/n]
If you start really using Proxmox I fully recommend buying a subscription. The community subscription is really very inexpensive and helps to support your access to an enterprise quality product, and also removes the annoying nag on the front page! If you do, remember to switch back to the enterprise repositories for stable updates.
If you want to run Frigate NVR, but you don’t want to dedicate a whole PC to it, this guide is for you. Frigate actually runs well on a low-power CPU, providedyou have a Coral TPU to run detection. For example, I’m running it on a J4125 4-core CPU that’s also running Openmediavault, Home Assistant and a bunch of other stuff. CPU usage ticks along at barely 20%, and the whole system is using around 15W measured at the wall.
Here’s a quick review of Coral TPUs:
USB Accelerator
Should work everywhere, but uses more power and has less bandwidth. Ignore Lesson 1
Mini PCIe Accelerator
If you have an older board that has a mini-PCIe slot, this should work. Ignore Lesson 1
M.2 Accelerator A+E key
Might work if your board has an A or E key M.2 slot. Read Lesson 1.
M.2 Accelerator B+M key
Might work if your board has an B or M key M.2 slot. Read Lesson 1.
M.2 Accelerator with Dual Edge TPU
Might work if your board has an A or E key M.2 slot. If it does, you might only get access to one TPU, or you might get both. Read Lesson 1.
Lesson 1 – You need an adapter (probably).
On the two motherboards I tried it in, the Google Coral M.2 Accelerator with Dual Edge TPU did not work well in the on-board WiFi M.2 E-key slot. On the Asrock J5040-ITX the Coral works, but only one TPU is detected and there is some incompatibility that causes high CPU usage at idle, and total gridlock with a multicore load. On the N100DC-ITX, the Coral isn’t even detected.
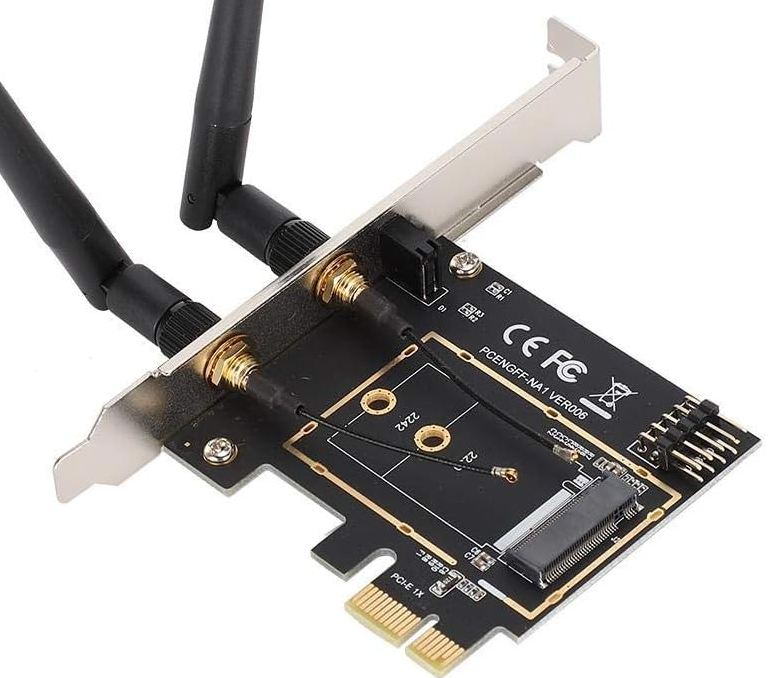
If you’re using a similar board, or your board doesn’t have an M.2 WiFi slot, save yourself the bother and get one of these:
With this adapter you’ll only get access to one TPU, but it’s much cheaper. You can just unscrew the antennas.
Lesson 2 – LXC for the win!
Frigate runs as a Docker container. When I first started using Docker on Proxmox, many people seem to agree that the best / safest way is to spin up a full-fat Virtual Machine, install some flavour of Linux on it, then run Docker under that. In my experience, for Frigate it’s way better to run Docker in an LXC container, and it runs beautifully. If you’re using ZFS you might want to do some research first.
To get this to work, we need to install the Coral driver on the Proxmox host. Note that if you go the VM route, you specifically don’t want to do this, you instead need to pass the raw PCIe device through to the VM guest, and install the driver in the guest OS instead.
The official instructions to install the Coral driver use apt-key to install Google’s package-signing key, which is deprecated in Debian Bookworm (12) on which Proxmox 8 is based. To avoid a warning about this, we instead install the key the new / correct way, then install the Coral driver.
Run the following commands as root on your Proxmox host:
UPDATE December 2023 …. if you run the above and see errors like this:
make -j4 KERNELRELEASE=6.5.11-4-pve -C /lib/modules/6.5.11-4-pve/build M=/var/lib/dkms/gasket/1.0/build……(bad exit status: 2)
Error! Bad return status for module build on kernel: 6.5.11-4-pve (x86_64)
Consult /var/lib/dkms/gasket/1.0/build/make.log for more information.
Error! One or more modules failed to install during autoinstall.
Refer to previous errors for more information.
dkms: autoinstall for kernel: 6.5.11-4-pve failed!
Congratulations! You’ve hit a bug in the current package for Gasket. Your package manager will probably throw lots of errors all the time now, and your Proxmox server will probably hang if you try to reboot it right now (if you have rebooted, use the boot options to boot a previous kernel)!
Unfortunately you’ll need to install gasket from source instead:
Note here that I am using a dual Coral TPU – if you have a single TPU you will only see one entry, and should remove any references to /dev/apex_1 in the instructions below.
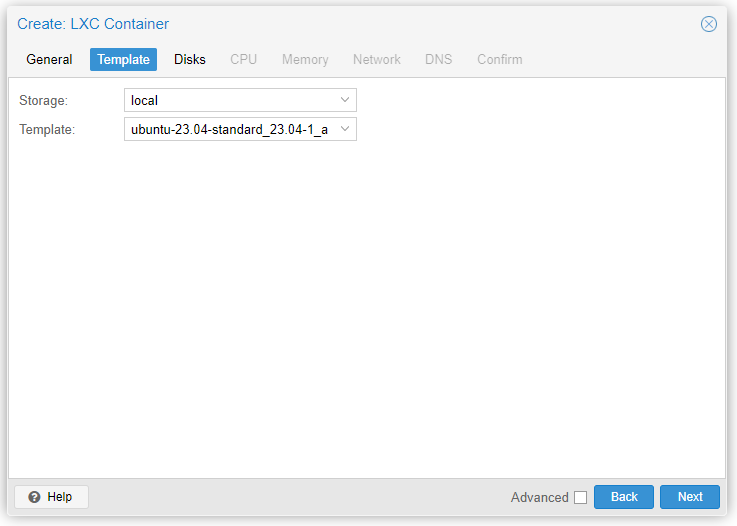
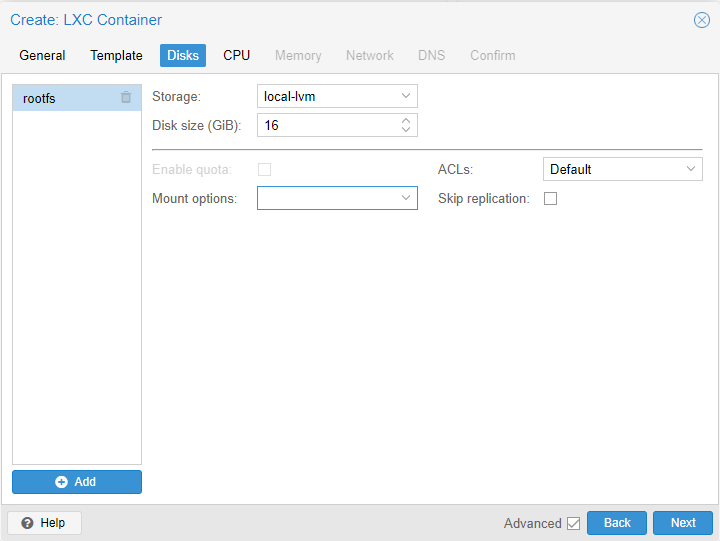
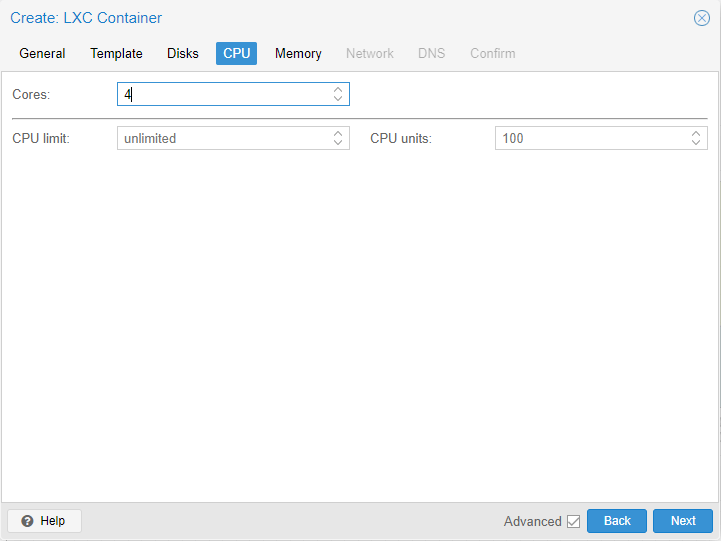
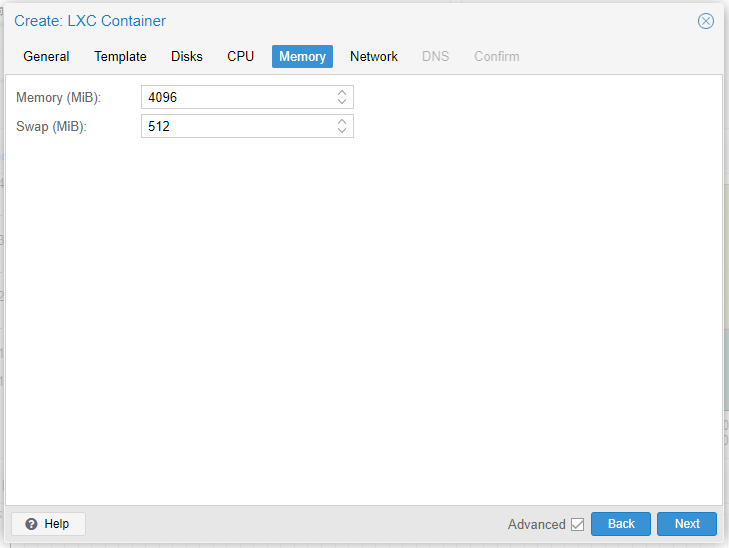
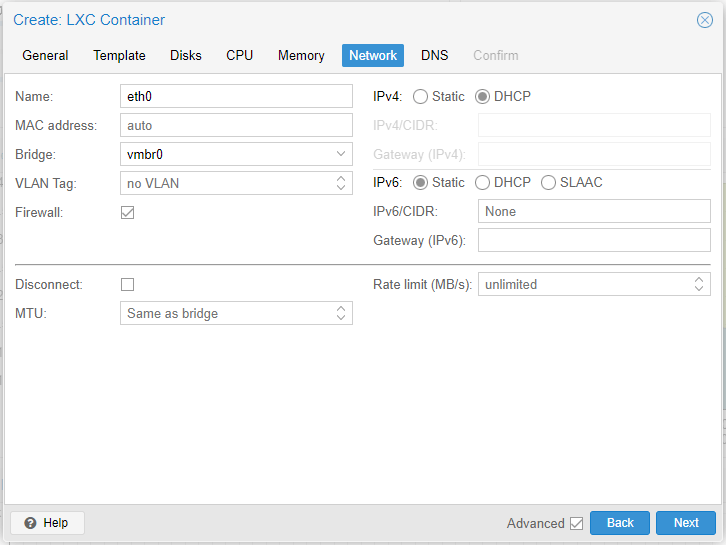
Now let’s set up a new LXC container for Frigate. I used a Ubuntu 23 template. The container must be privileged and have nesting enabled.
Don’t start the container yet. Edit the container config file (either SSH to your proxmox server, or use the console from the web UI) – change 114 below for whatever the ID is of your new container:
If that all went well your container will reboot, then you have Docker installed with Portainer agent (if you don’t already have a container that has Portainer installed you can just install portainer-ce instead…) and automatic unattended upgrades for the container.
Check that /dev/apex0 & /dev/dri/renderD128 are both visible in the container as well.
Now you can add your new Docker instance to your existing Portainer setup, or fire up the new one you just installed. Add yourself a new stack for Frigate.
This is my stack config – I’m using a Cloudflare tunnel to access Frigate from anywhere without having to use port forwarding – I really recommend this setup. I limit access using Cloudflare Access and it’s so simple to maintain. If you don’t already use Cloudflare take a look – it’s free for up to 25 users.